How to install Brainybear chatbot on your Webflow site
This article shows you how to install the Brainybear chatbot on a site created and hosted using Webflow.
Webflow may change parts of this process from time to time
While we try to keep track of any major changes to popular platforms, companies may change parts of their software over time that we are unaware of. For the most up-to-date information about managing scripts in Webflow, check their documentation.
Step 1. Navigate to Brainybear > Assistants and copy the chatbot snippet for the Brainybear chatbot.
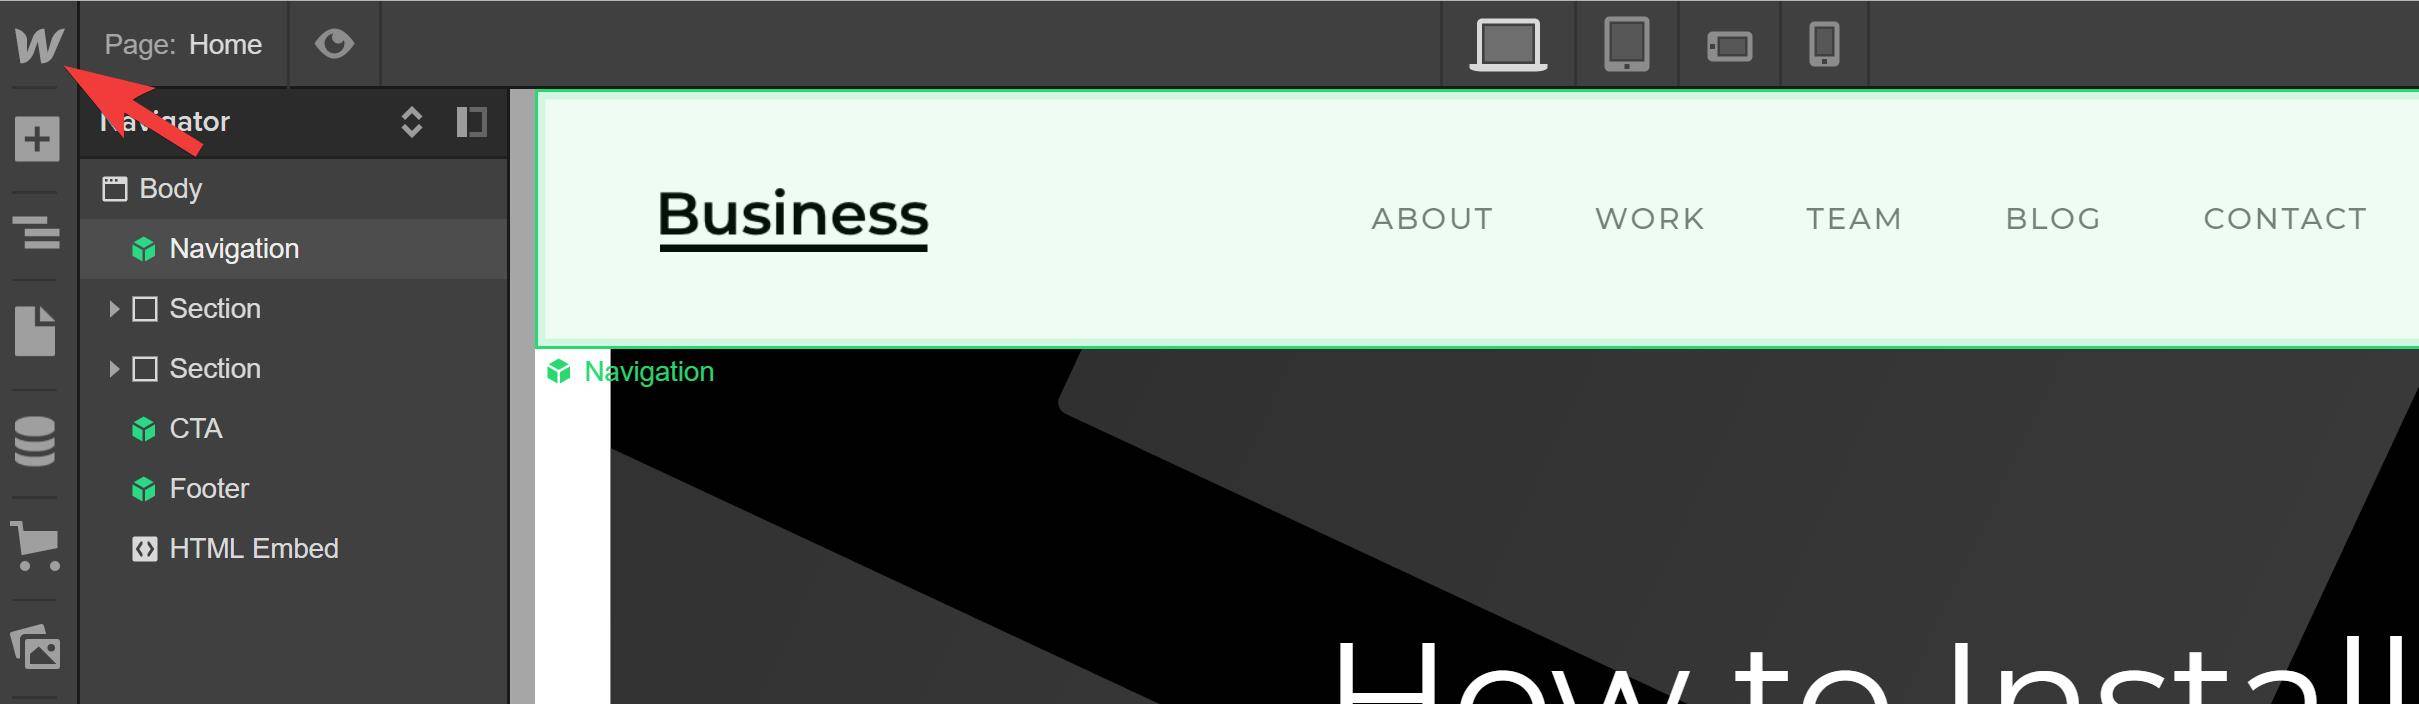
Step 2. Click on the Webflow icon in the top left of your Webflow dashboard.
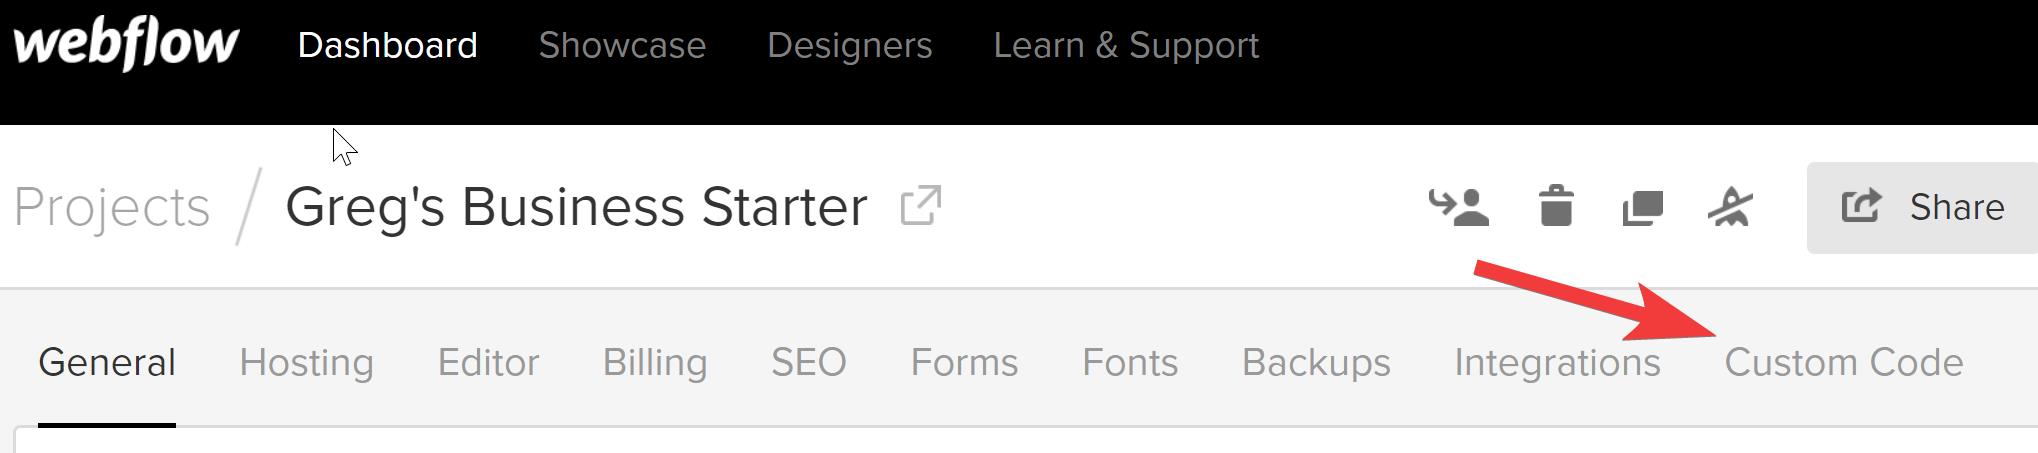
Step 3. Click on Project Settings.

Step 4. Click on Custom Code.
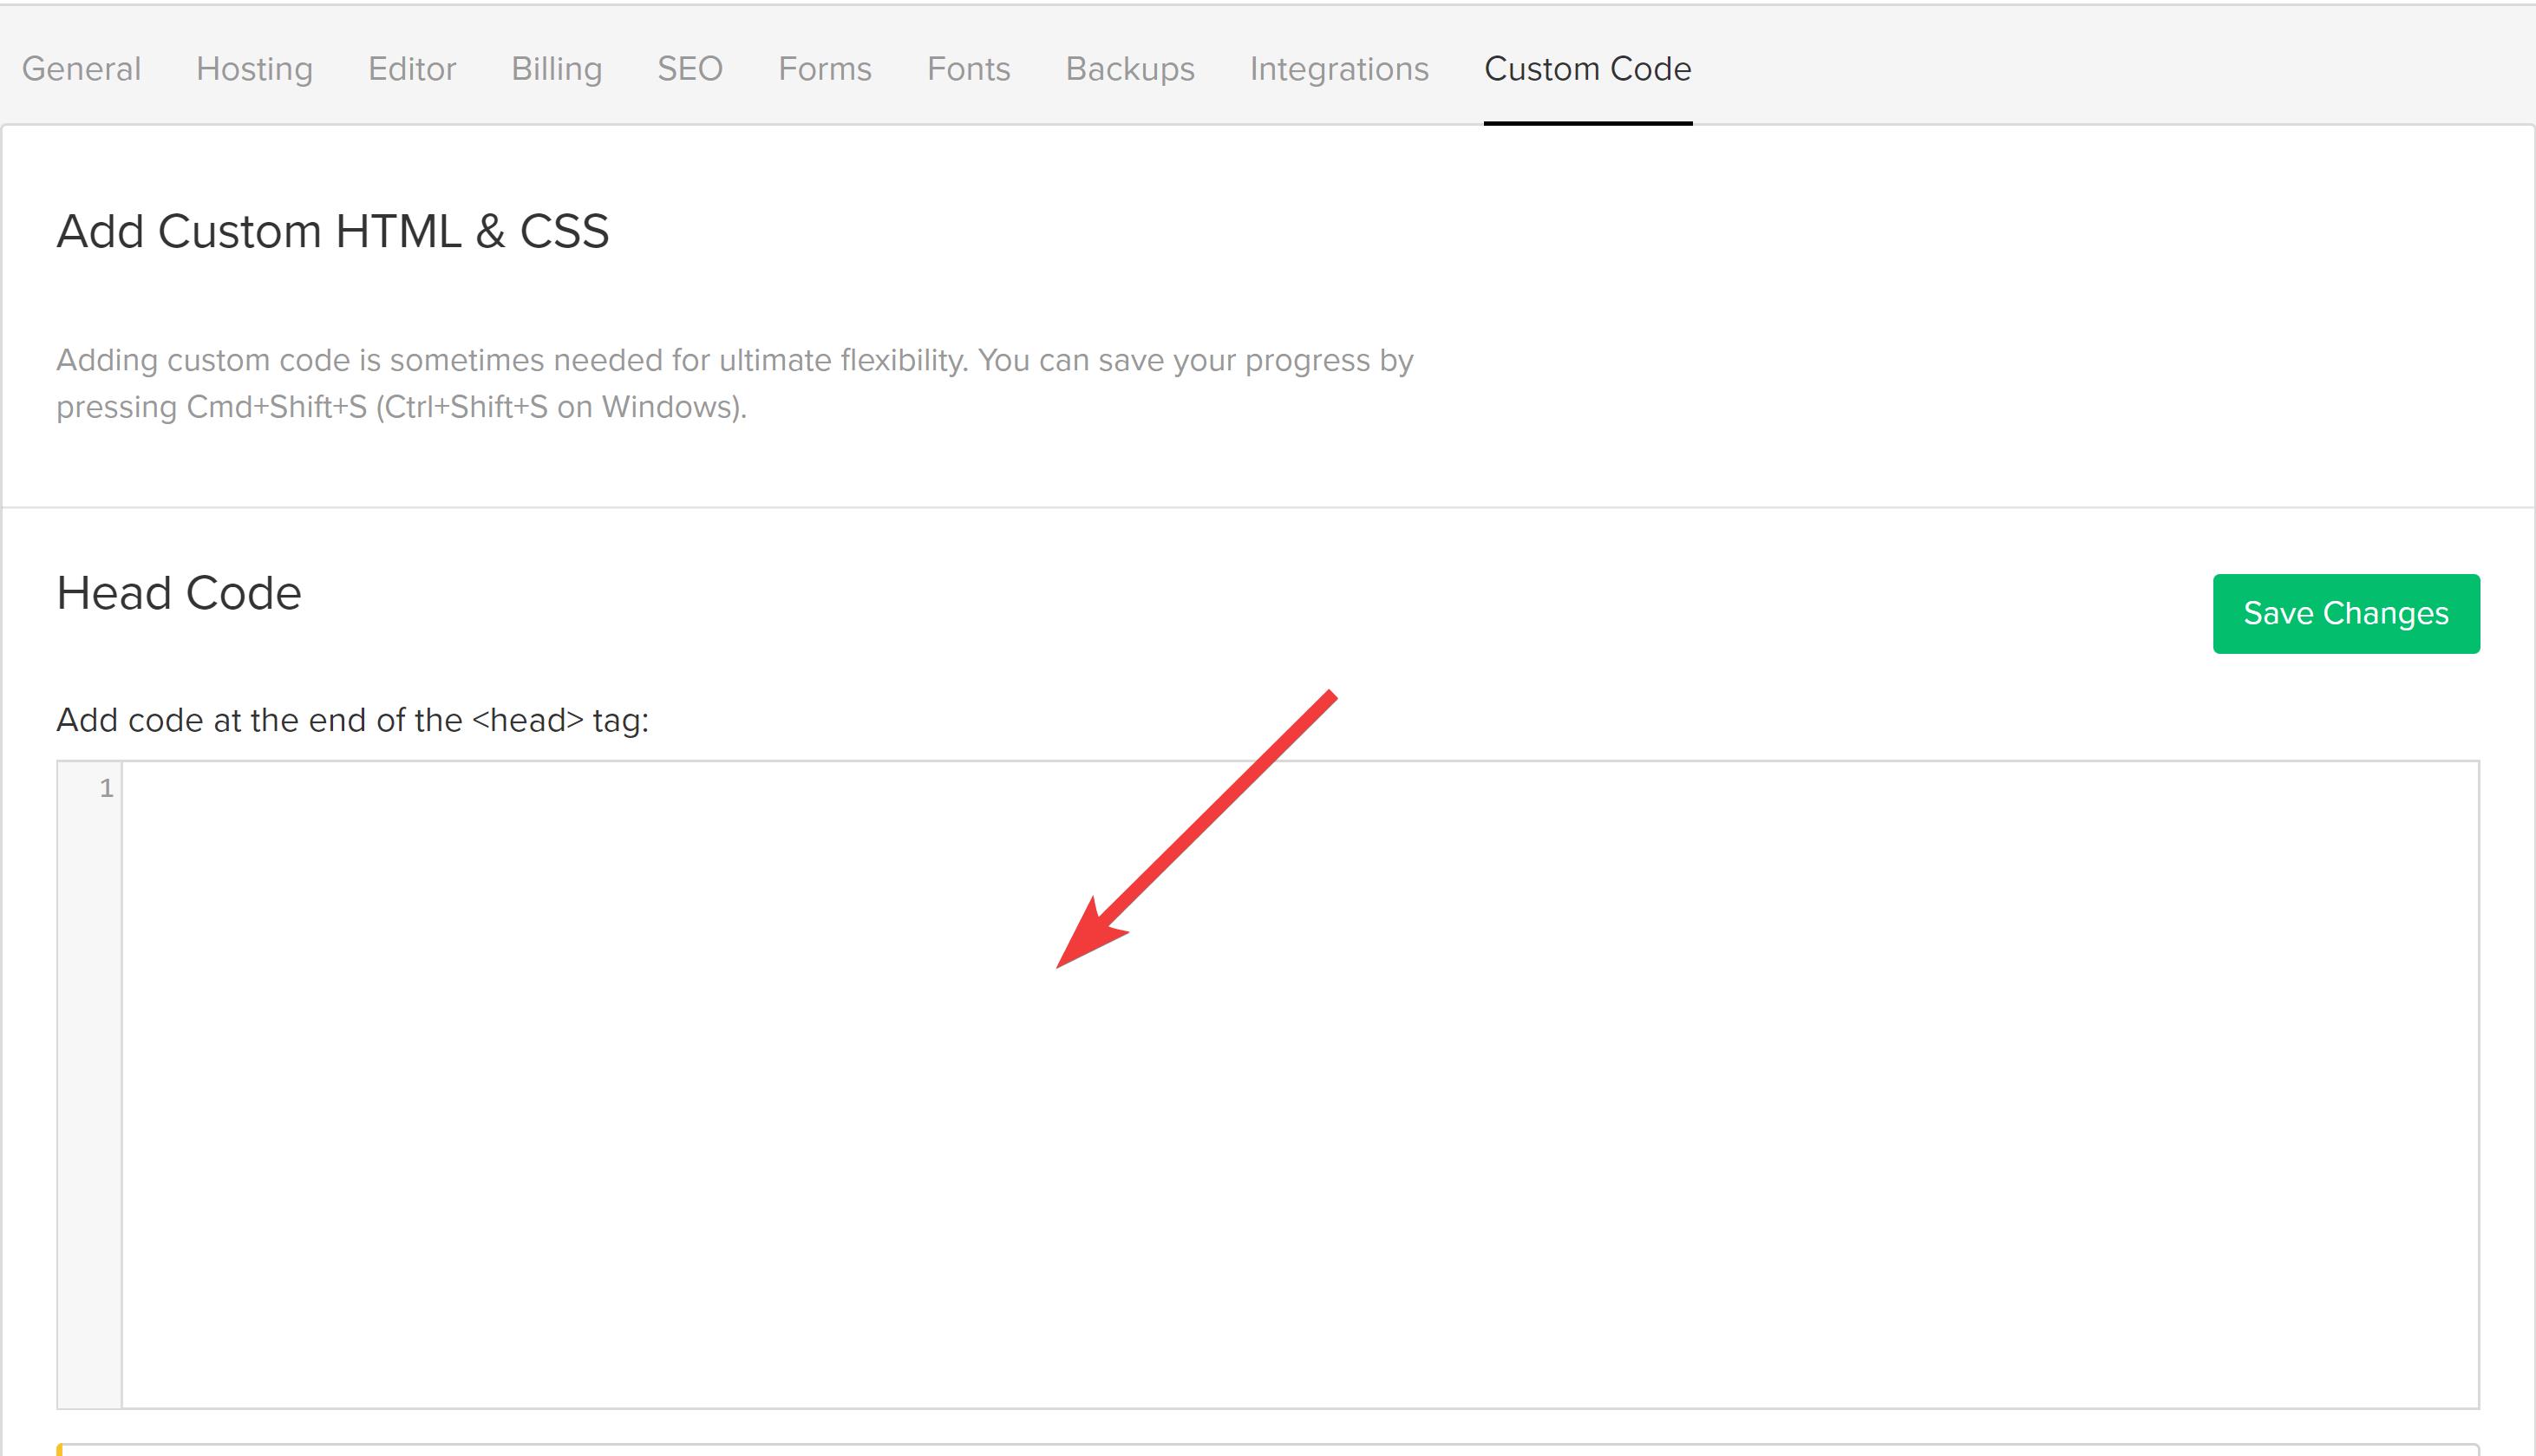
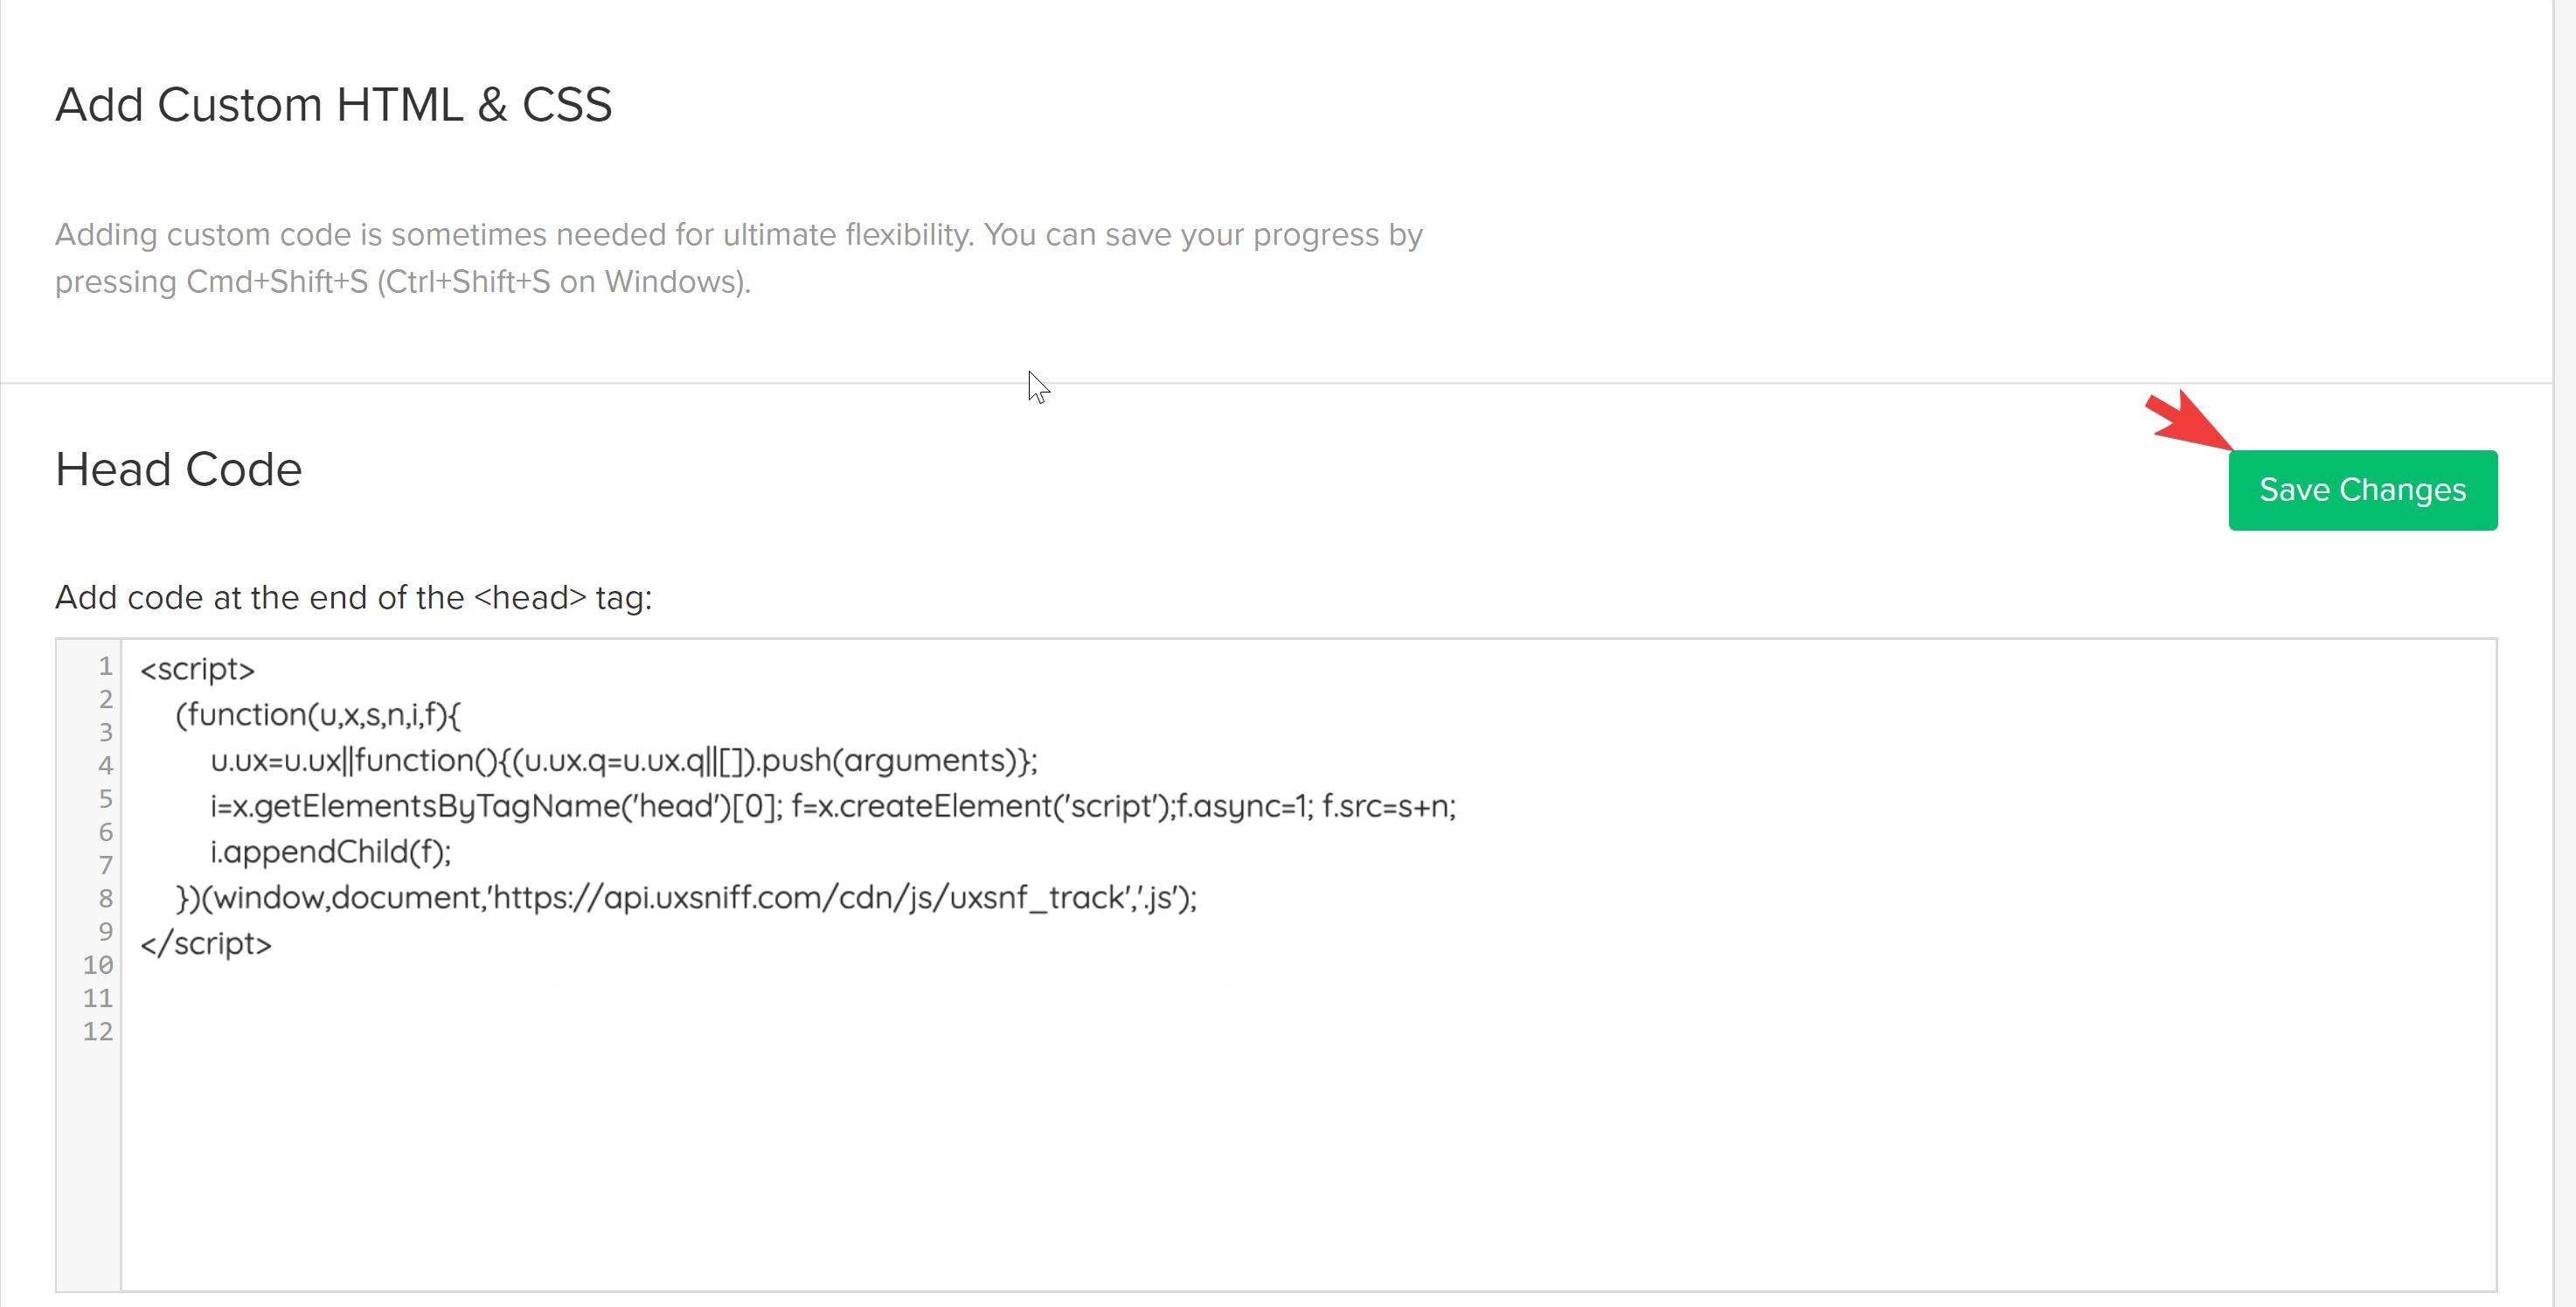
Step 5. Paste your chatbot snippet into the Head Code box.
Step 6. Click Save Changes.
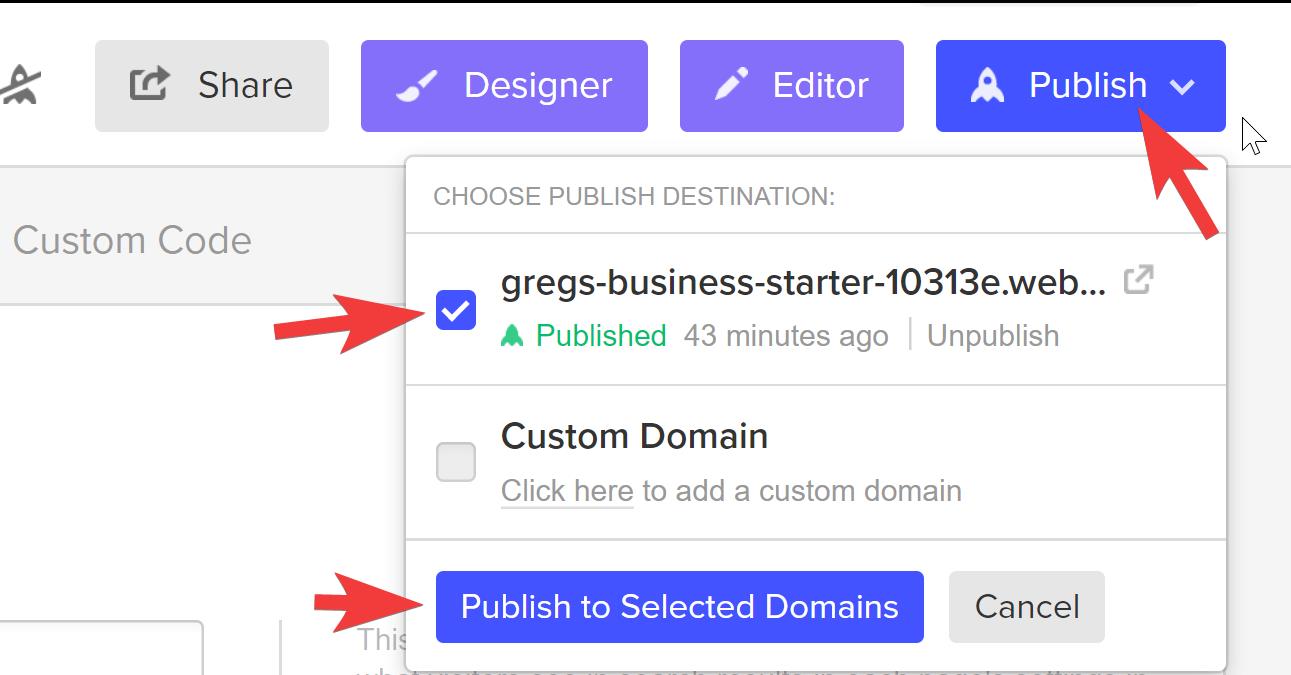
Step 7. Click Publish on your project settings page.
When asked to select a domain, you should select the top-level domain.
Step 8. Click Publish to Selected Domains.
Edit Name
Company Info
Companies can use this form to fill out information that will appear on invoices (which can be downloaded here). All fields are optional. If you do not want the field to show up on your invoice, please leave it blank.
Exclude URL