How to integrate your Brainybear AI chatbot with Facebook Messenger?
Integrating your Brainybear AI chatbot with your Messenger can revolutionize your social media interactions, providing immediate and automated responses to your customers' inquiries on Facebook Messanger. This integration not only enhances customer service efficiency but also ensures that every message is addressed promptly, improving engagement and satisfaction.
Step 1. Login to your Brainybear account and go to Assistants.
Step 2. Click on Message icon.
Step 3. Click on Facebook Messenger tab. Copy the Callback URL
Copy the Callback URL to your clipboard, by clicking the copy icon that appears at the end of the URL. Keep this pop up open, don't close it yet! You will need it for step 9 again!
Step 4. Go to your Meta for Developers account.
Go to your Meta for Developers account. Click on Messenger API Settings on the left side menu. Then, go to the onfigure webhooks section and click on it to open the dropdown section.
Step 5. Click on Configure.
Step 6. Paste the Callback URL that you copied from your AI Chatbot (step 3).

Step 7. Go back to Brainybear Facebook Messenger tab and copy the Verify token by clicking the copy icon.
Step 8. Go back to Meta for Developers, and paste the token on the Verify Token field. Then, click Verify and Save.
Step 9. You will see that the Webhook Fields is empty. Click on the Manage button.
You can find the Messenger tab from the side navigation, if Messenger is not found, click on "Add Product" and add Messenger to the side navigation.
Step 10. Subscribe to messages.
A pop up will appear. scroll down until you see the item messages. Click Subscribe. You don't need to subscribe to any other items. Close this pop up window by clicking on the X on the top right corner.
Step 11. On the dashboard, go to the Generate access token field. Click on "Connect".
Step 12. Allow all the necessary permissions to Meta to access your Page.
Step 13. Once your account is connected, click on "Add Subscription" and select "message" from the pop up.and click on "Confirm"
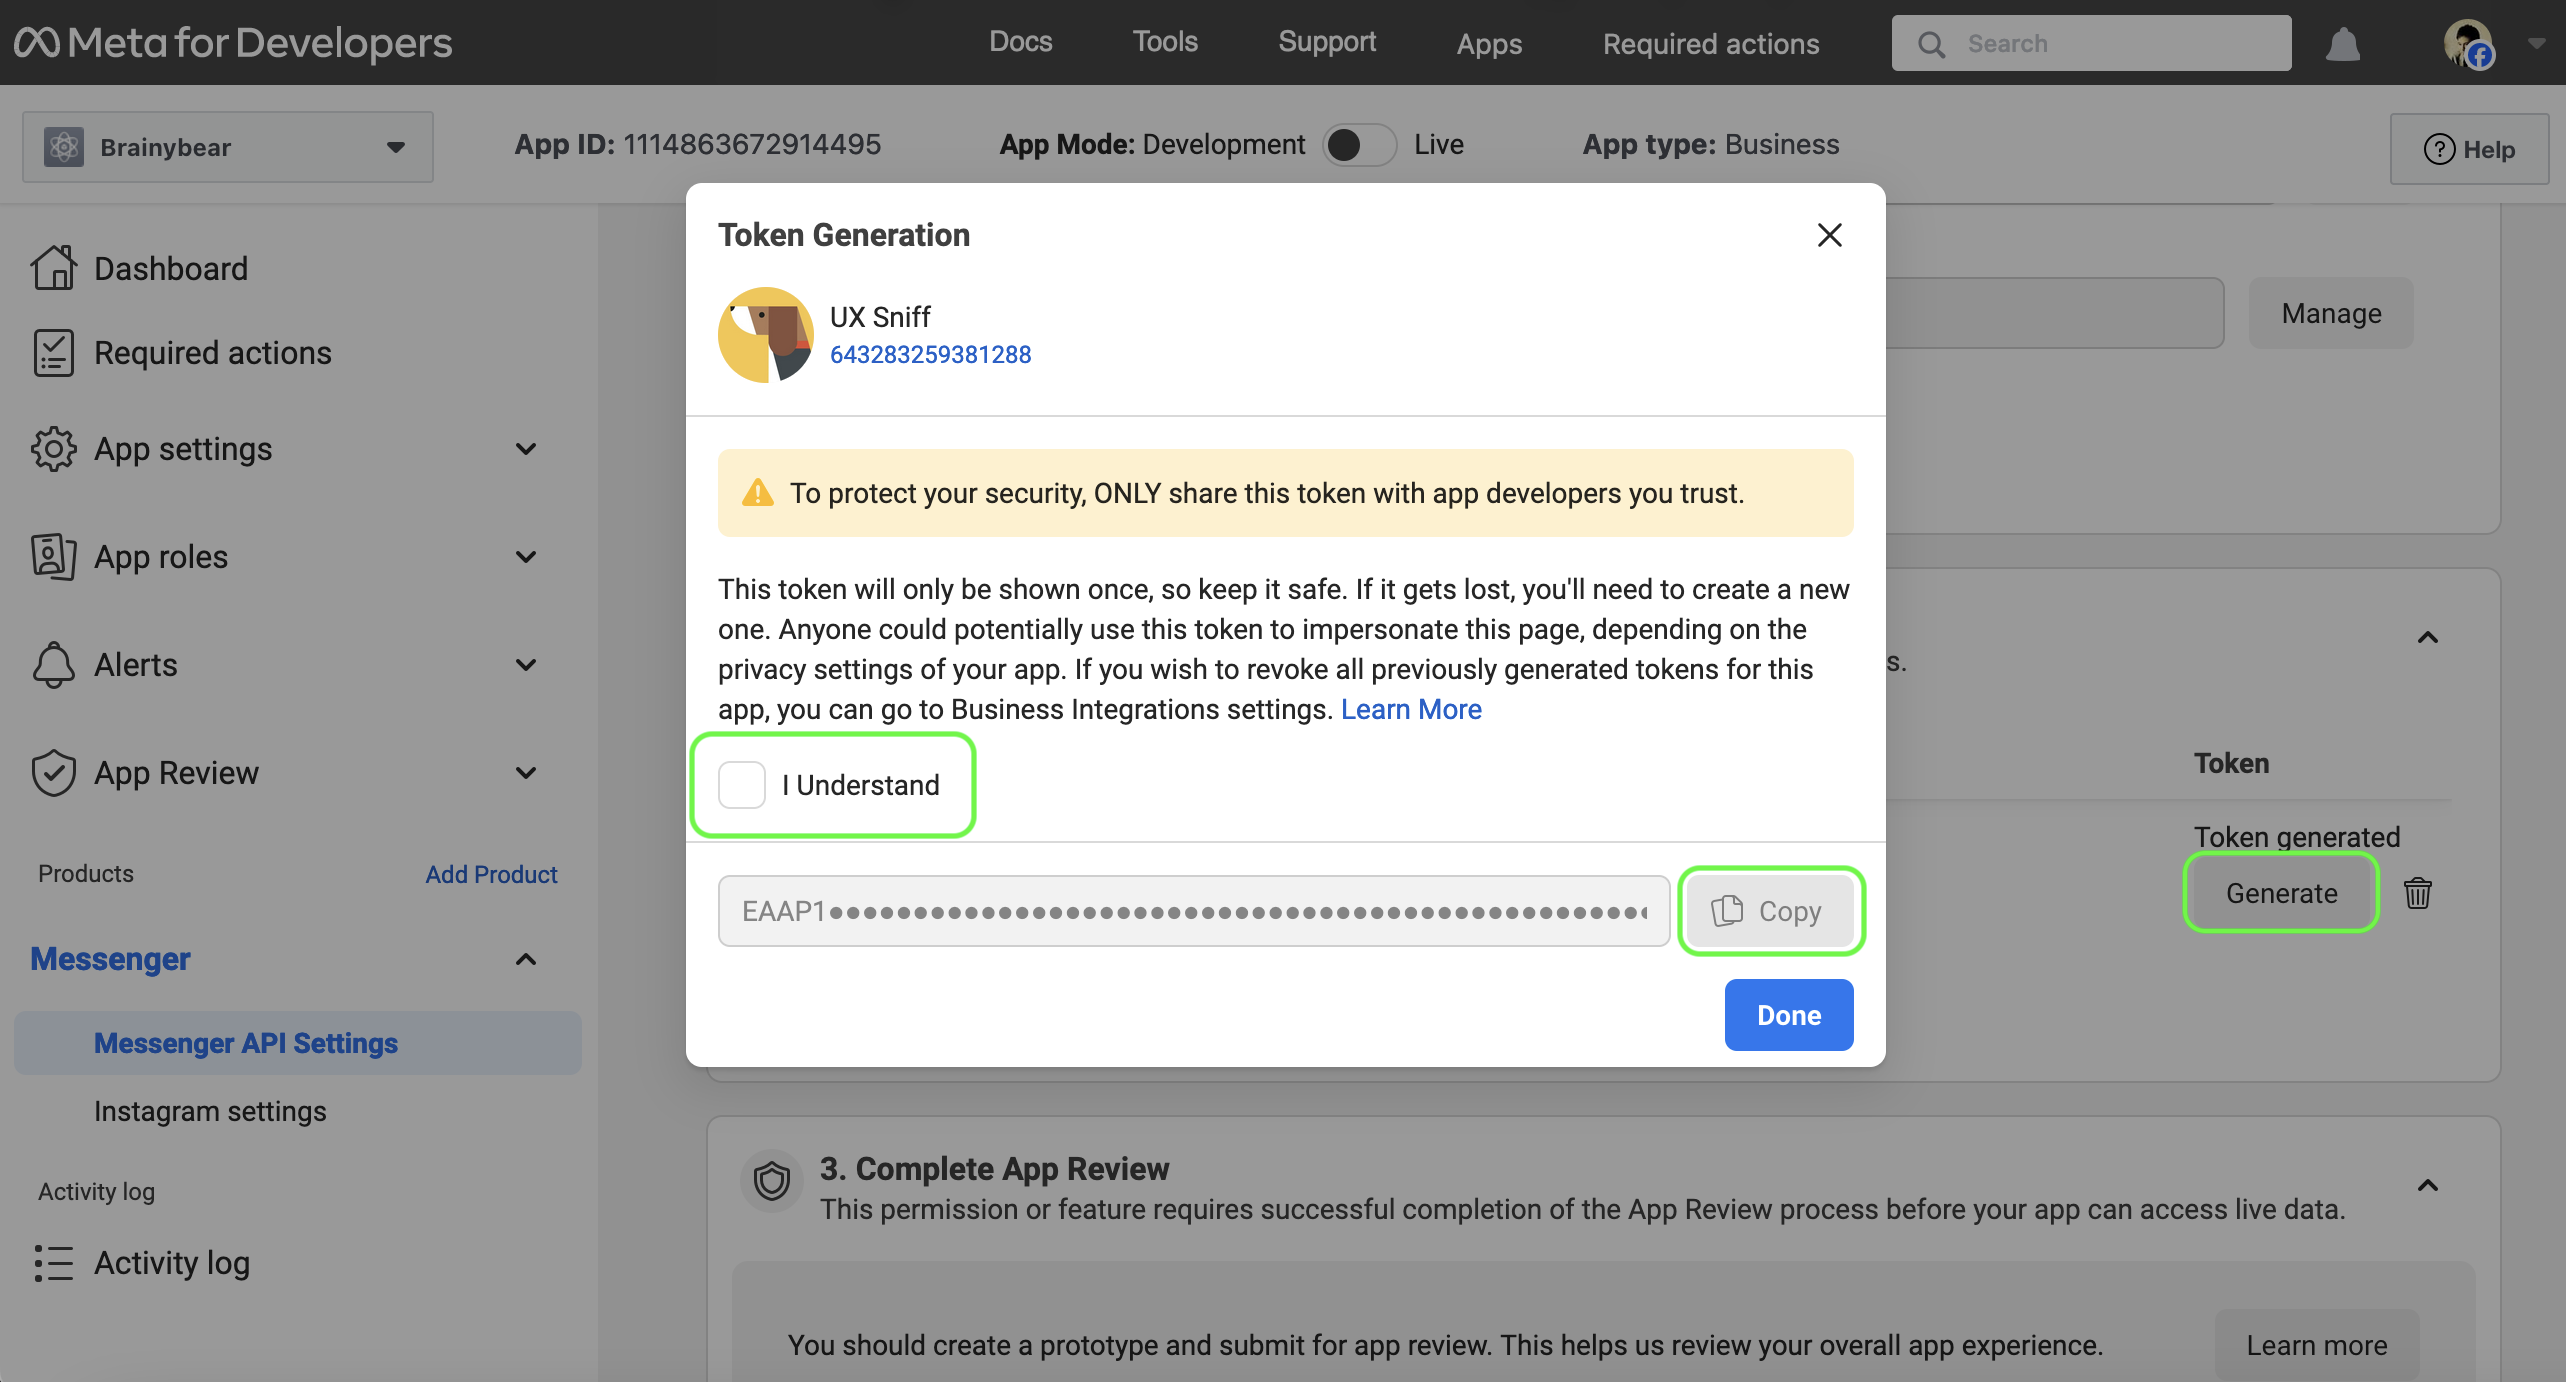
Step 14. Click on "Generate" to generate a token. Click on "I Understand" and "Copy" the token and click on "Done"
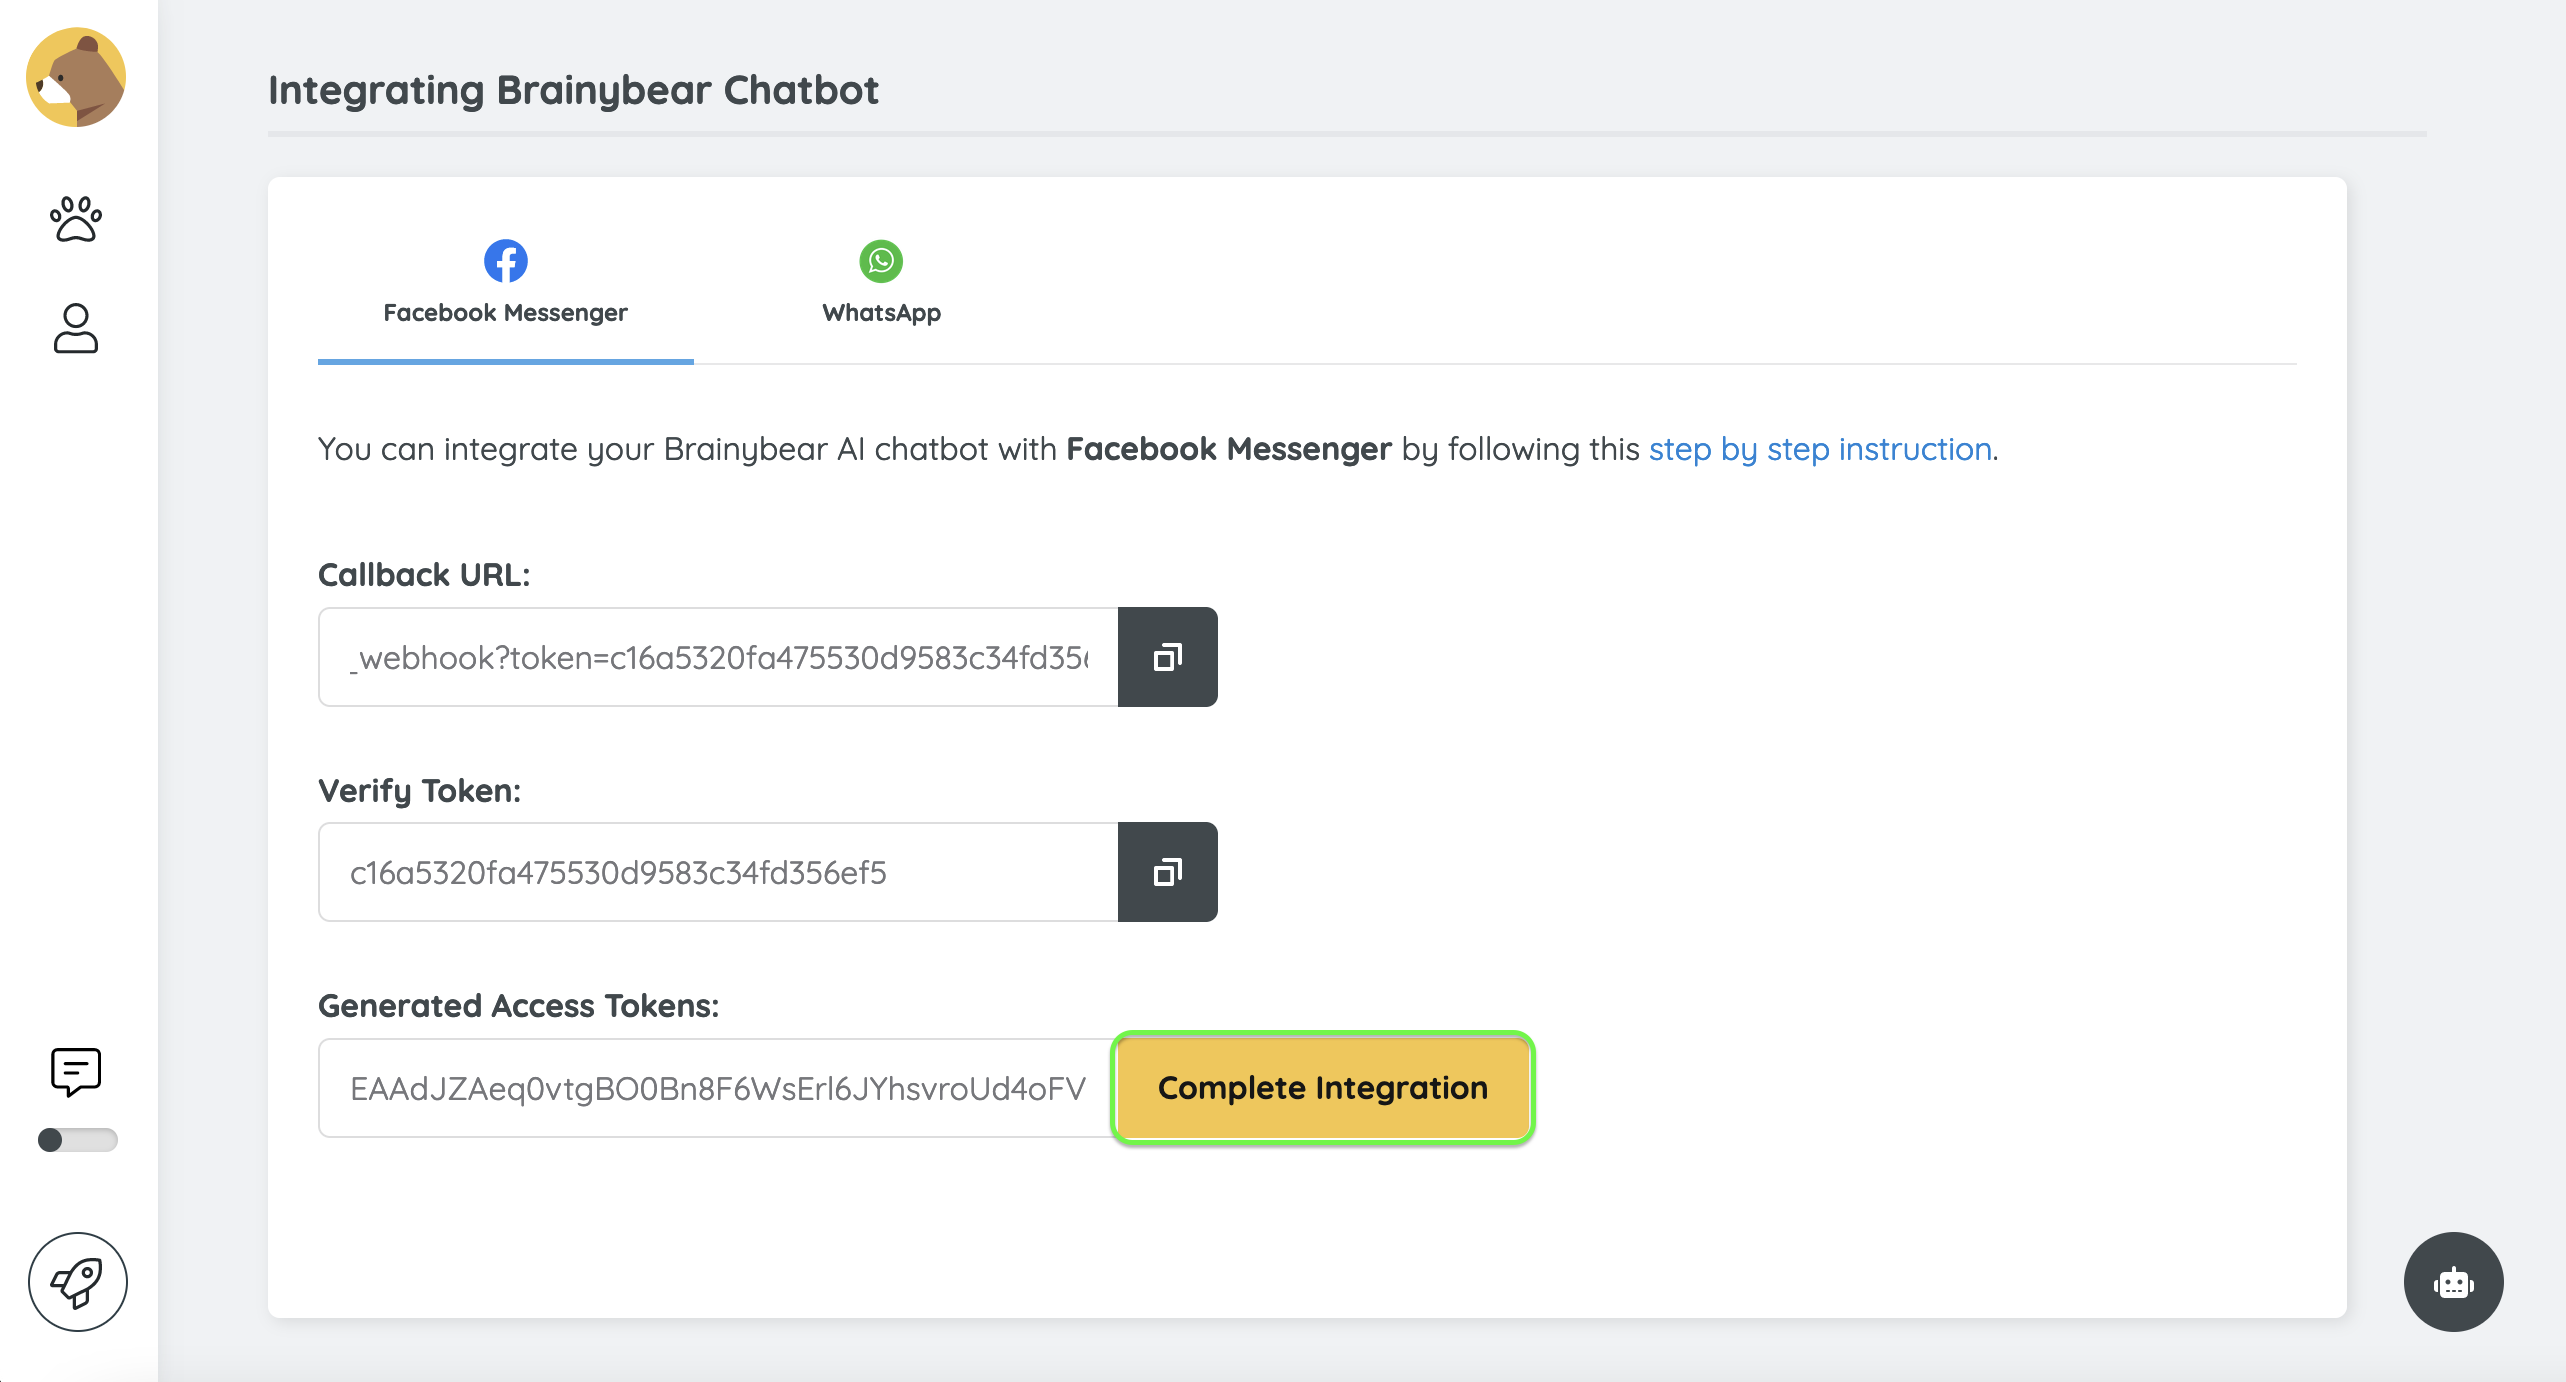
Step 15. Go back to Brainybear, paste the token in "Generated Access Tokens" and click "Complete Integration".
Step 16. Almost done. Don't forget to turn your App Mode from development to live.