How to integrate your Brainybear AI chatbot with Slack Messaging?
Integrating your Brainybear AI chatbot with Slack can revolutionize workspace interactions by providing immediate and automated responses to team questions. This integration not only enhances productivity but also saves hours otherwise spent answering frequently asked questions or addressing knowledge-based inquiries.
Prerequisites
A Slack App to connect your bot to Slack.
A Brainybear Business plan.
Create a Slack App.
If you don't have a Slack app already, follow the steps below to create one:
- Go to this link.
- Select from scratch.
- Enter a name for your app.
- Select the workspace you want to connect your bot to.
- Click Create App.
Done! You have created a Slack app.
Setting up Slack
Bot Token
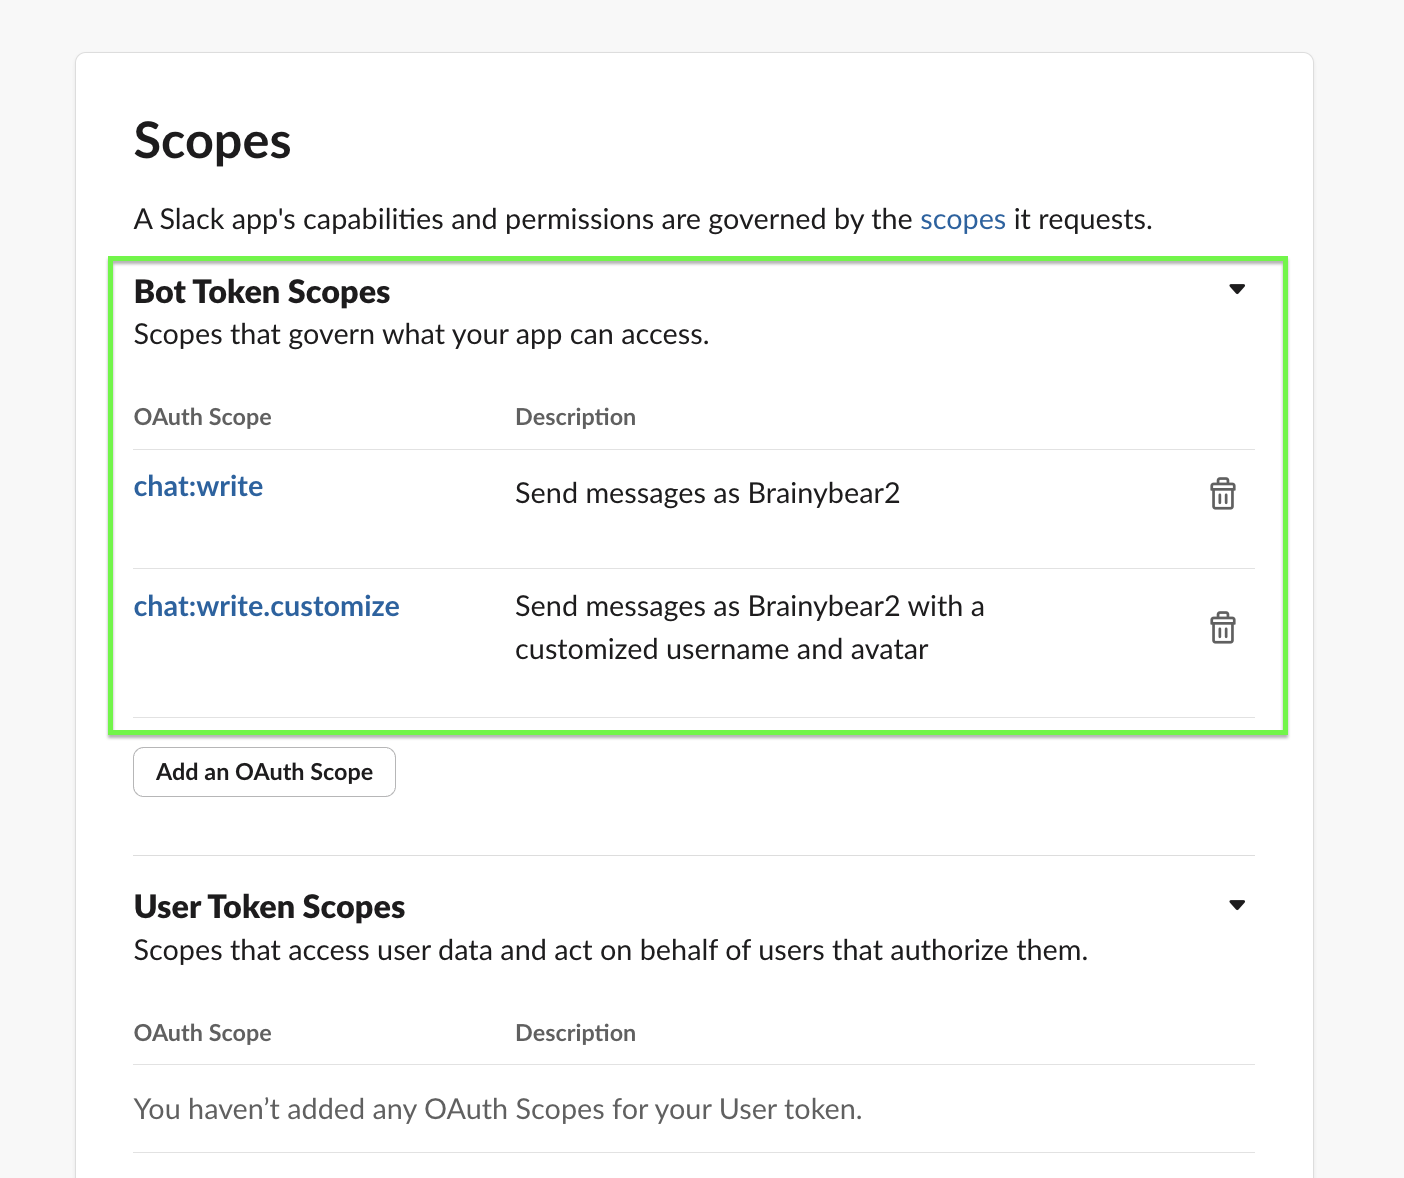
- In the left sidebar, click on Features > OAuth & Permissions
Scroll down to the Scope > Bot Token Scopes section, click Add an OAuth Scope. Select both chat:write and chat:write.customize options from the list.
Scroll up and click the Install to Workspace button in the OAuth Tokens for Your Workspace section.
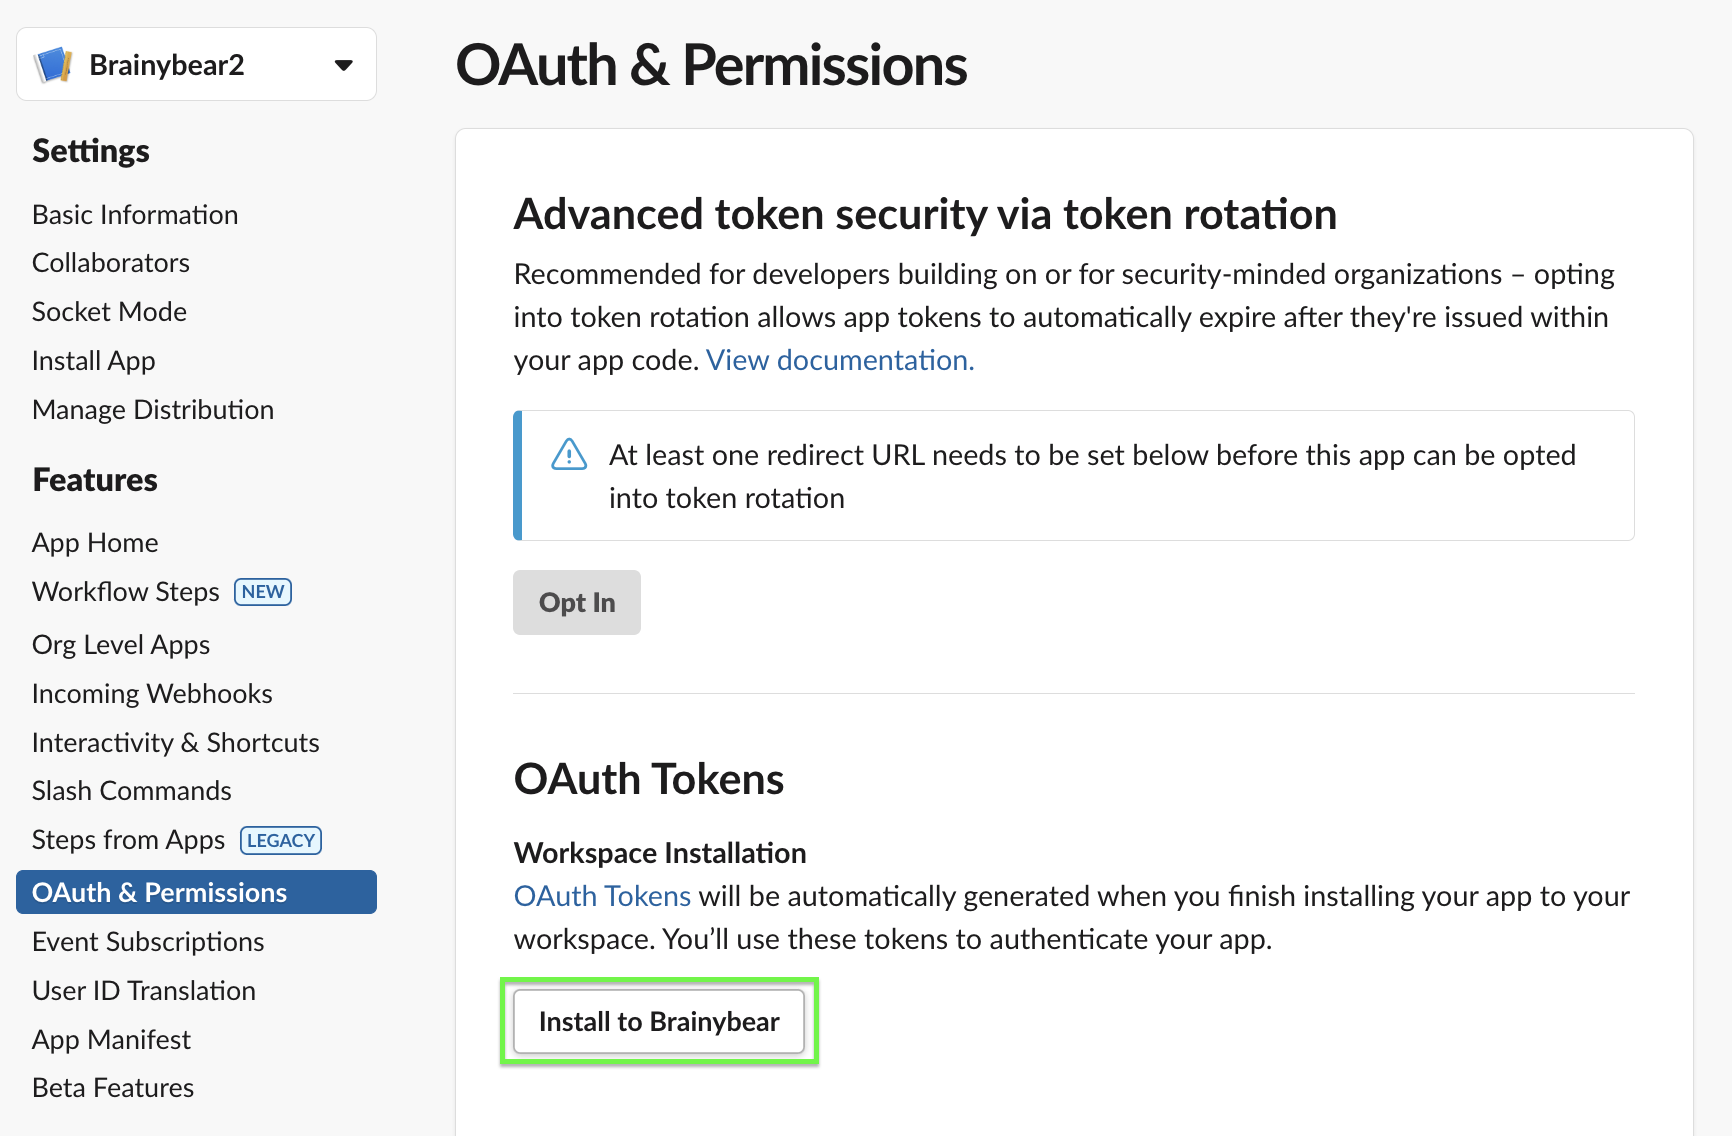
- In the next screen, your app will request access to your Slack workspace. Click Allow.
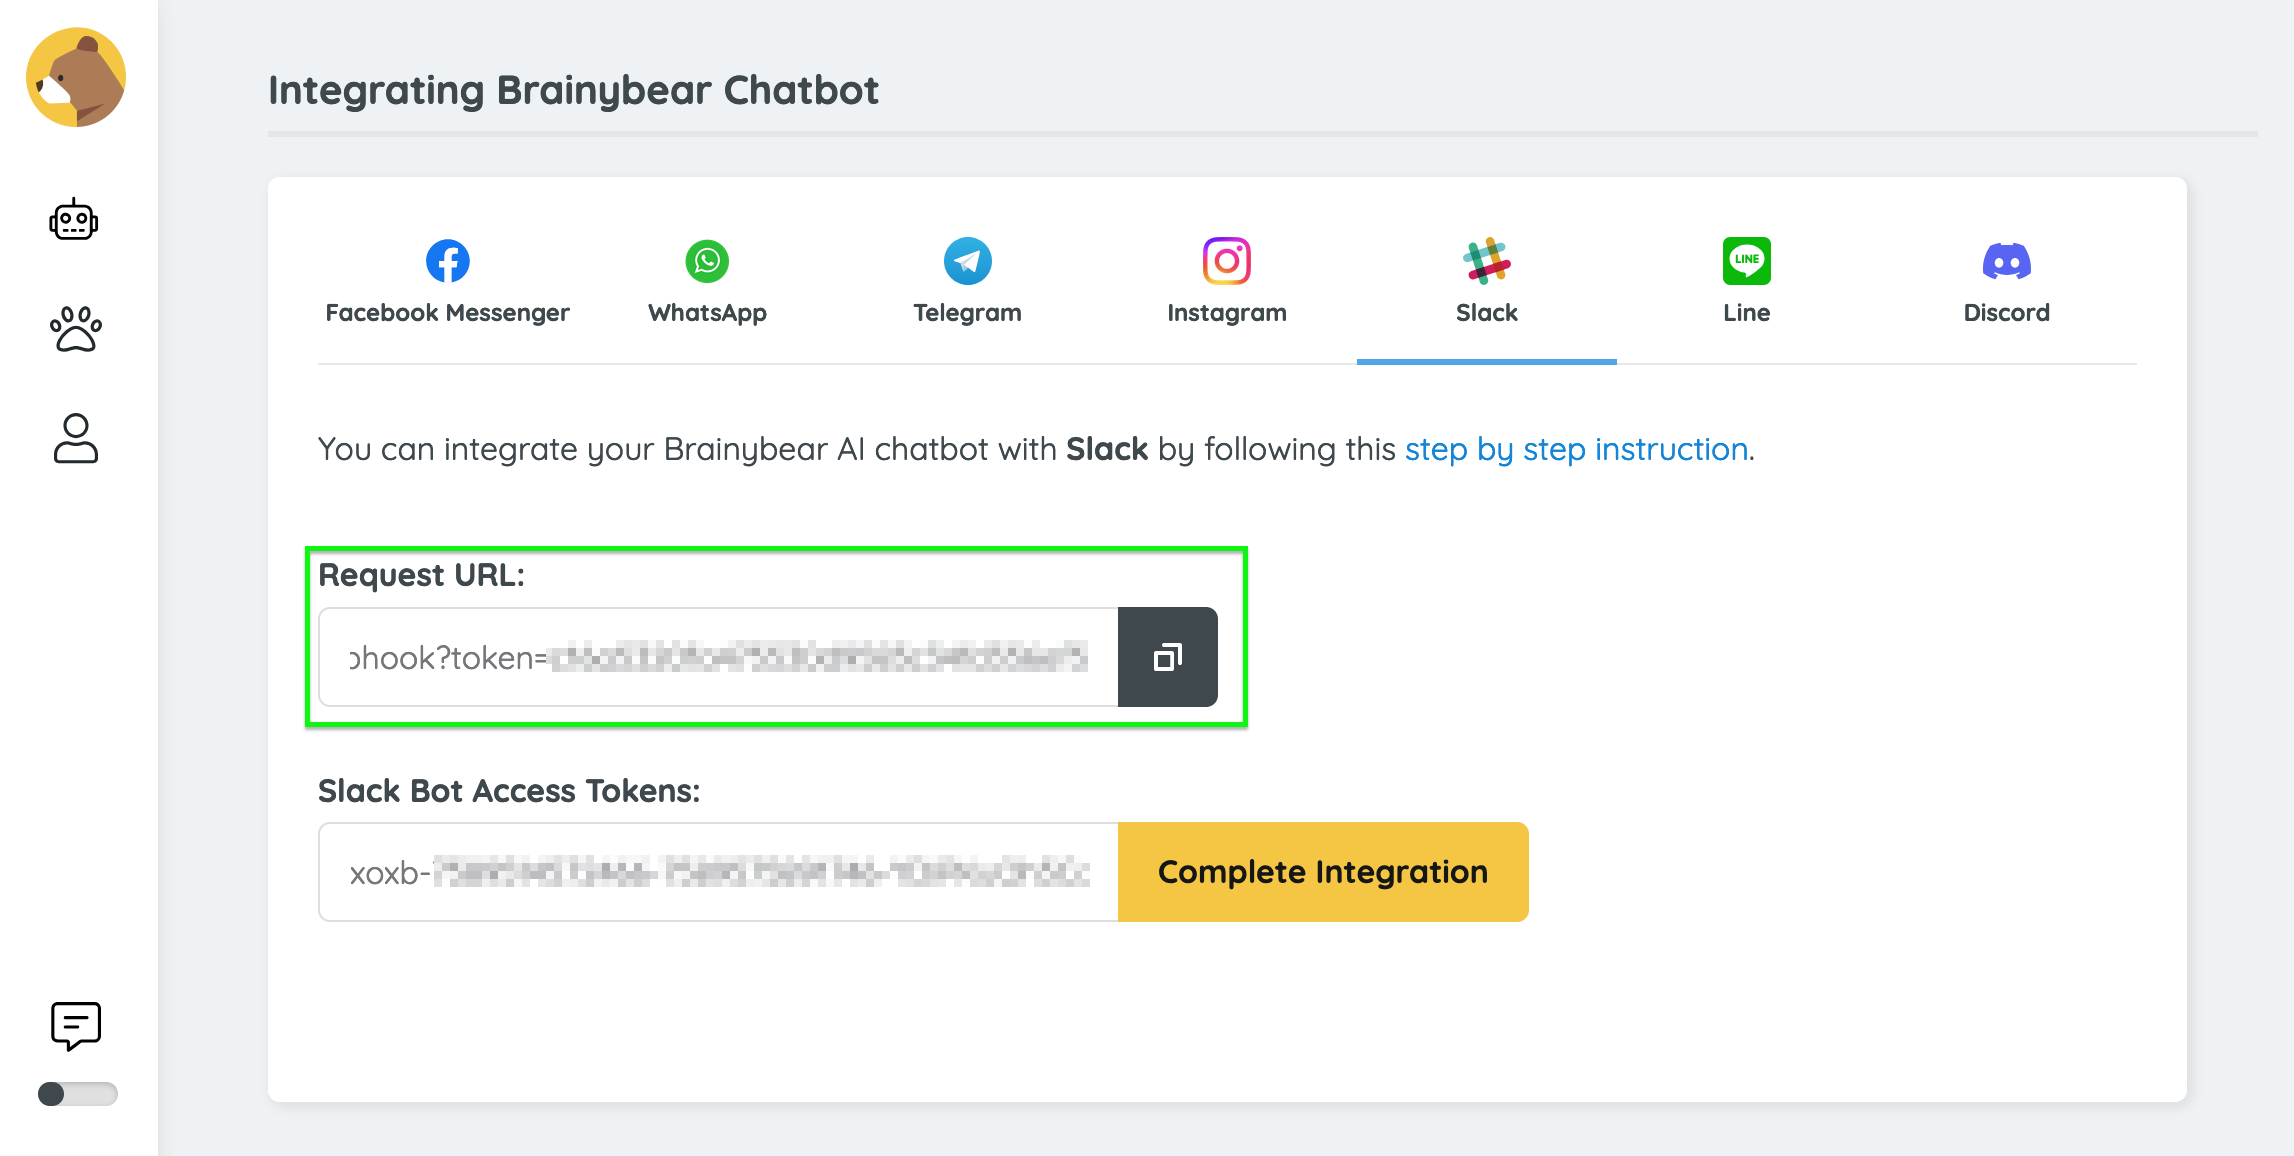
In the OAuth & Permissions > OAuth Tokens for Your Workspace section, copy the Bot User OAuth Token.

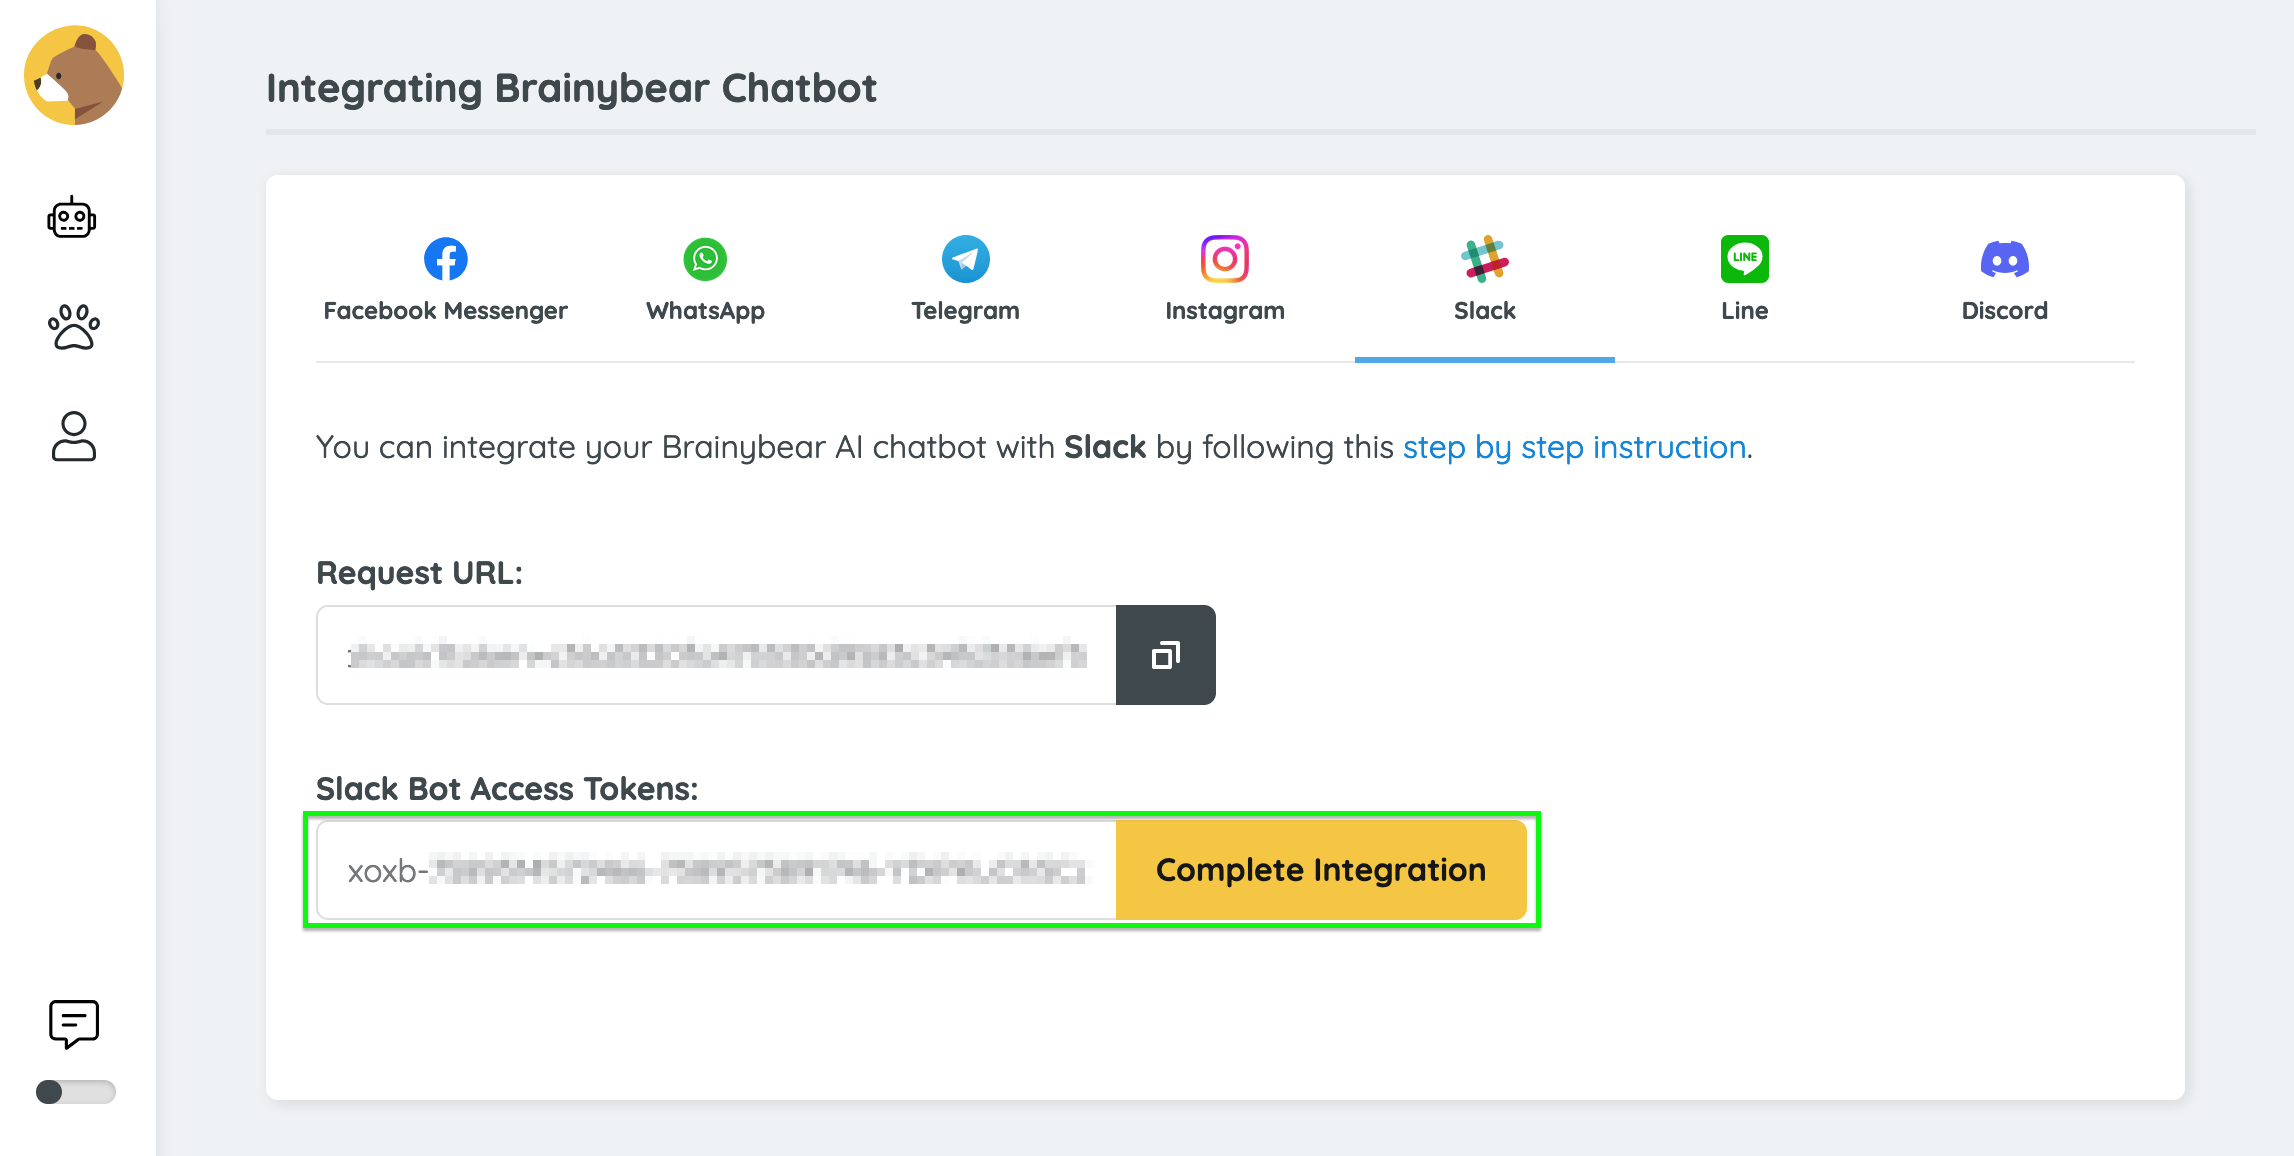
Copy the token and paste it in the Bot Token input in Brainybear and click Complete Integration.
Webhook Configuration.
Events Webhook
Slack sends regular events such as messages to the event webhook
- In the left sidebar, click on Features > Event Subscriptions
- Turn on events by click the On/Off button
Copy paste the webhook url provided in the Brainybear integration UI to the Request URL field
Under Subscribe to bot event, add message.im and message.channels.
Please note that the 'message.channels' event triggers every time a user posts a message in the channel, which can be annoying in some cases. Consider removing this event and replacing it with the 'app_mention' event, so that the chatbot only replies when someone tags it, for example, @brainybear.
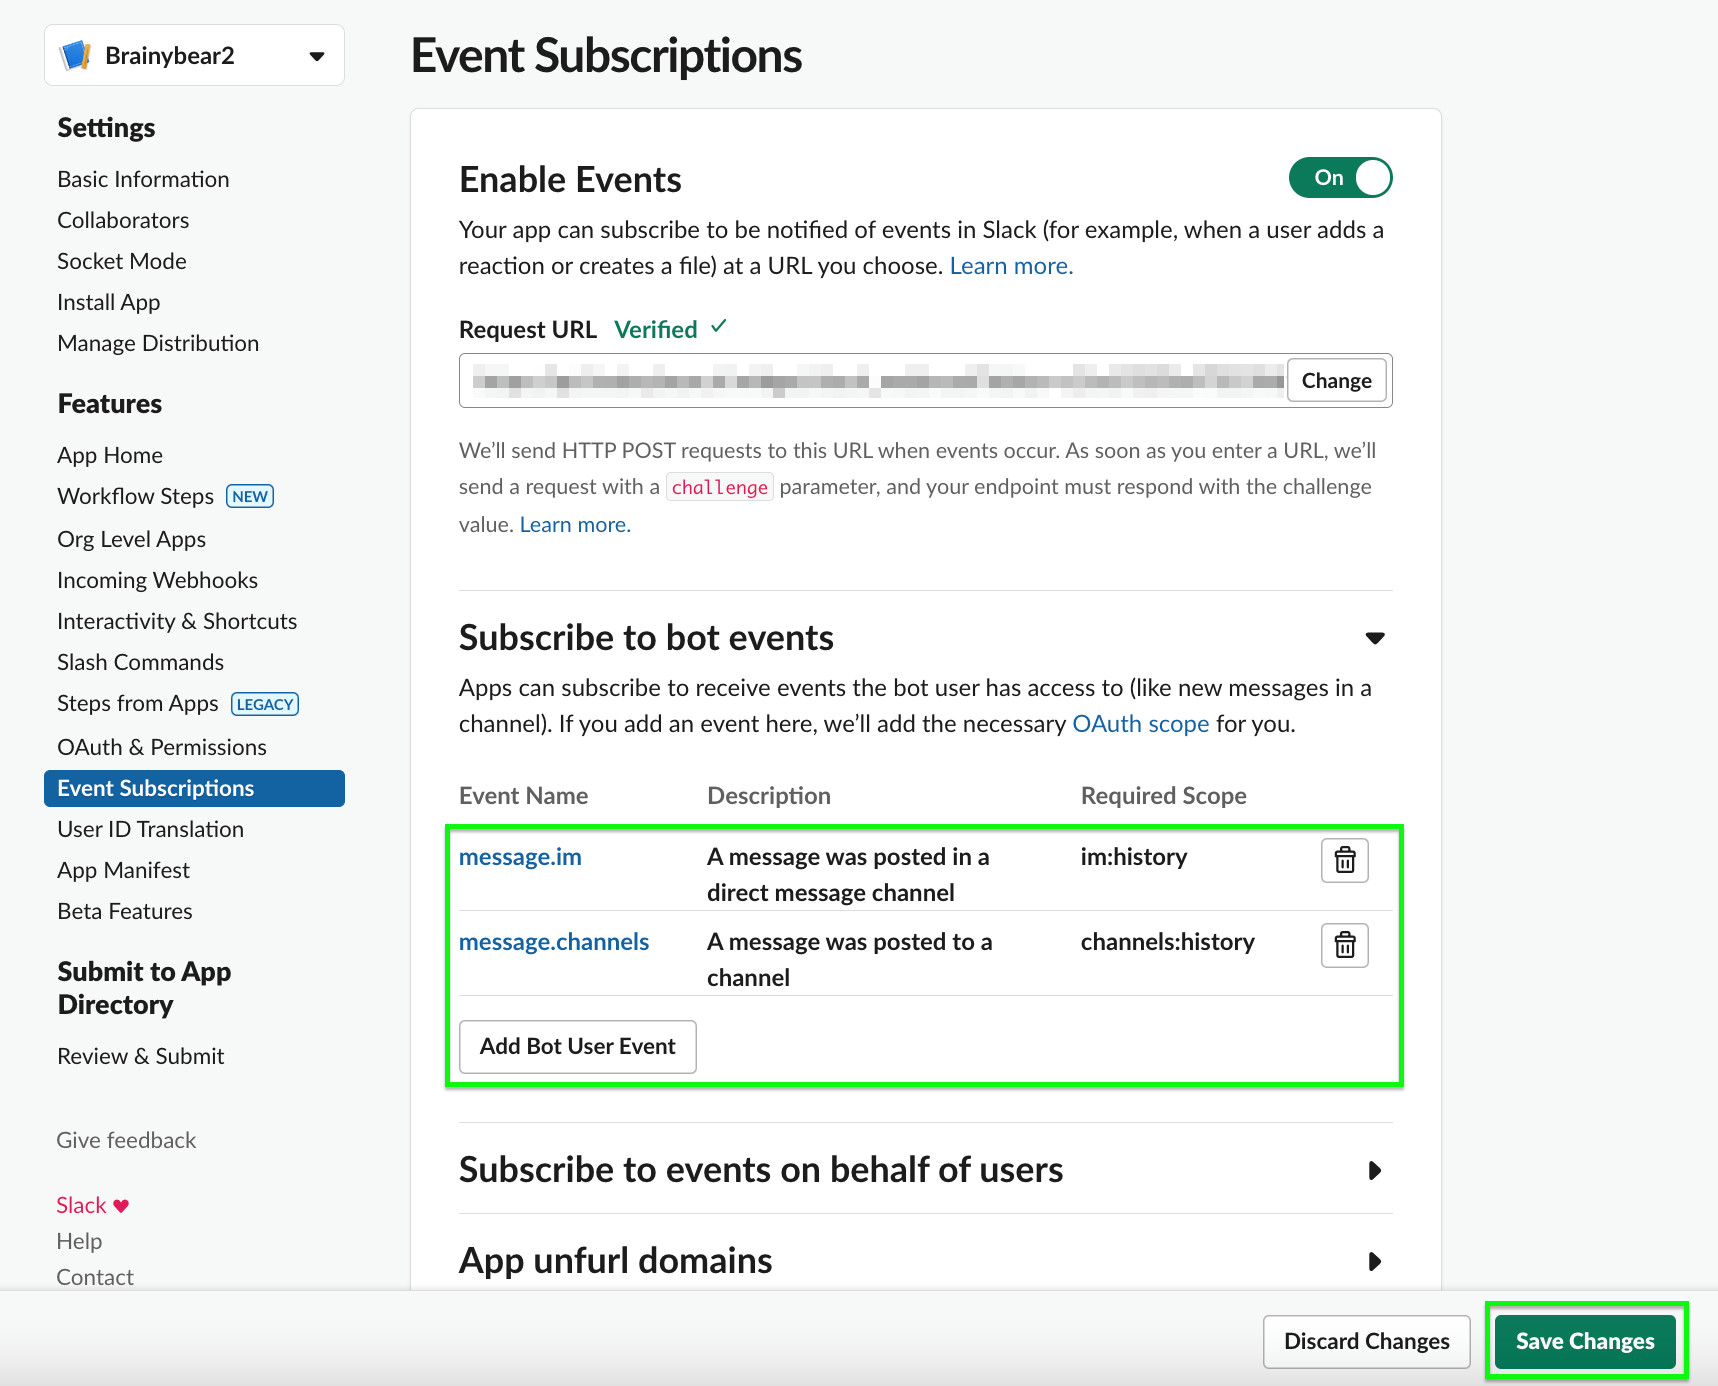
- Click the Save Changes button. Make sure your Slack channel configuration is saved before doing this step, otherwise webhook validation will fail
- A yellow banner will be displayed at the top of the screen. Click the reinstall your app link
- In the next screen, your app will request access to your Slack workspace. Click Allow.
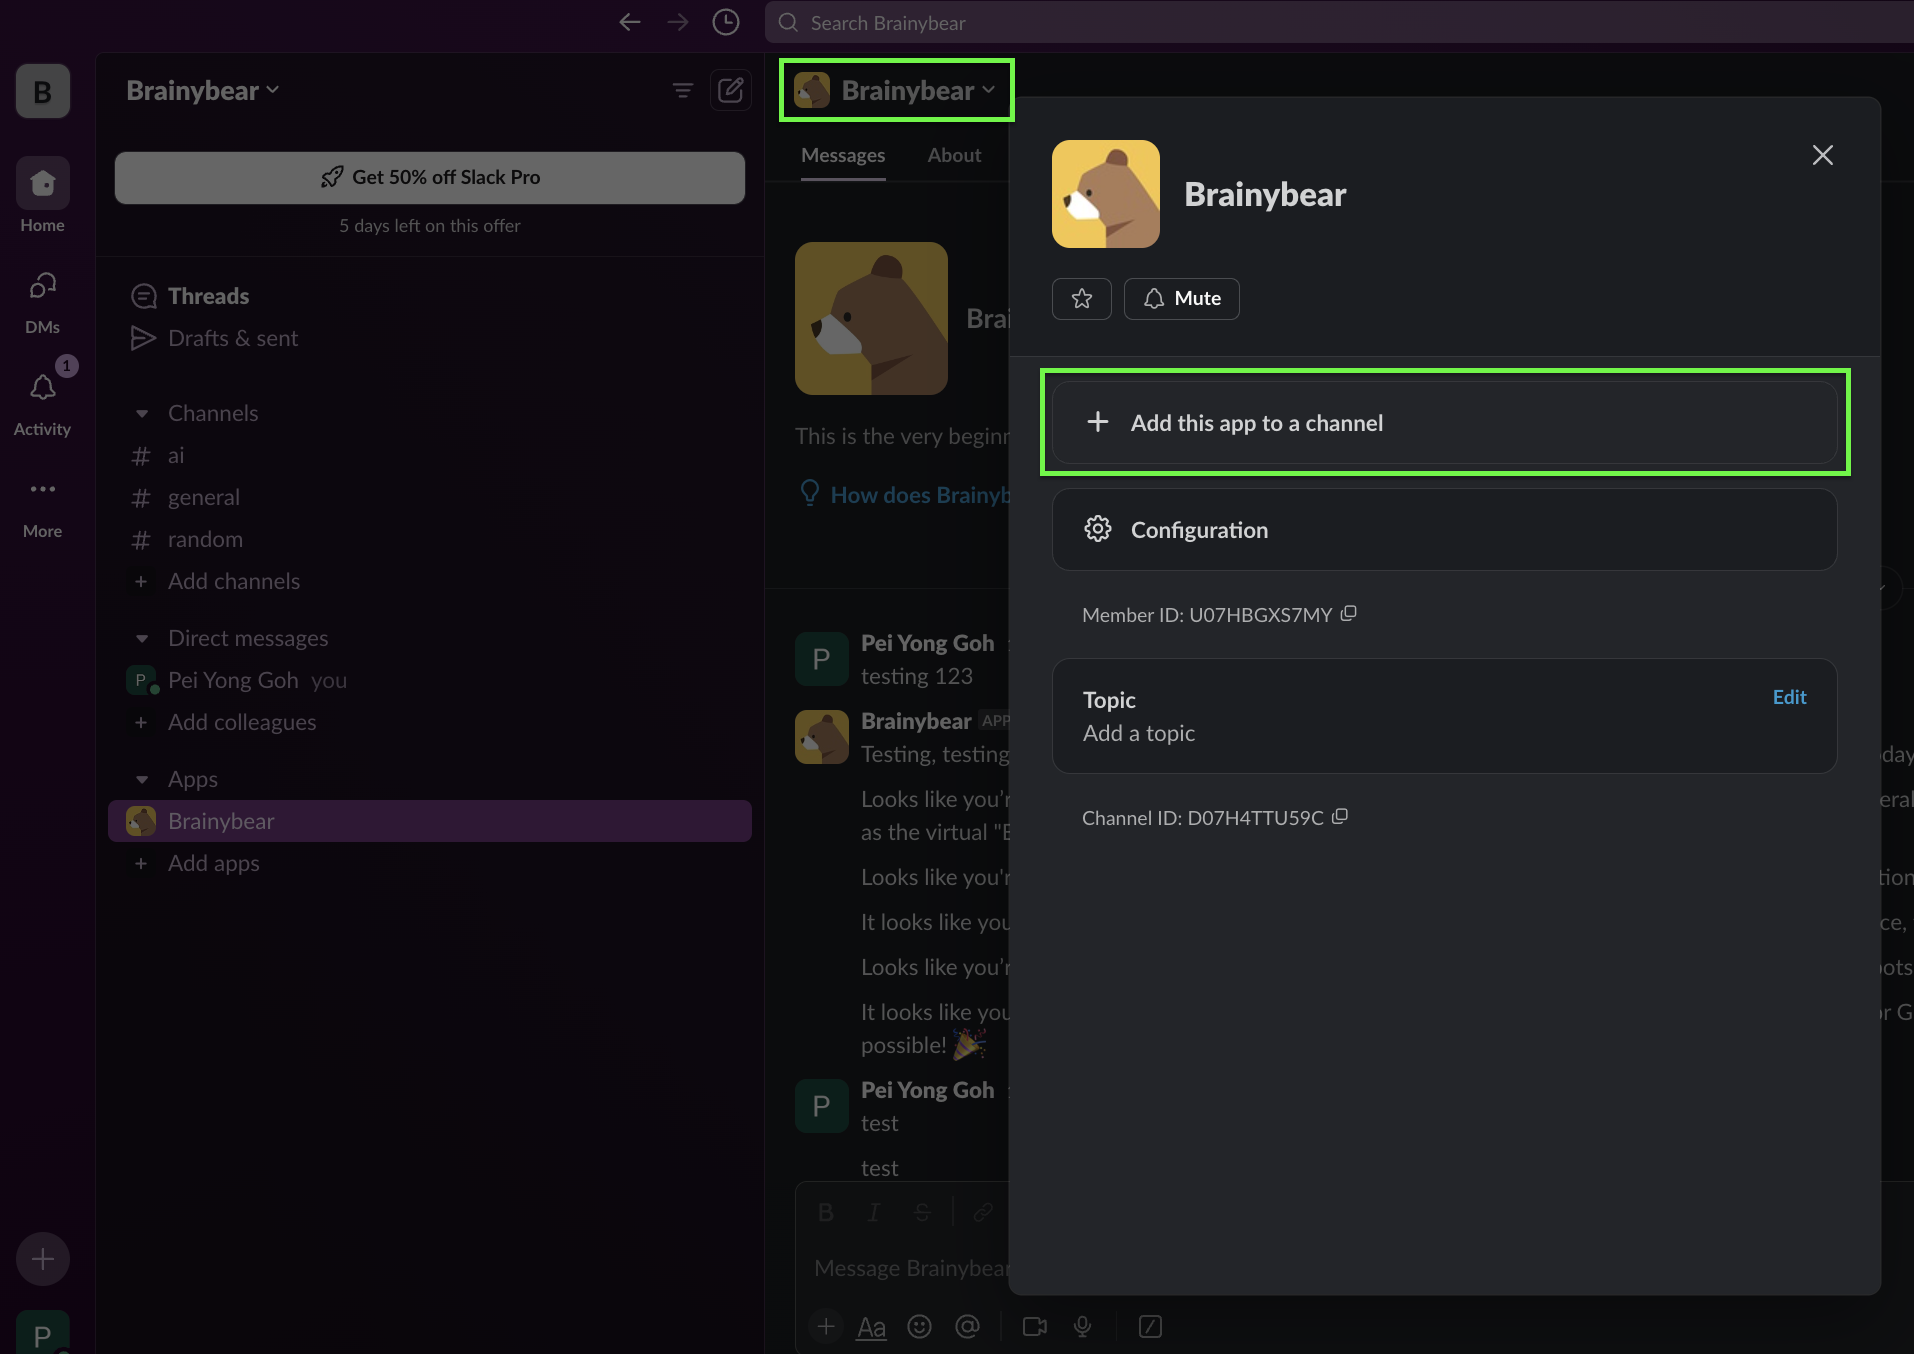
Add App to Workspace
Your Slack app needs to be added to your workspace to allow Slack users to communicate with it:
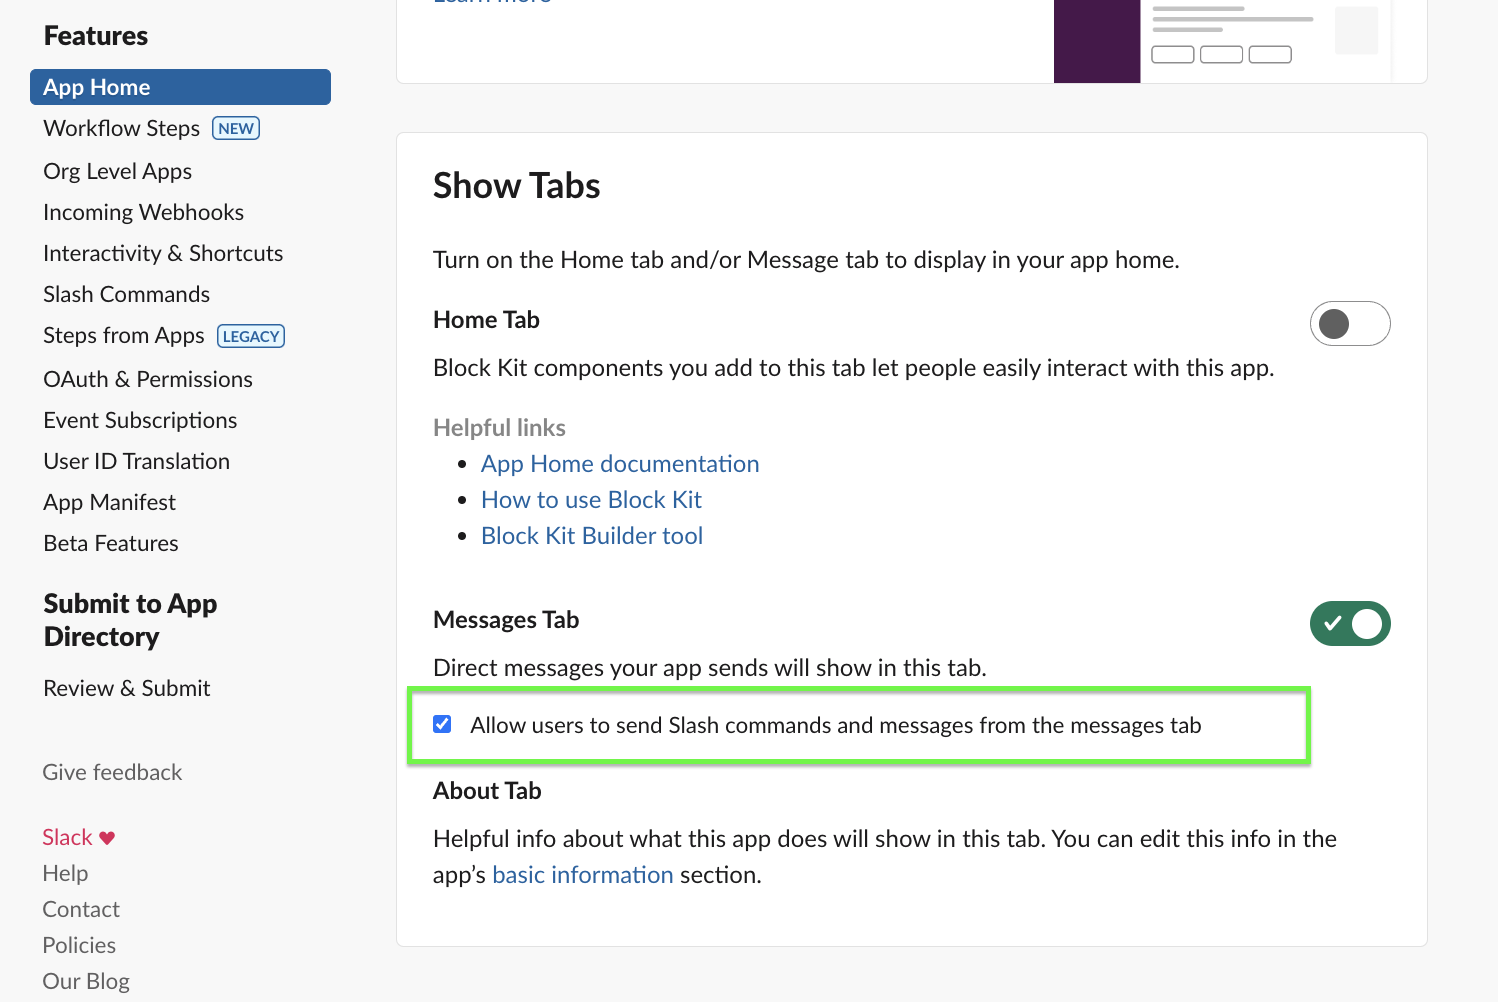
- In the left sidebar, click on Features > App Home
Scroll down and in the Show Tabs > Messages Tab section, tick Allow users to send Slash commands and messages from the messages tab
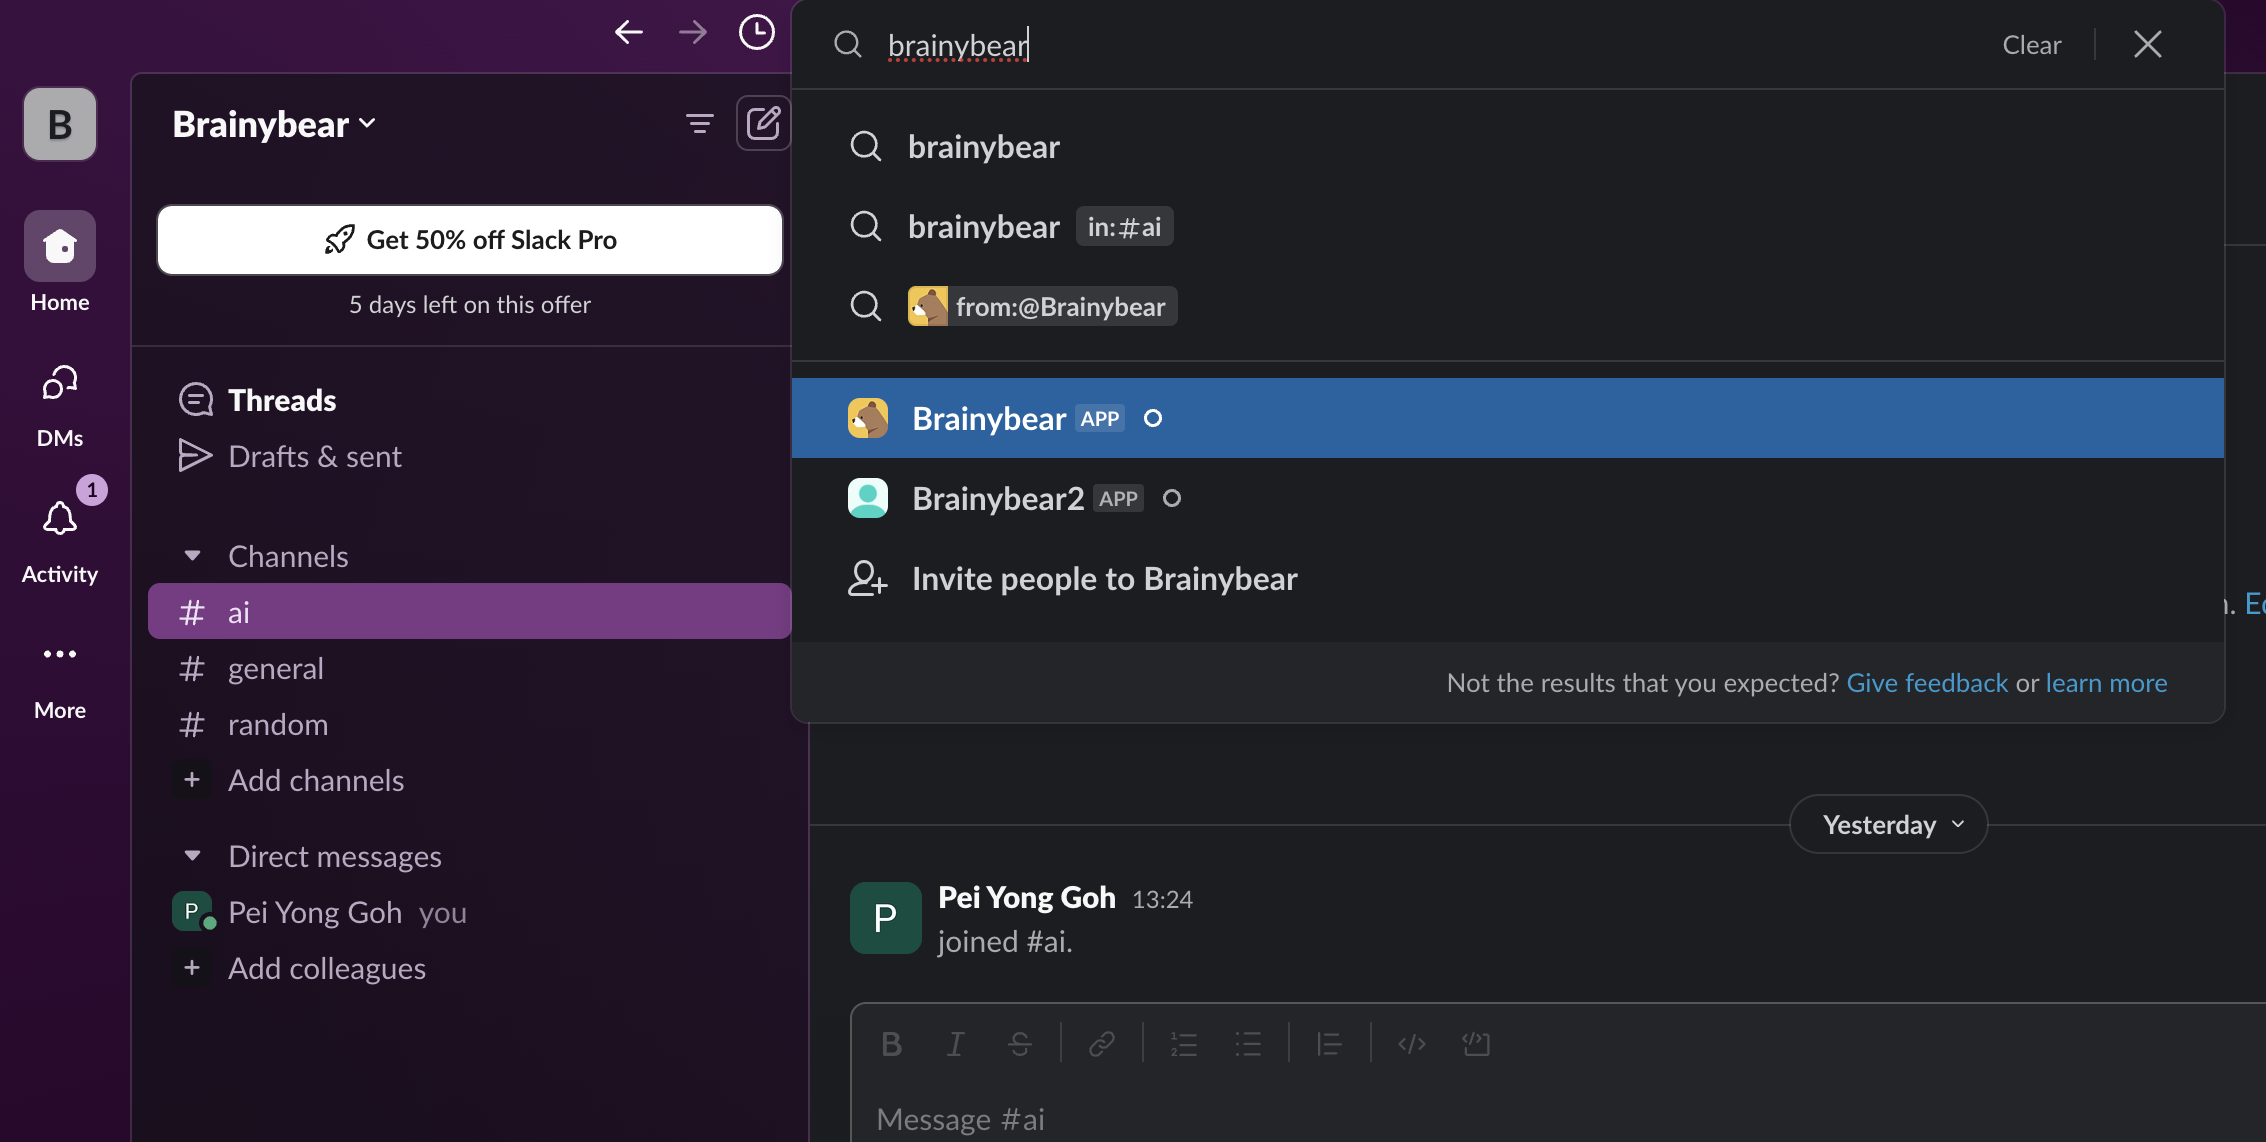
In Slack, under the Apps section of the sidebar, click the + Add apps button. In the search bar, type the name of your Slack app. Click on your Slack app in the search results. You can then begin chatting with your Slack app directly.
To add the chatbot to your channel, click the dropdown button under the App name. Click on the + Add this app to channel button. Please note that the chatbot will respond to every message in this channel unless you remove the 'channel.message' event as mentioned above.