How to integrate your Brainybear AI chatbot with WhatsApp?
Integrating your Brainybear AI chatbot with your WhatsApp can revolutionize your interactions, providing immediate and automated responses to your customers' inquiries on WhatsApp. This integration not only enhances customer service efficiency but also ensures that every message is addressed promptly, improving engagement and satisfaction.
After you use 1,000 free user-initiated conversations each month, Facebook will charge extra usage fee on your Meta Developer Account.
Step 1. Login to your Brainybear account and go to Assistants.
Step 2. Click on Message icon.

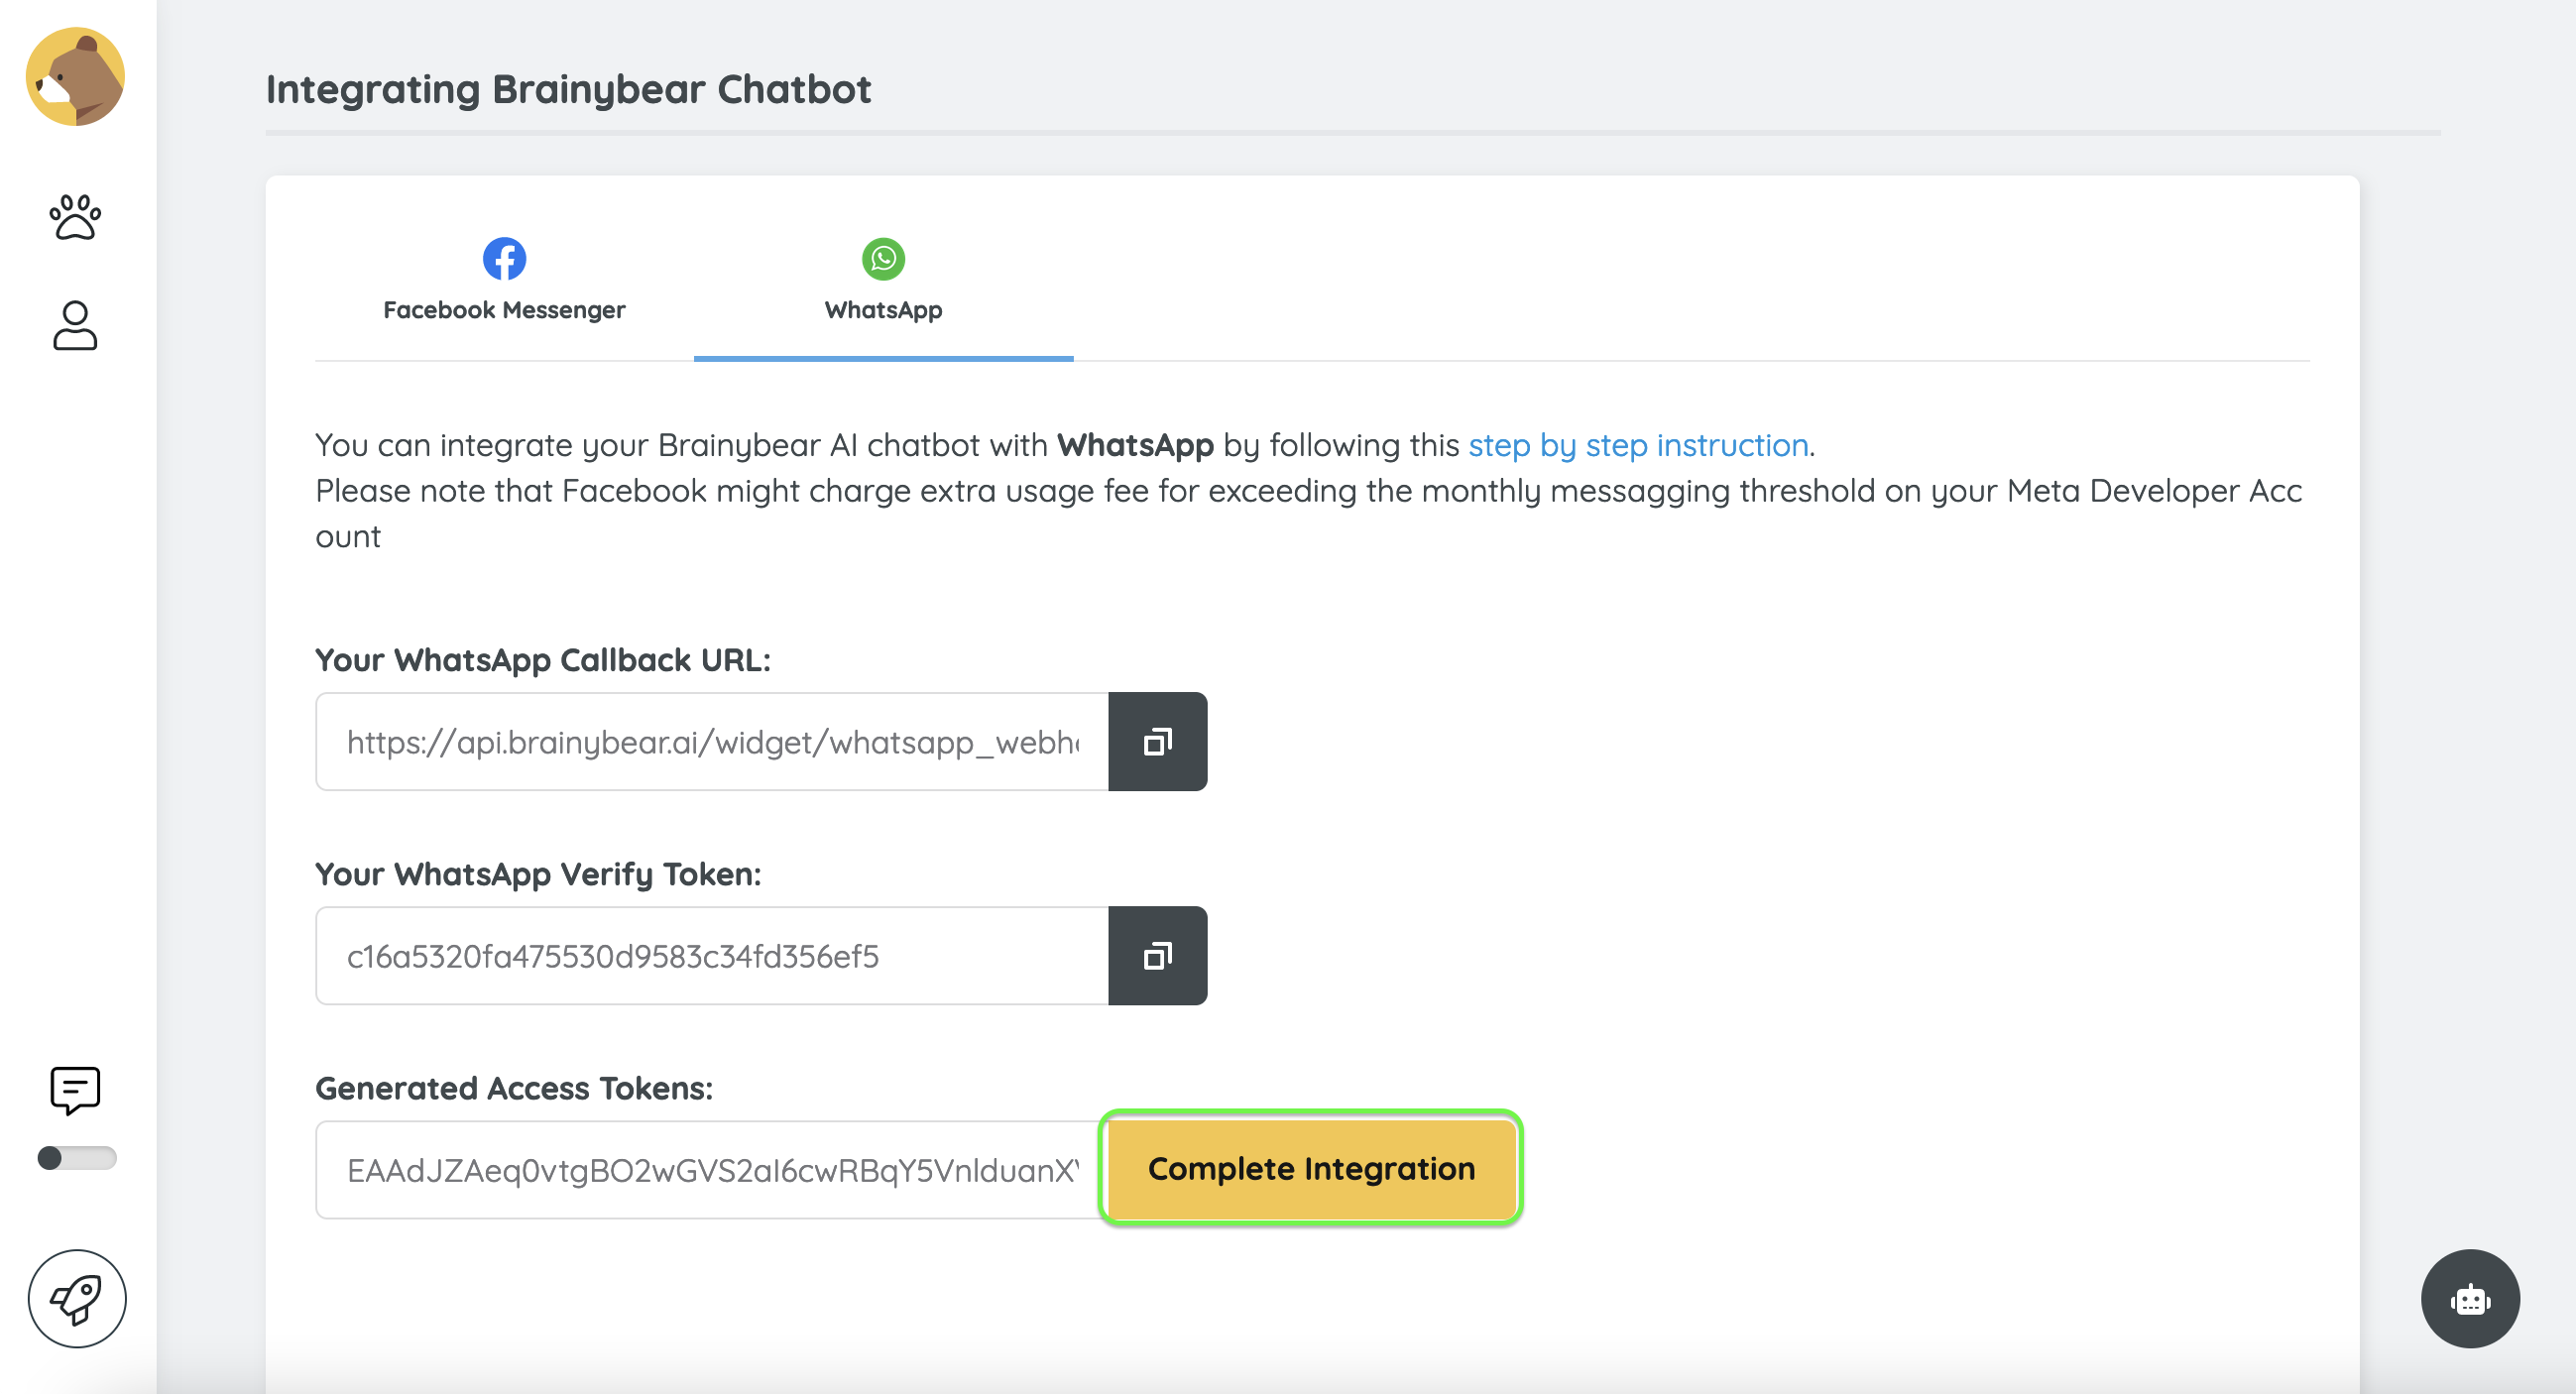
Step 3. Click on WhatsApp tab. Copy the Callback URL
Copy the Callback URL to your clipboard, by clicking the copy icon that appears at the end of the URL. Keep this pop up open, don't close it yet! You will need it for step 9 again!

Step 4. Go to your Meta for Developers account.
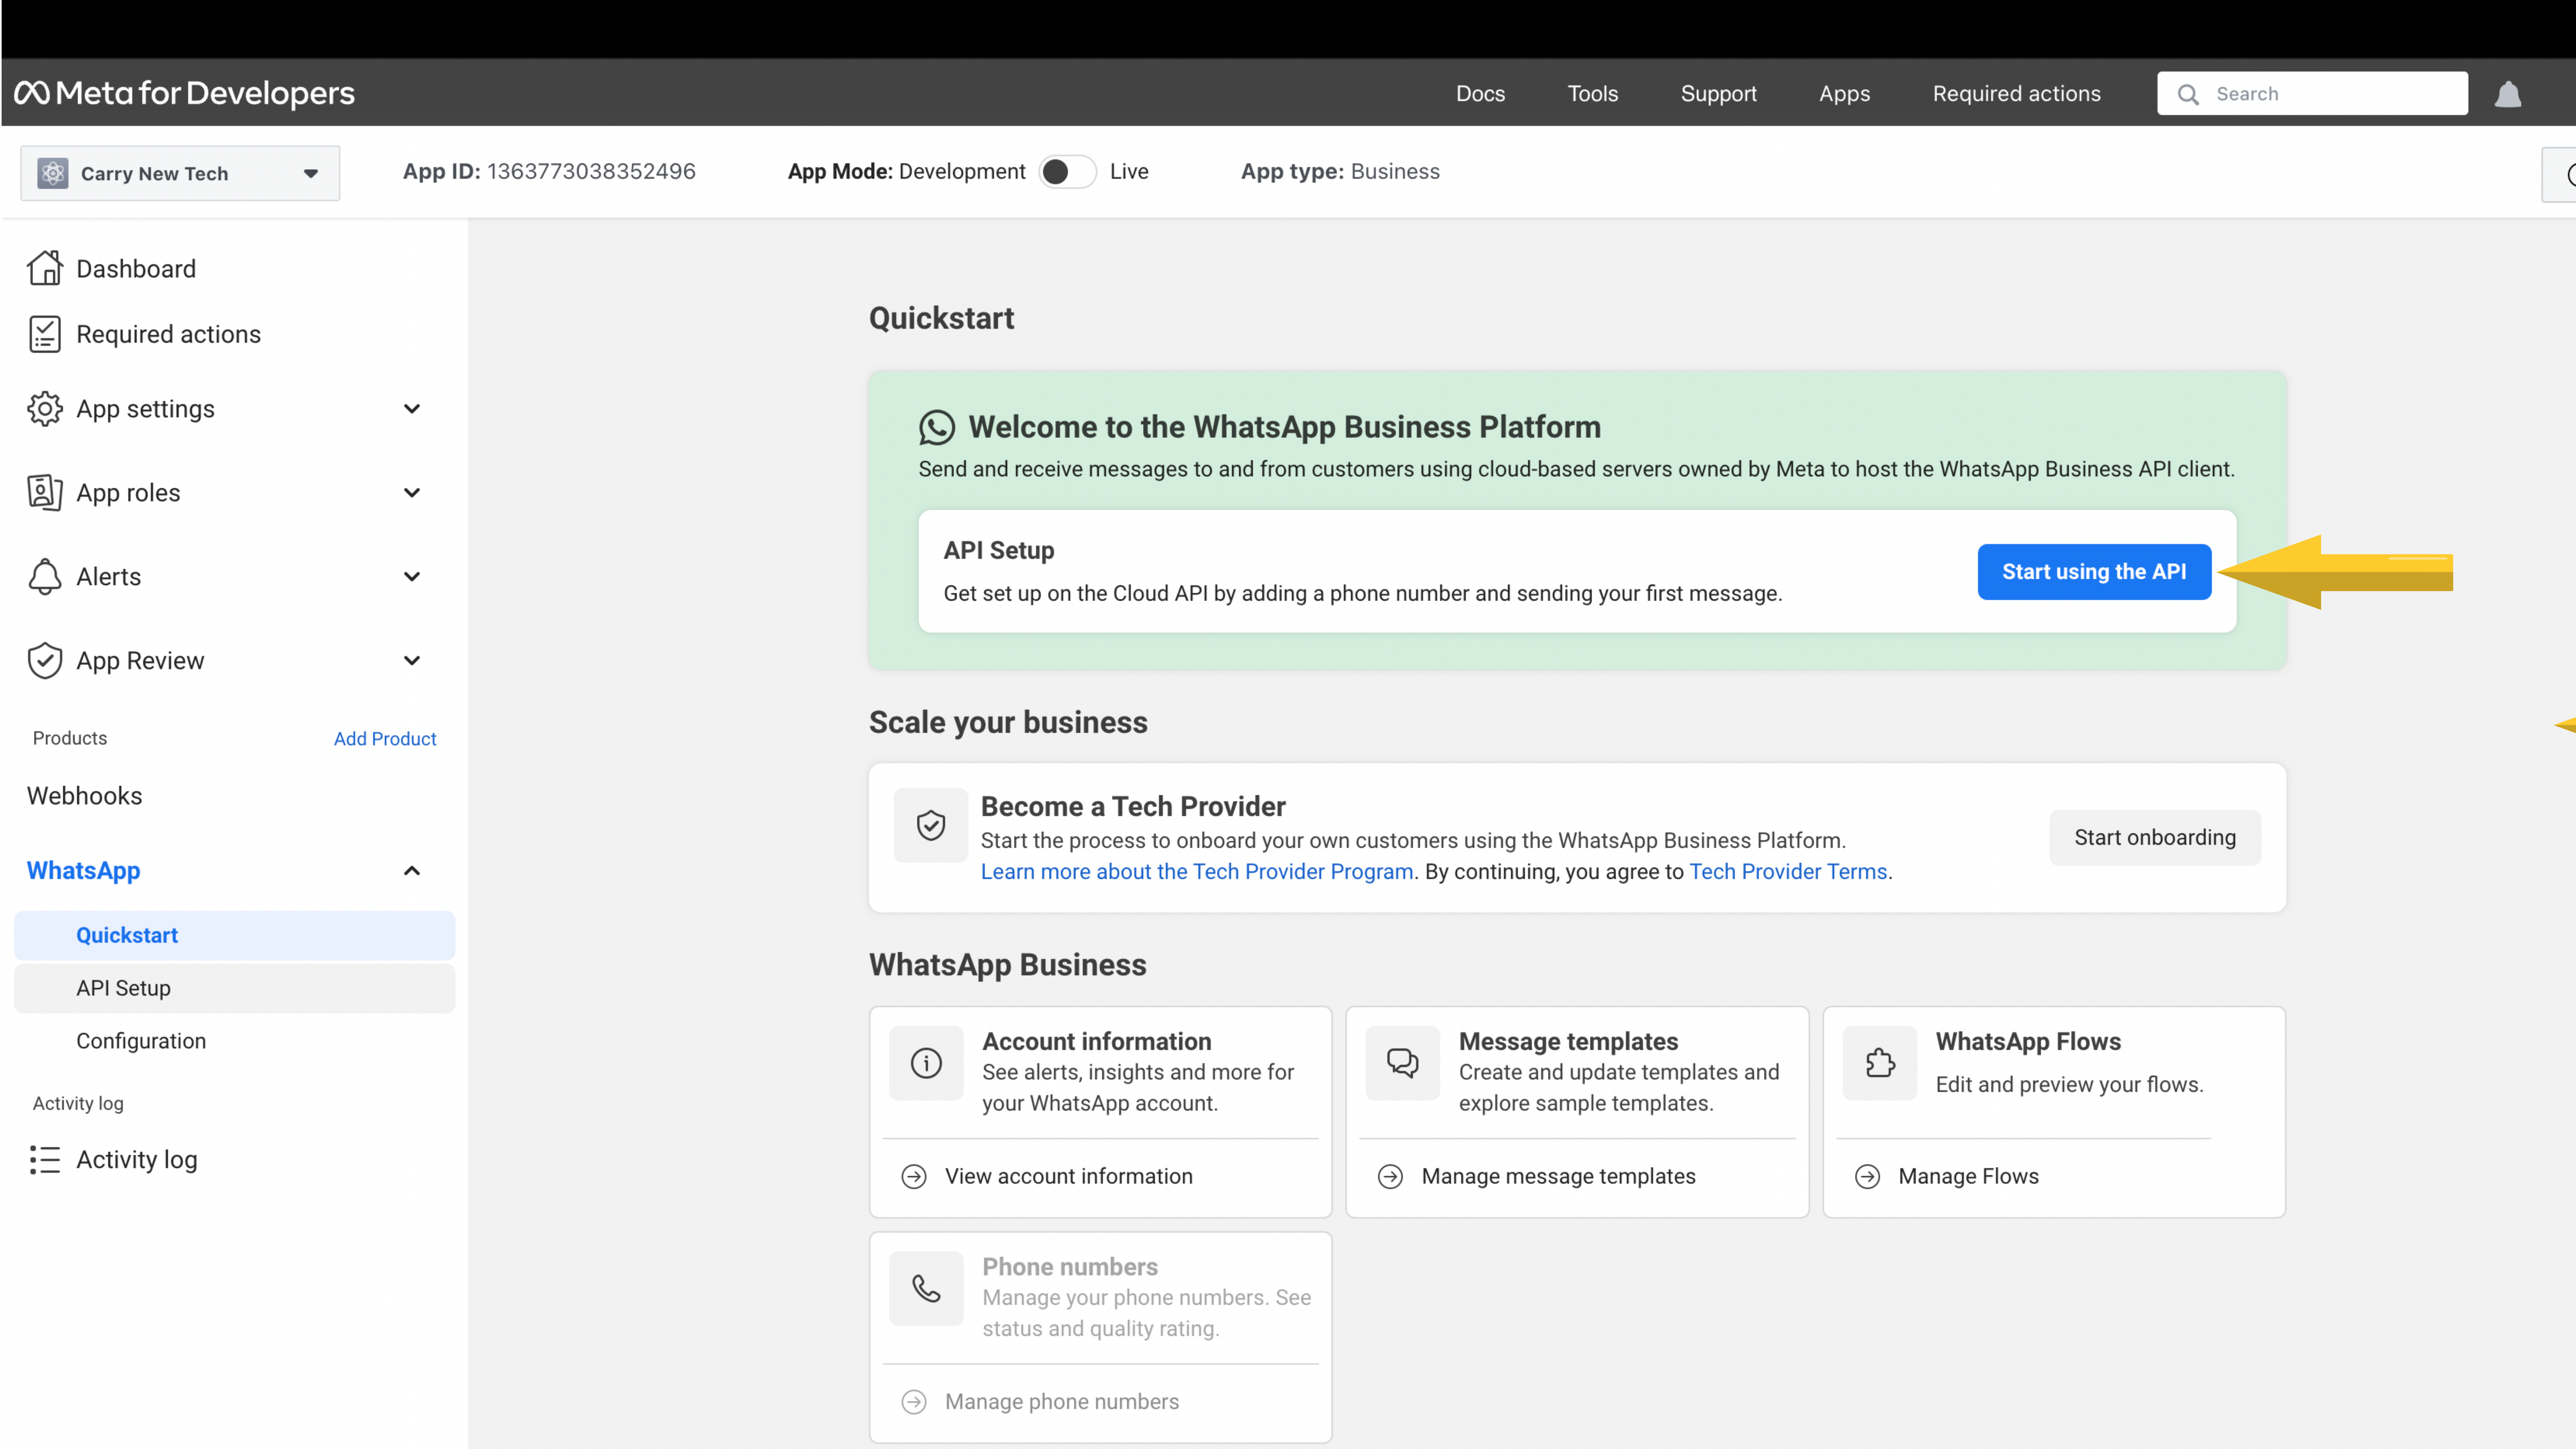
Go to your Meta for Developers account. Click on WhatsApp on the left side menu. Then, go to the Quickstart and Click on "Start using API"
You can find the WhatsApp tab from the side navigation, if WhatsApp is not found, click on "Add Product" and add WhatsApp to the side navigation.
Step 5. Copy the "Temporary access token" and paste it on Brainybear "Generated Access Token" field, click Complete integration.
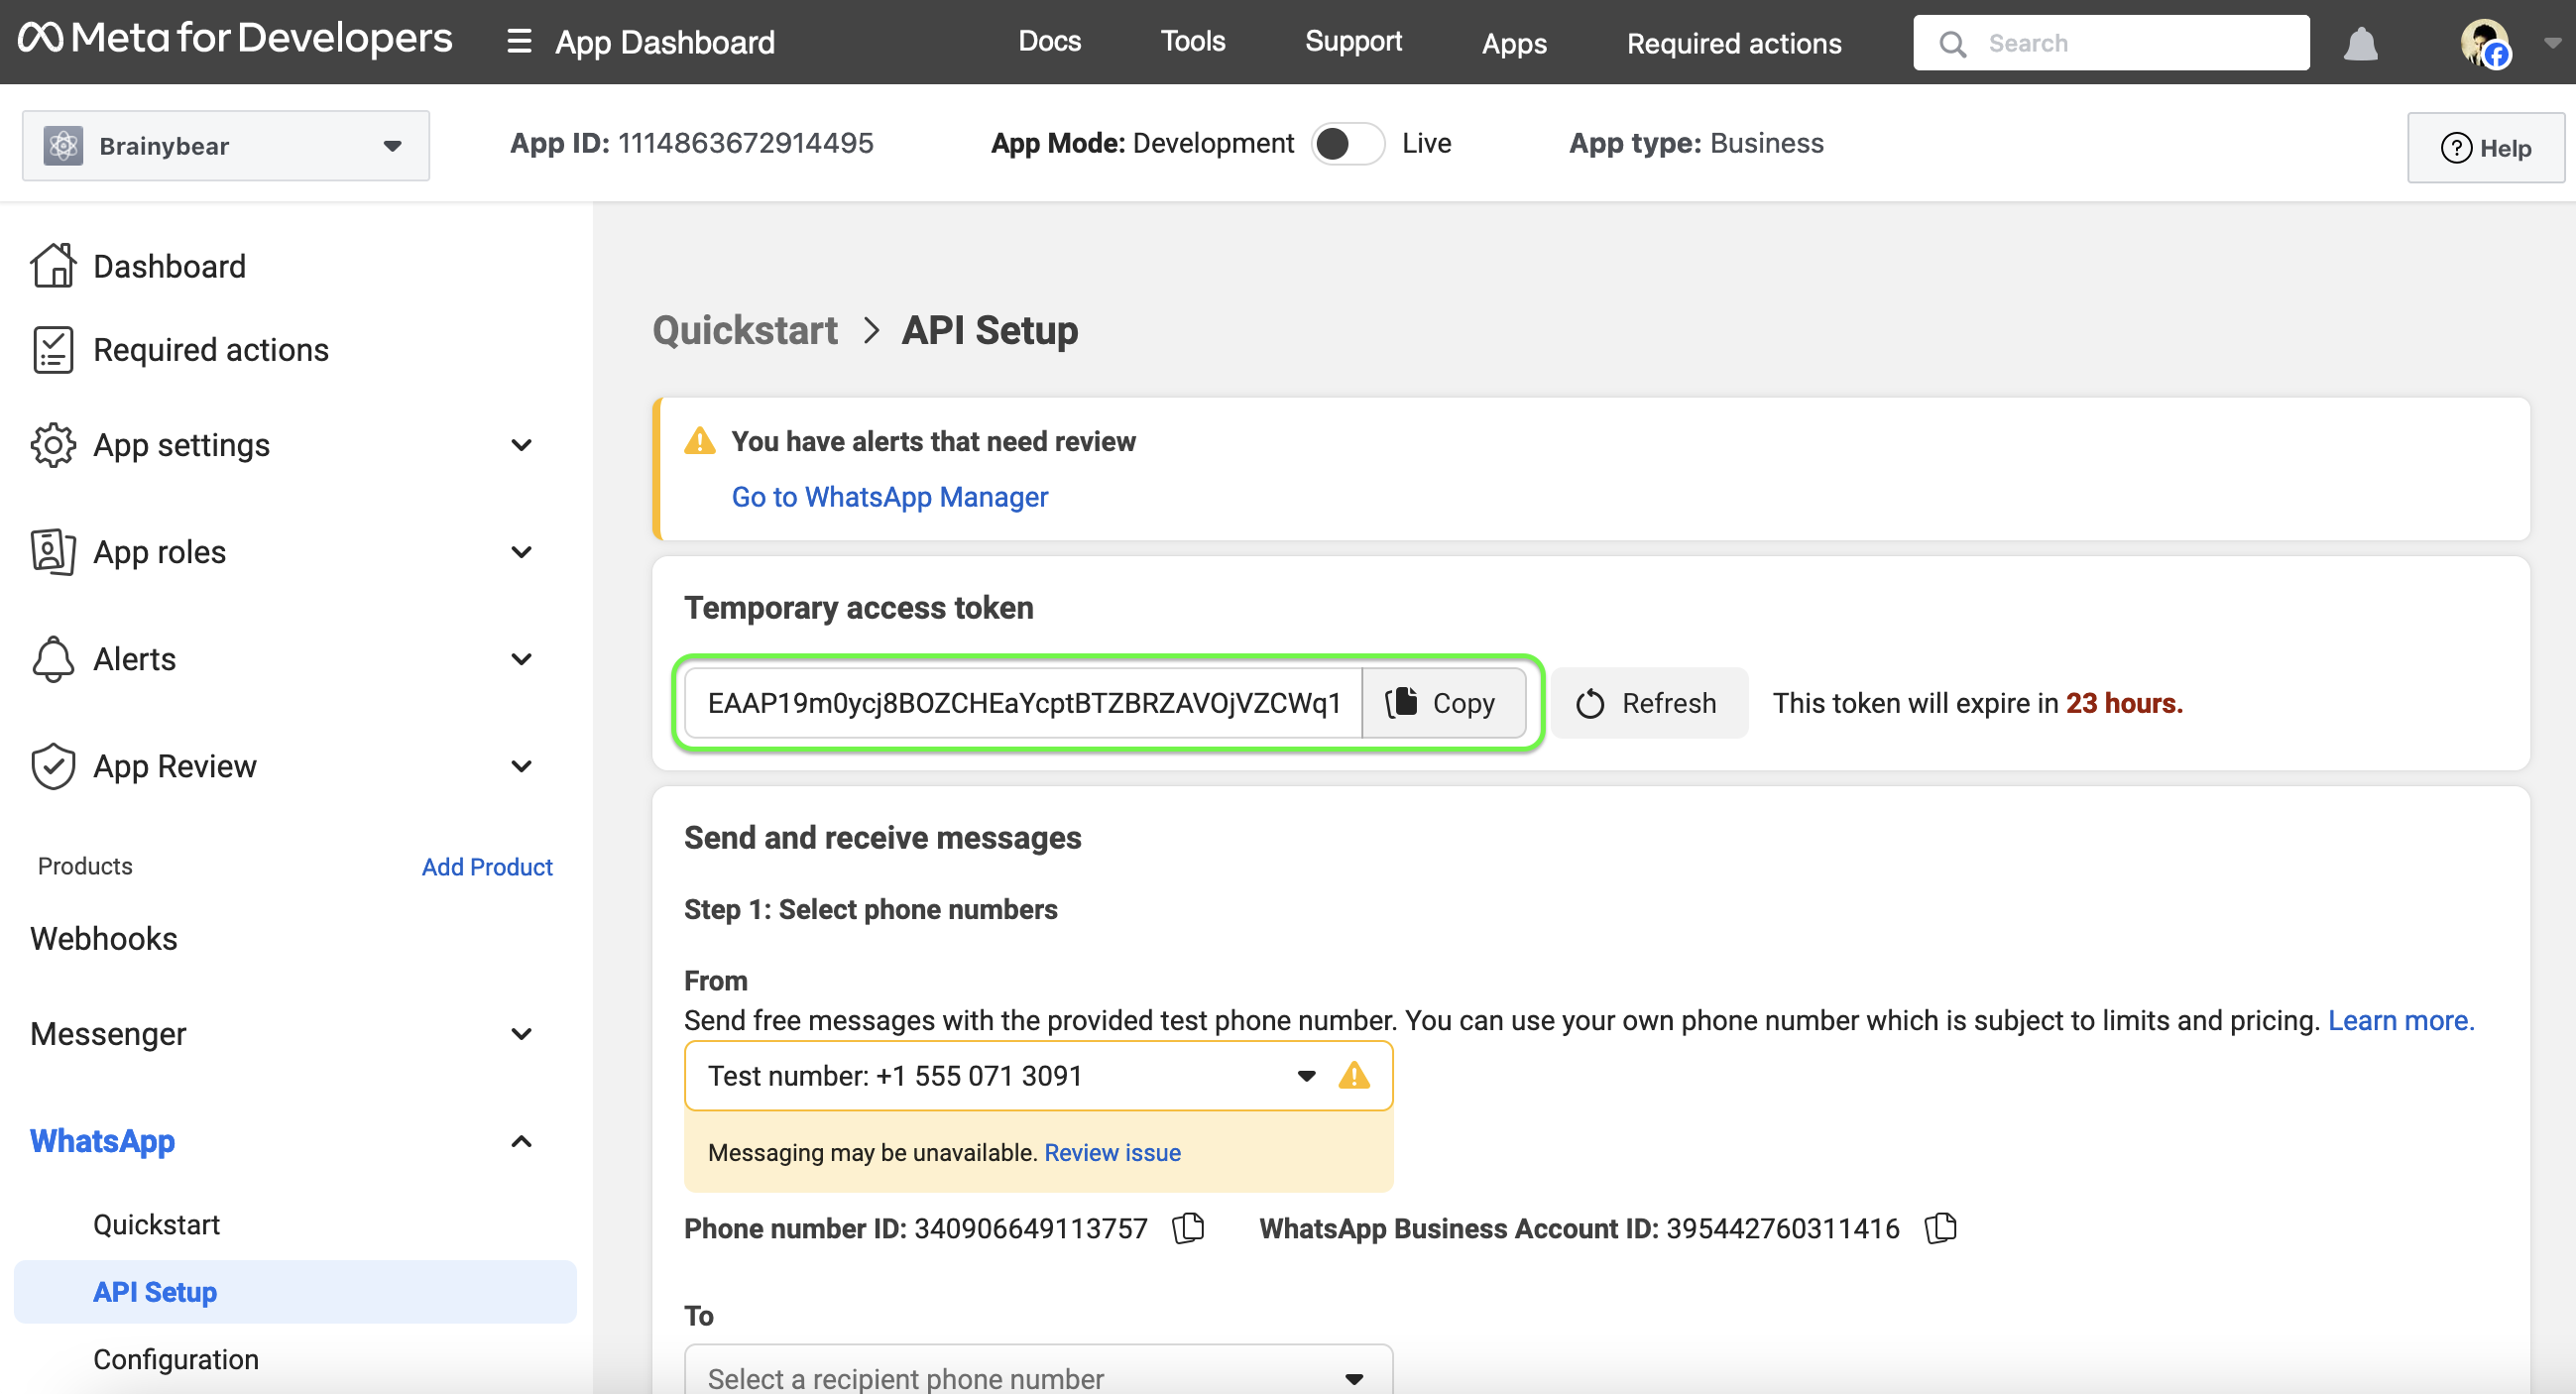
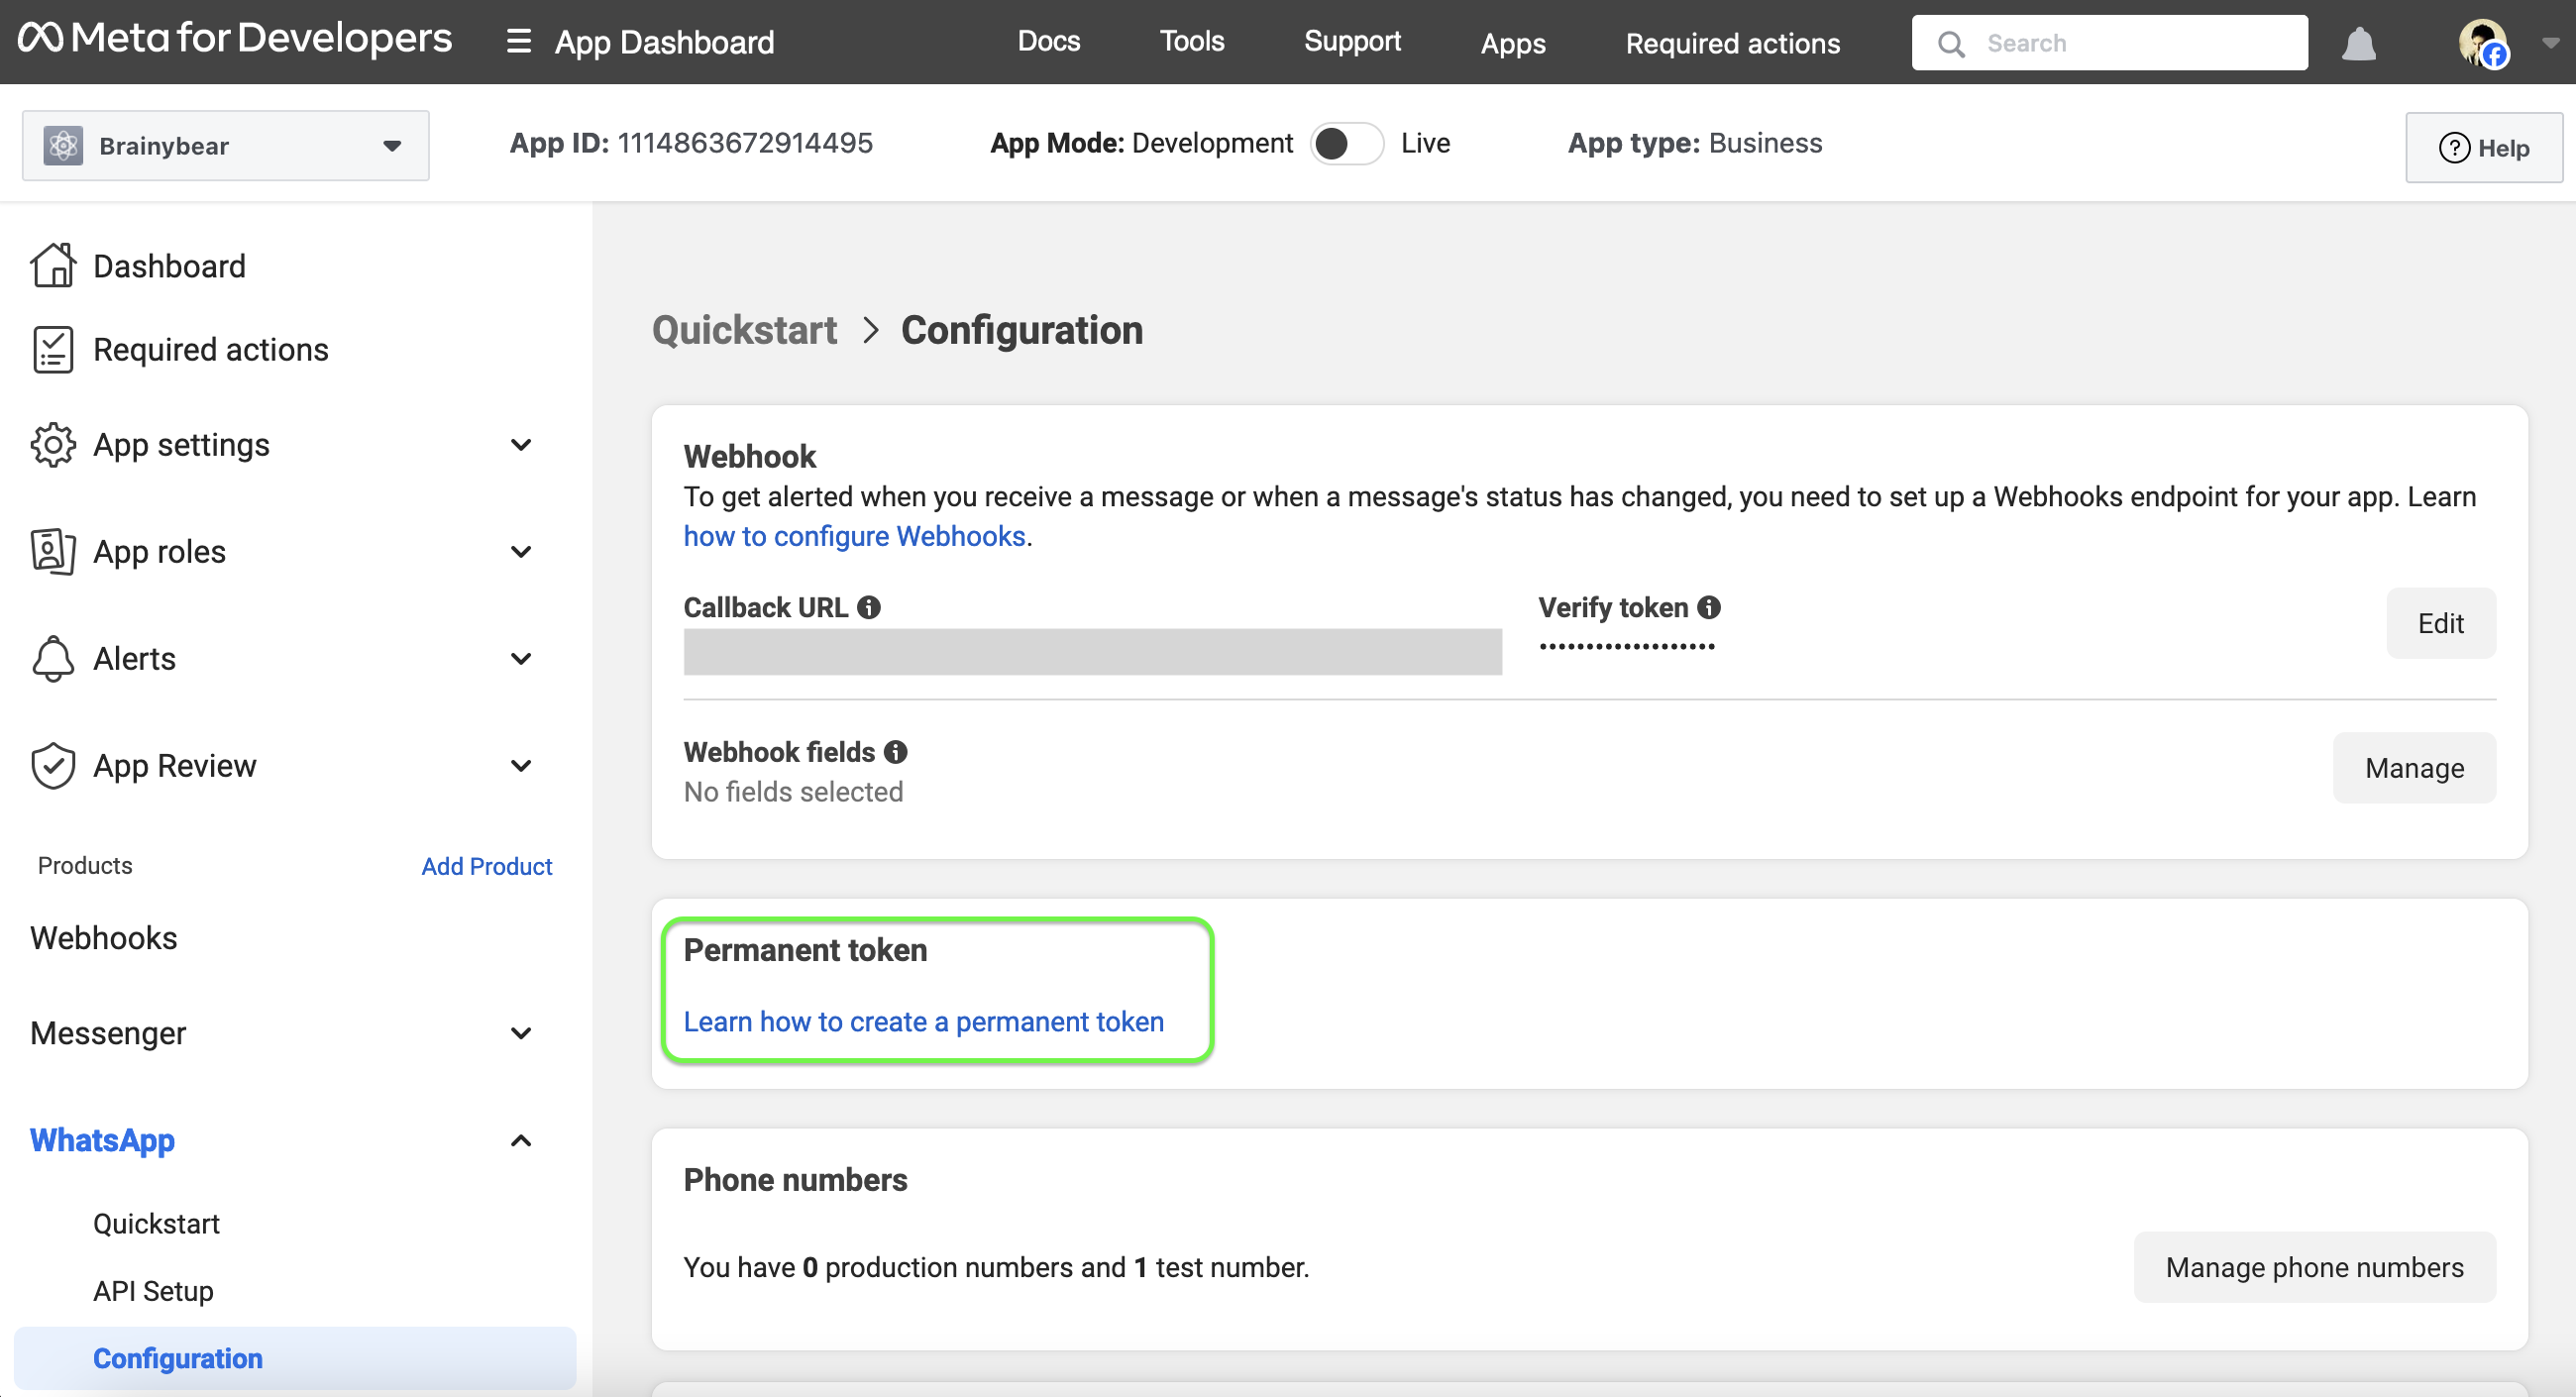
The temporary access token only valid for 24 hours for testing purpose. For getting a permanant access token, Go to Configuration under WhatsApp menu, click on learn more for Permanent Access Token.
Alternatively, you can follow this step-by-step instructions to get a Permanent Access Token for your chatbot.
When you get your Permanent Access Token for your chatbot, replace the "Temporary access token" in Step 5 with your permanent token. Paste it on Brainybear "Generated Access Token" field and click Complete integration.
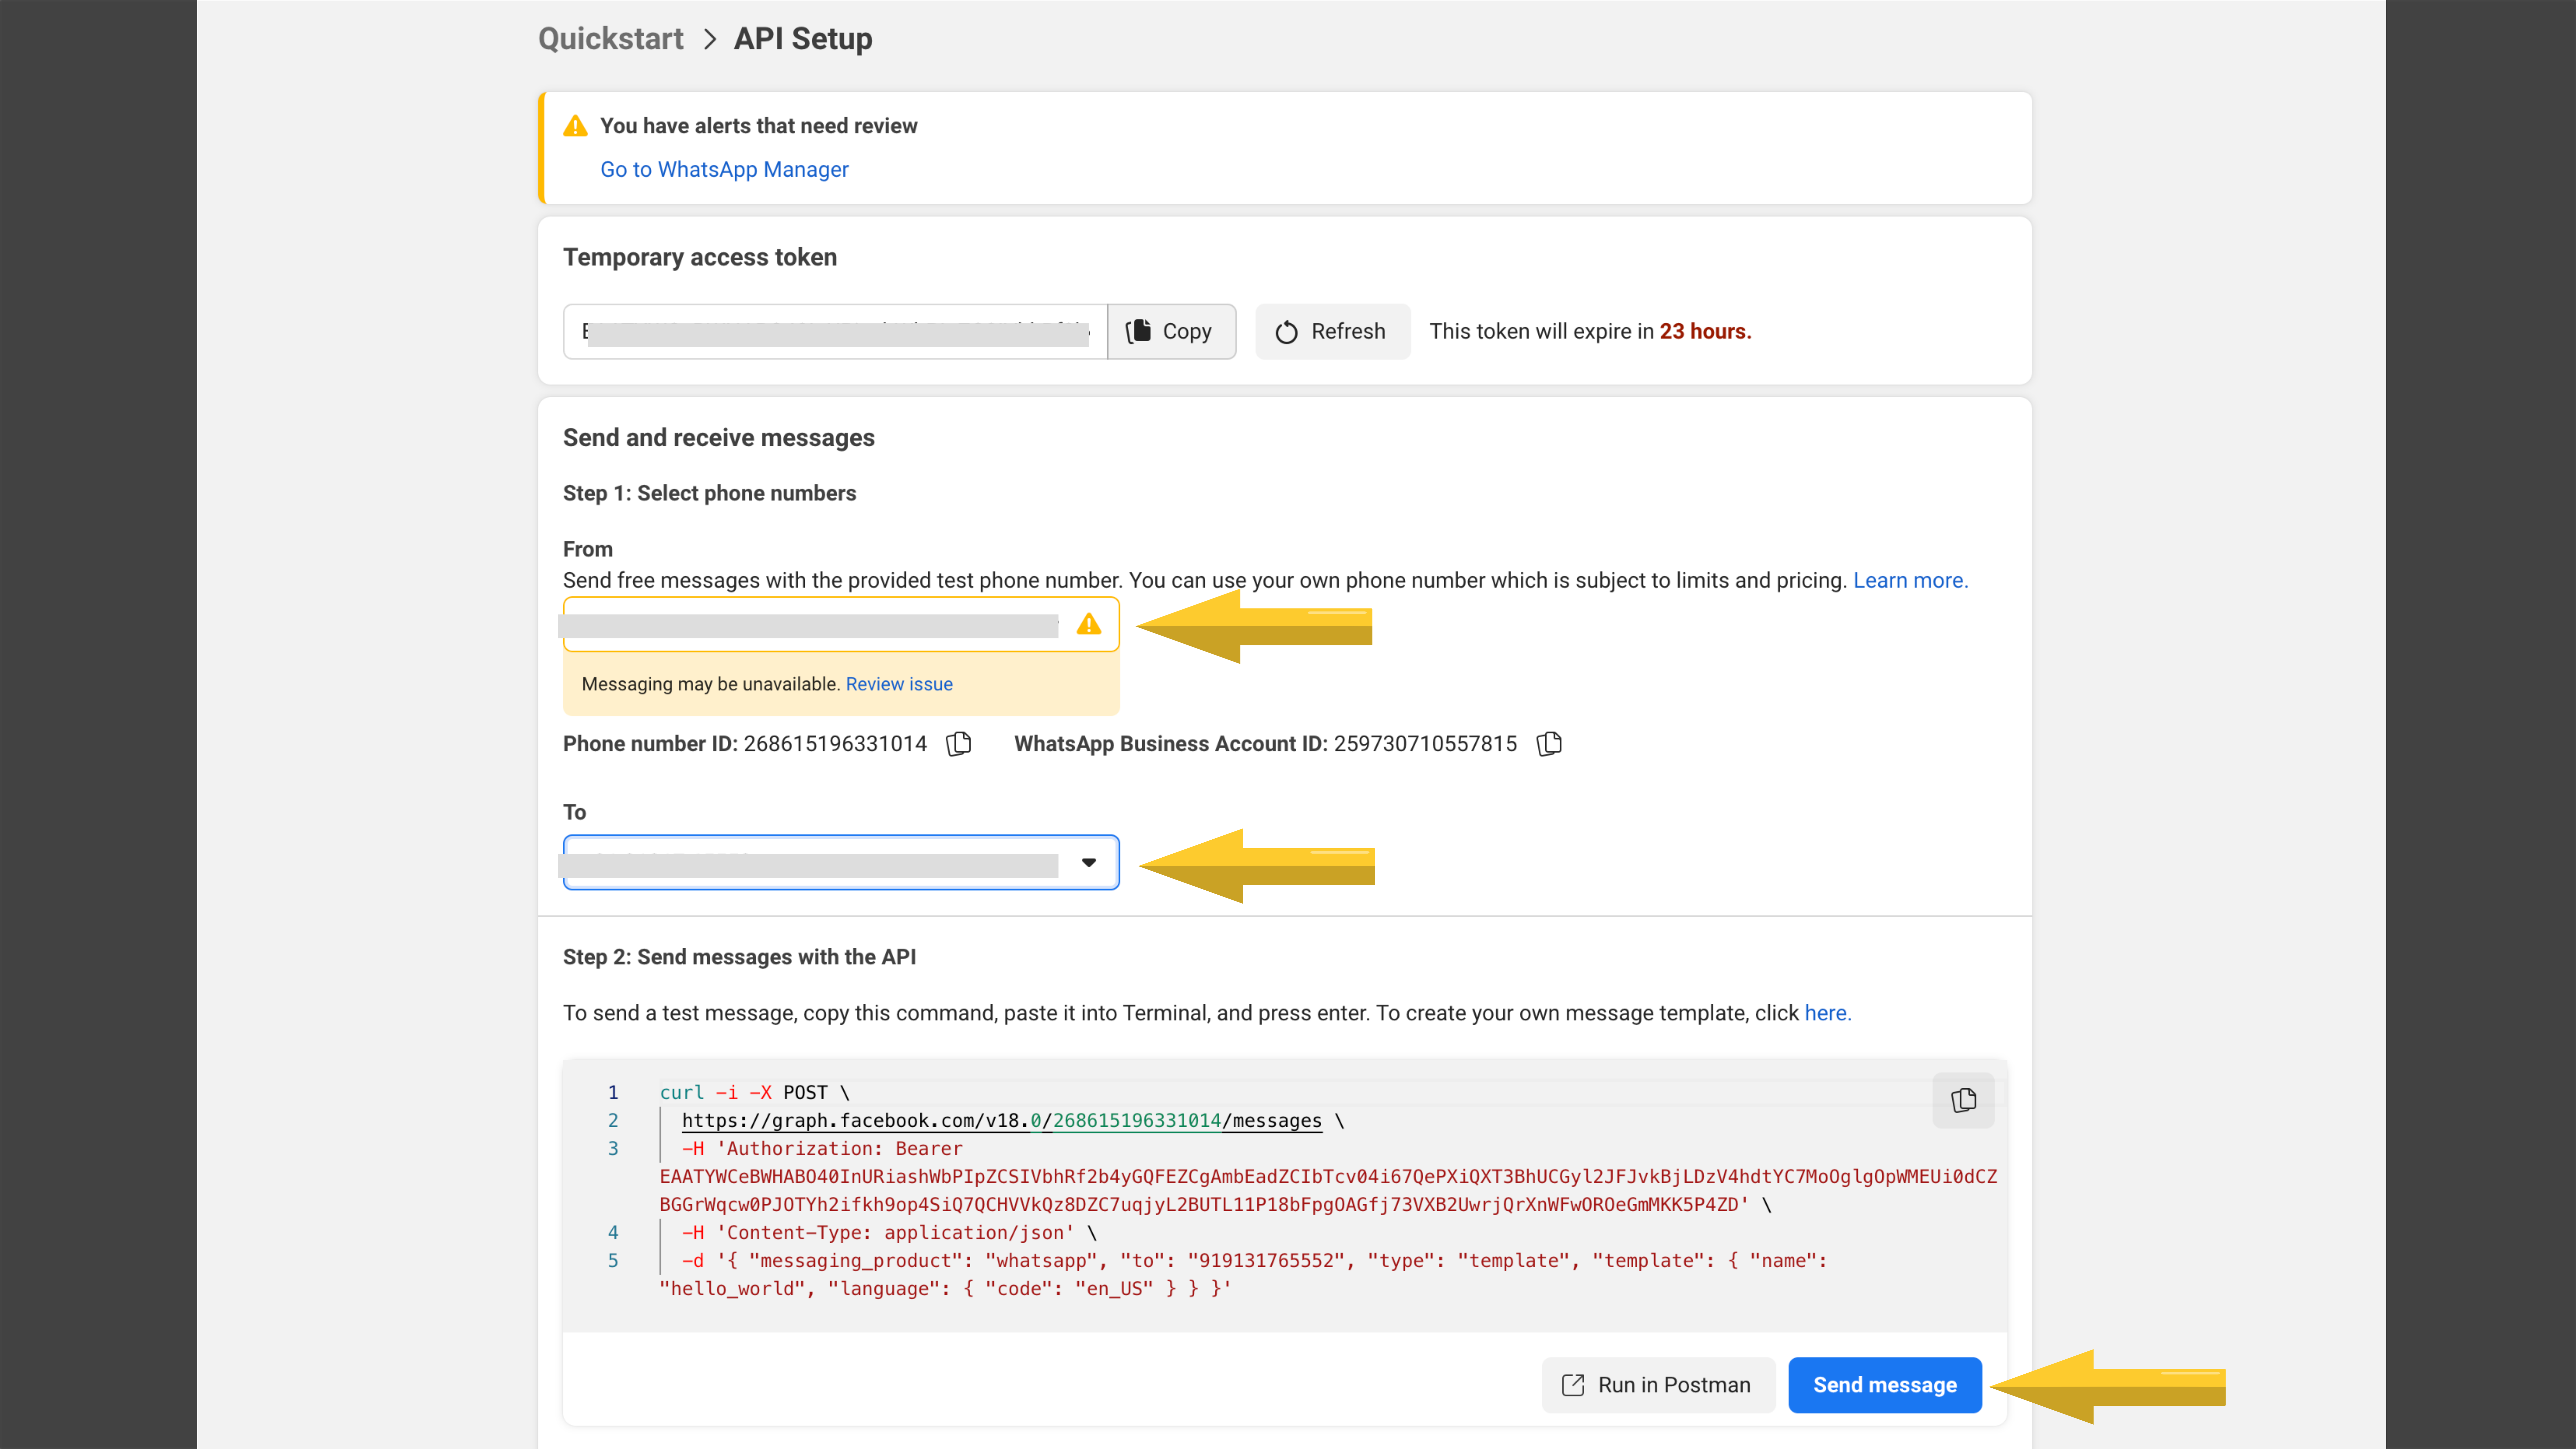
Step 6. Now setup your WhatsApp number and add one more test number to test the trigger and click "Send Message".
Step 7. After successful test message, you will be switched to "Configuration" tab. Now click on "Edit".
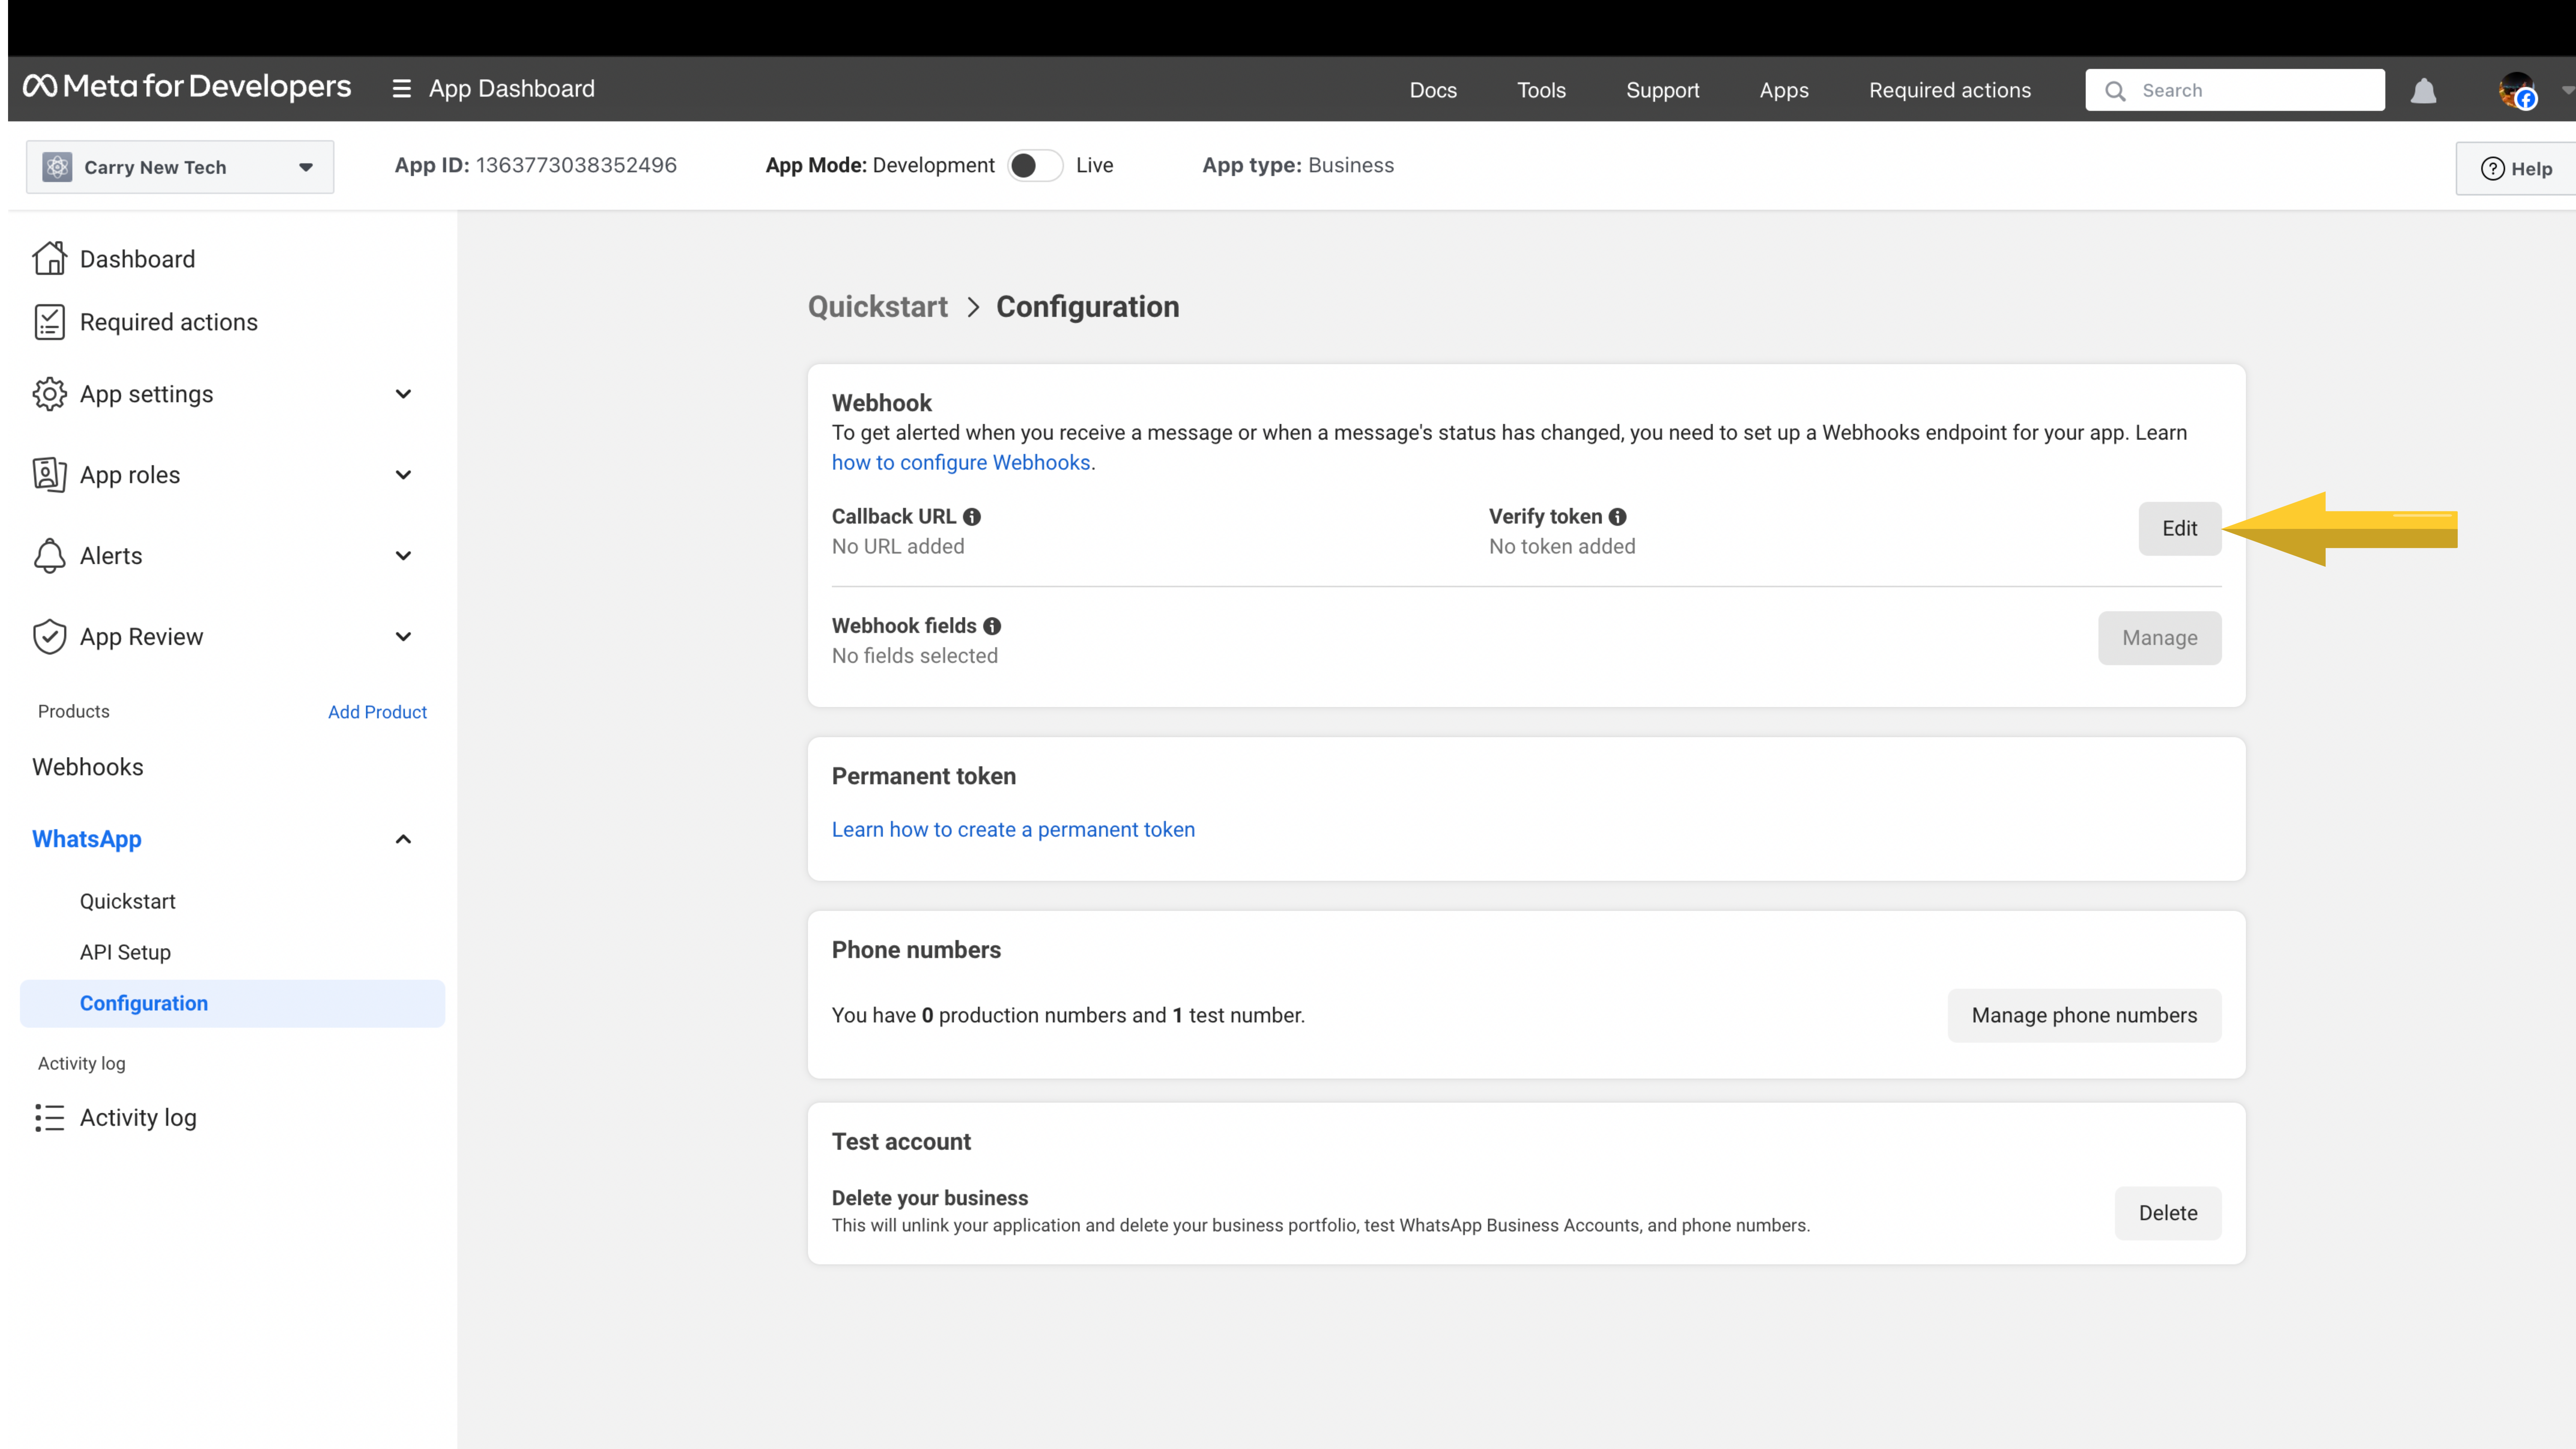
Step 8. Paste the Callback URL which you copied from Brainybear.
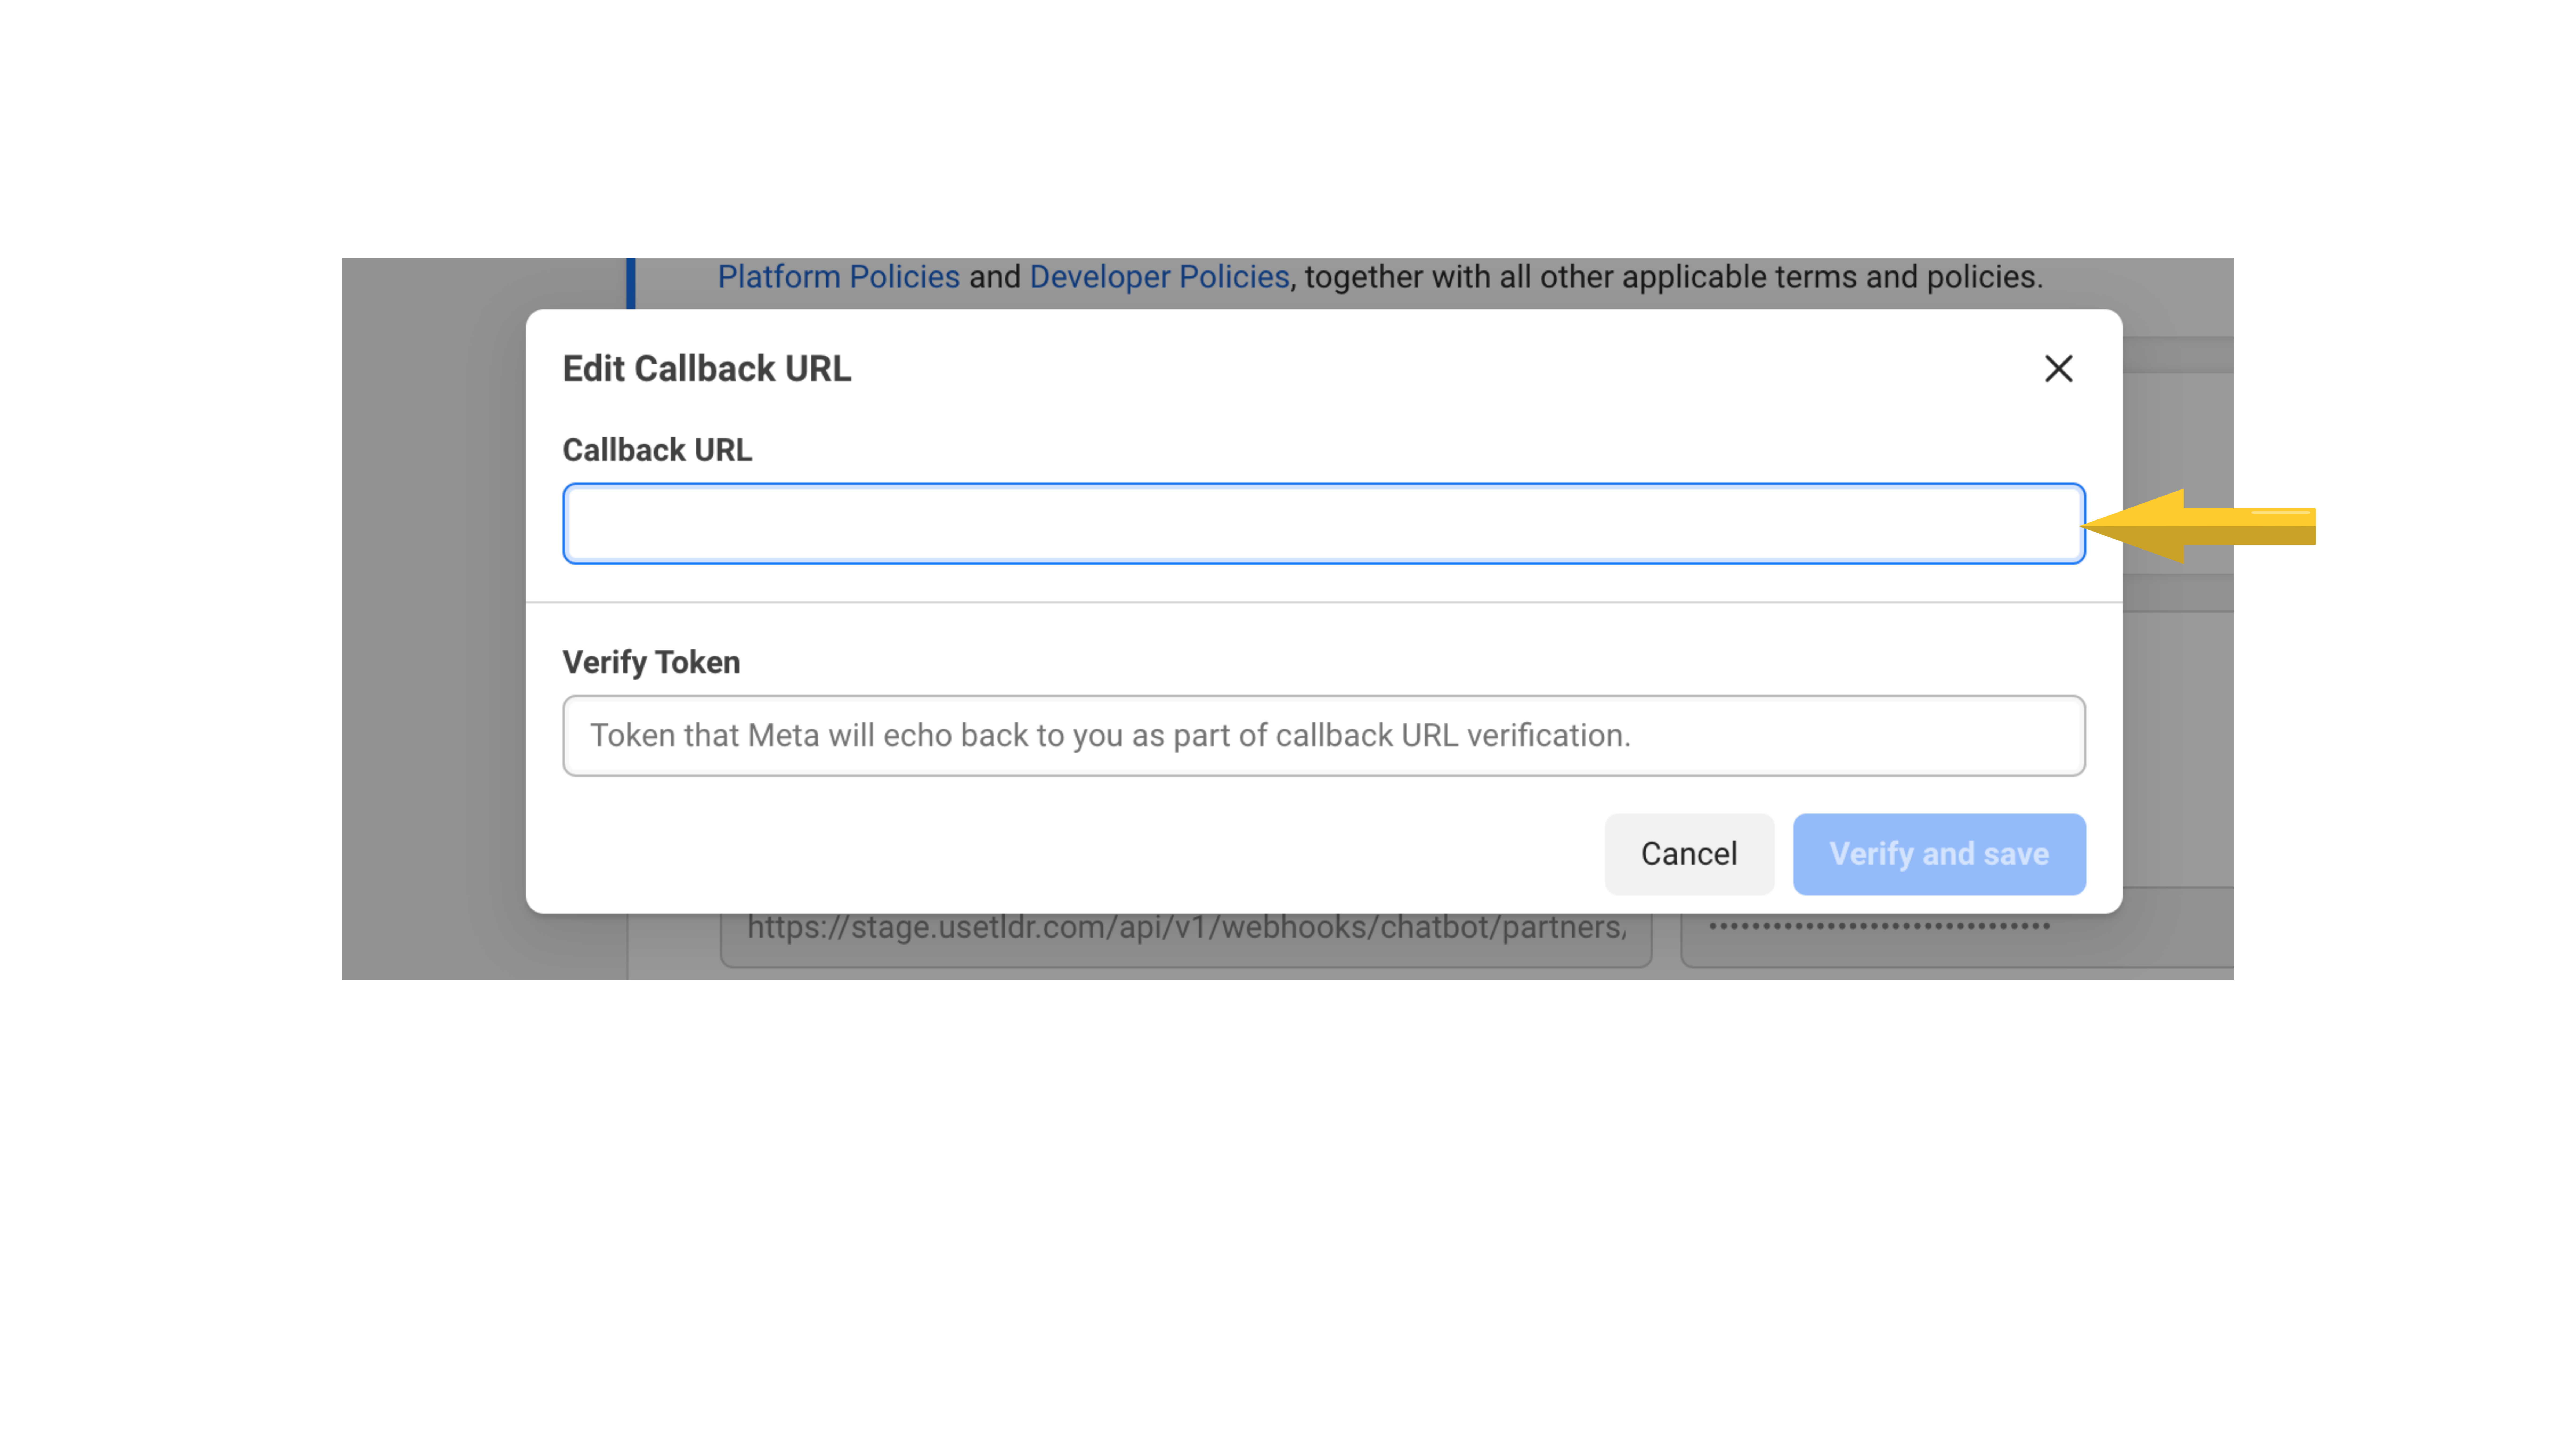
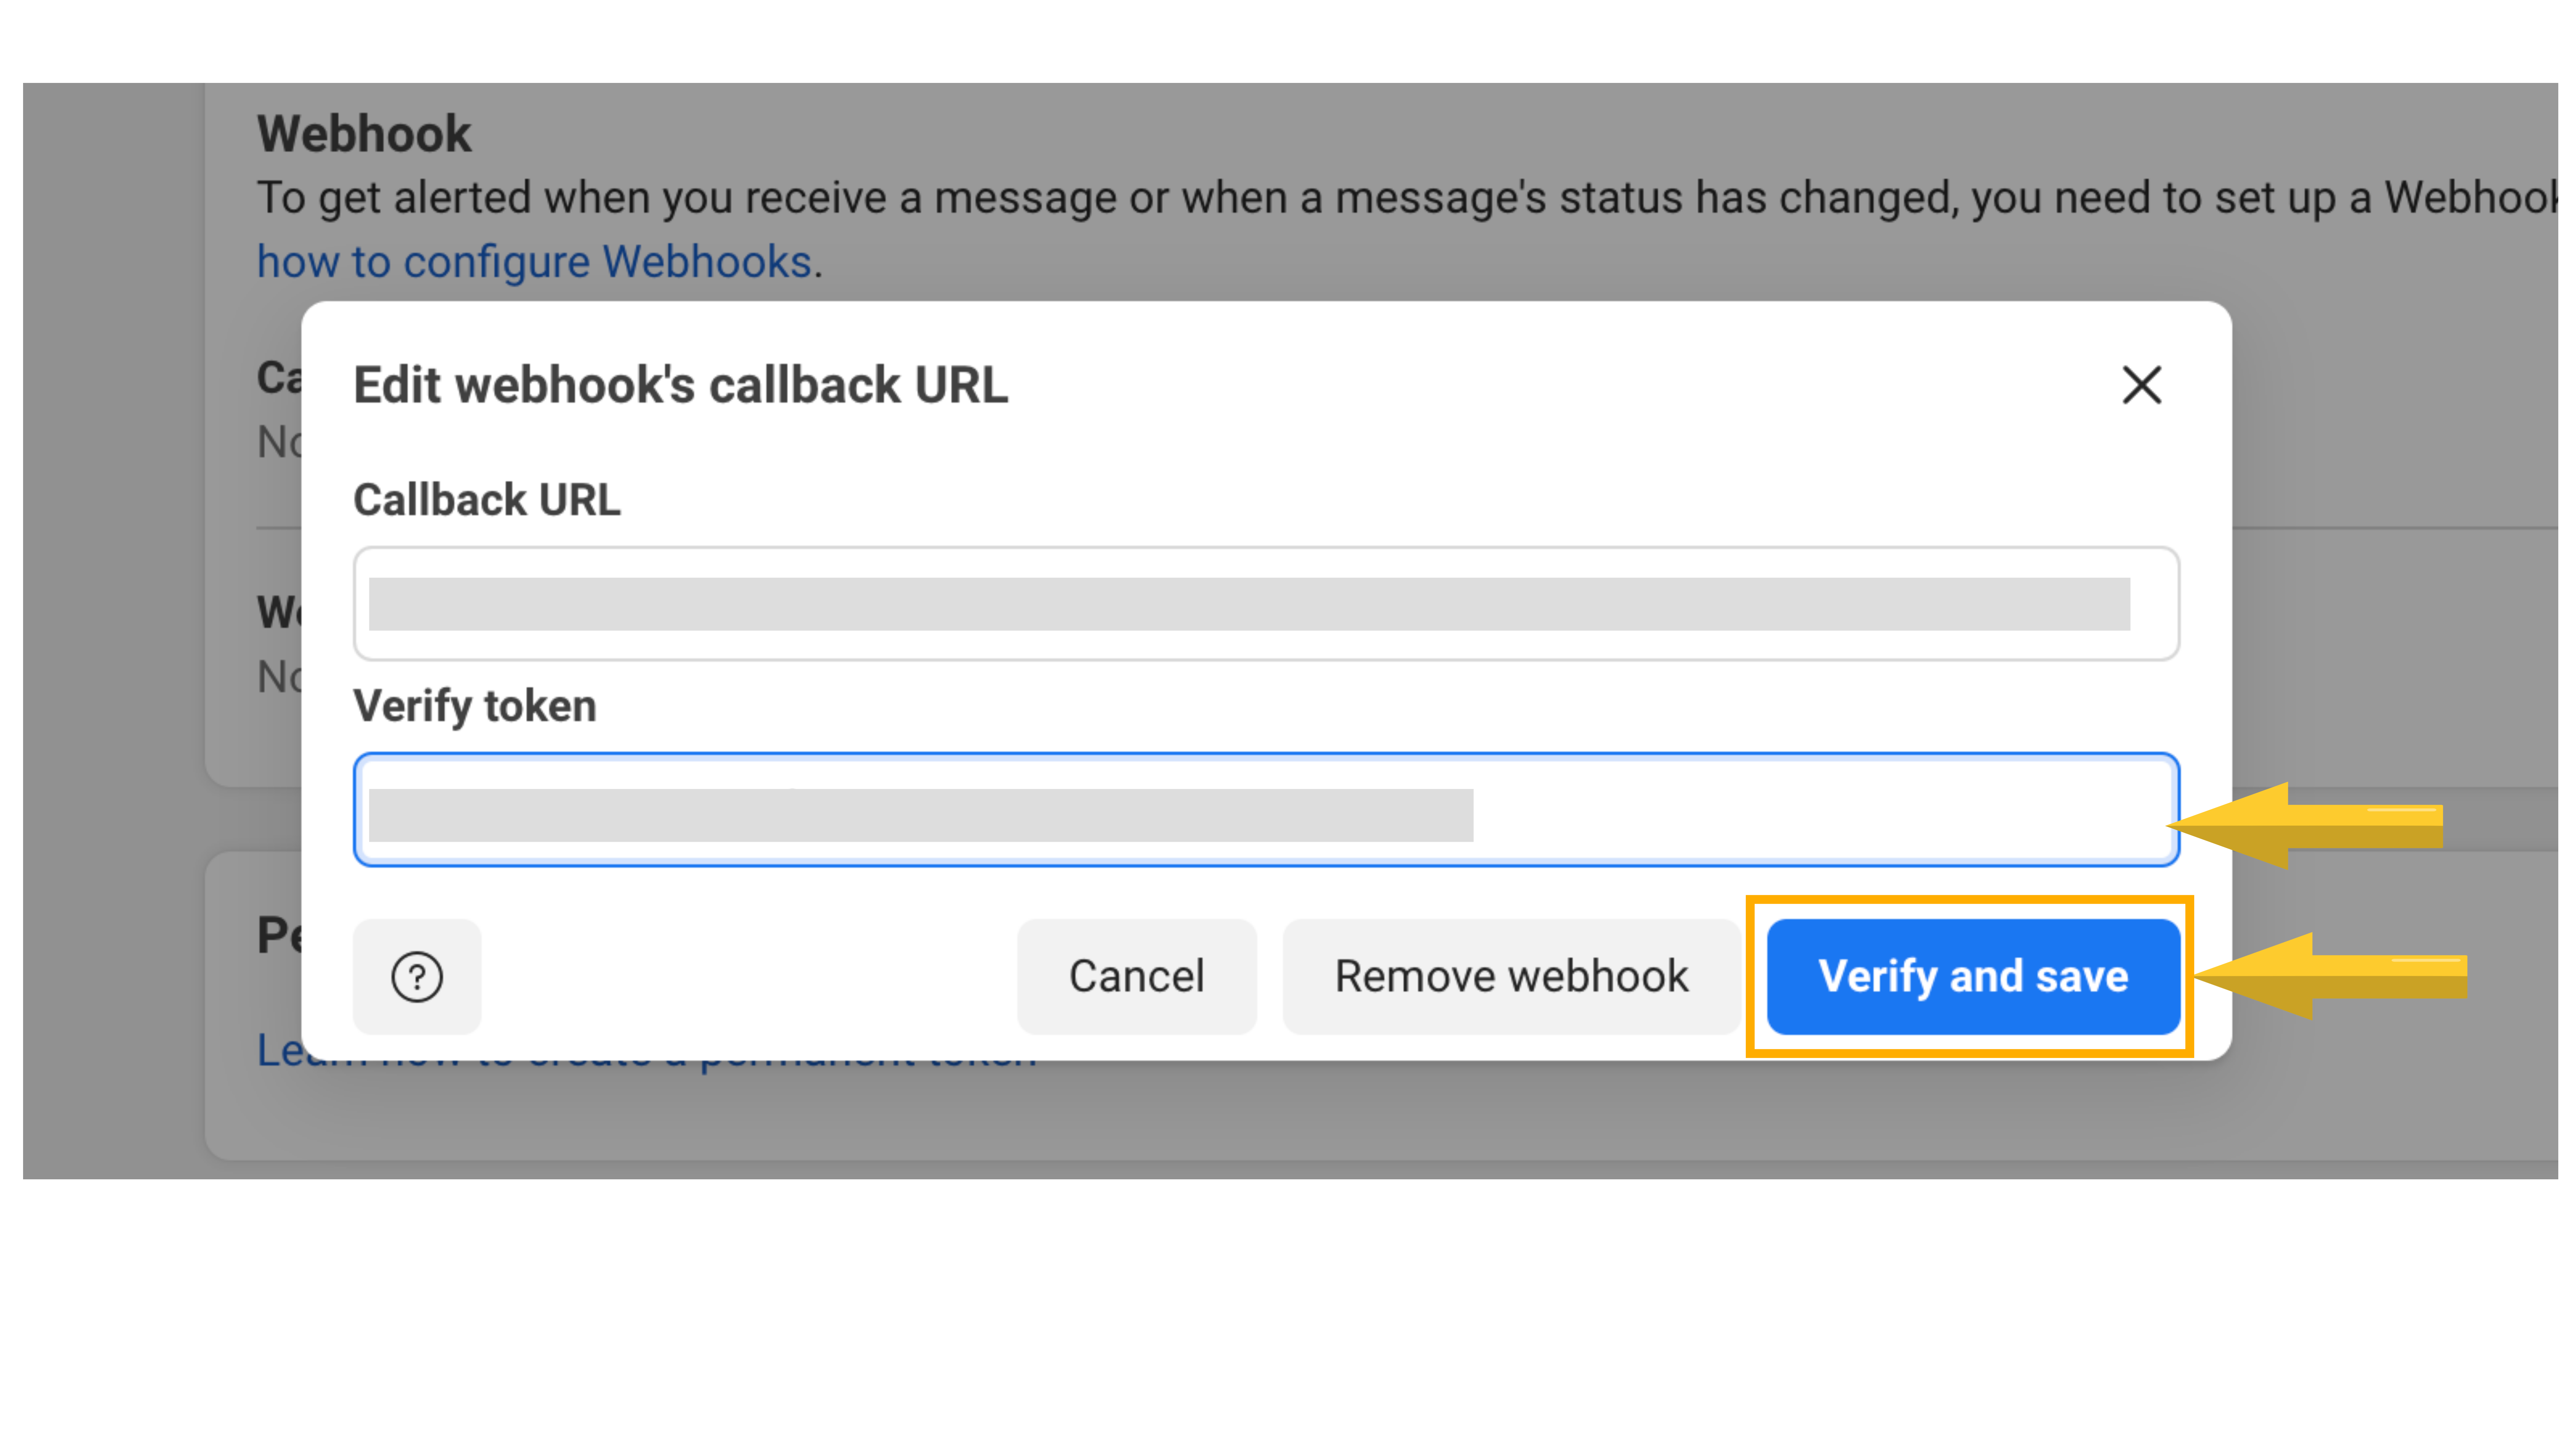
Step 9. Repeat the same for "Verify Token". Copy it from Brainybear and paste it on the "Verify Token" field. Click "Verify and save".
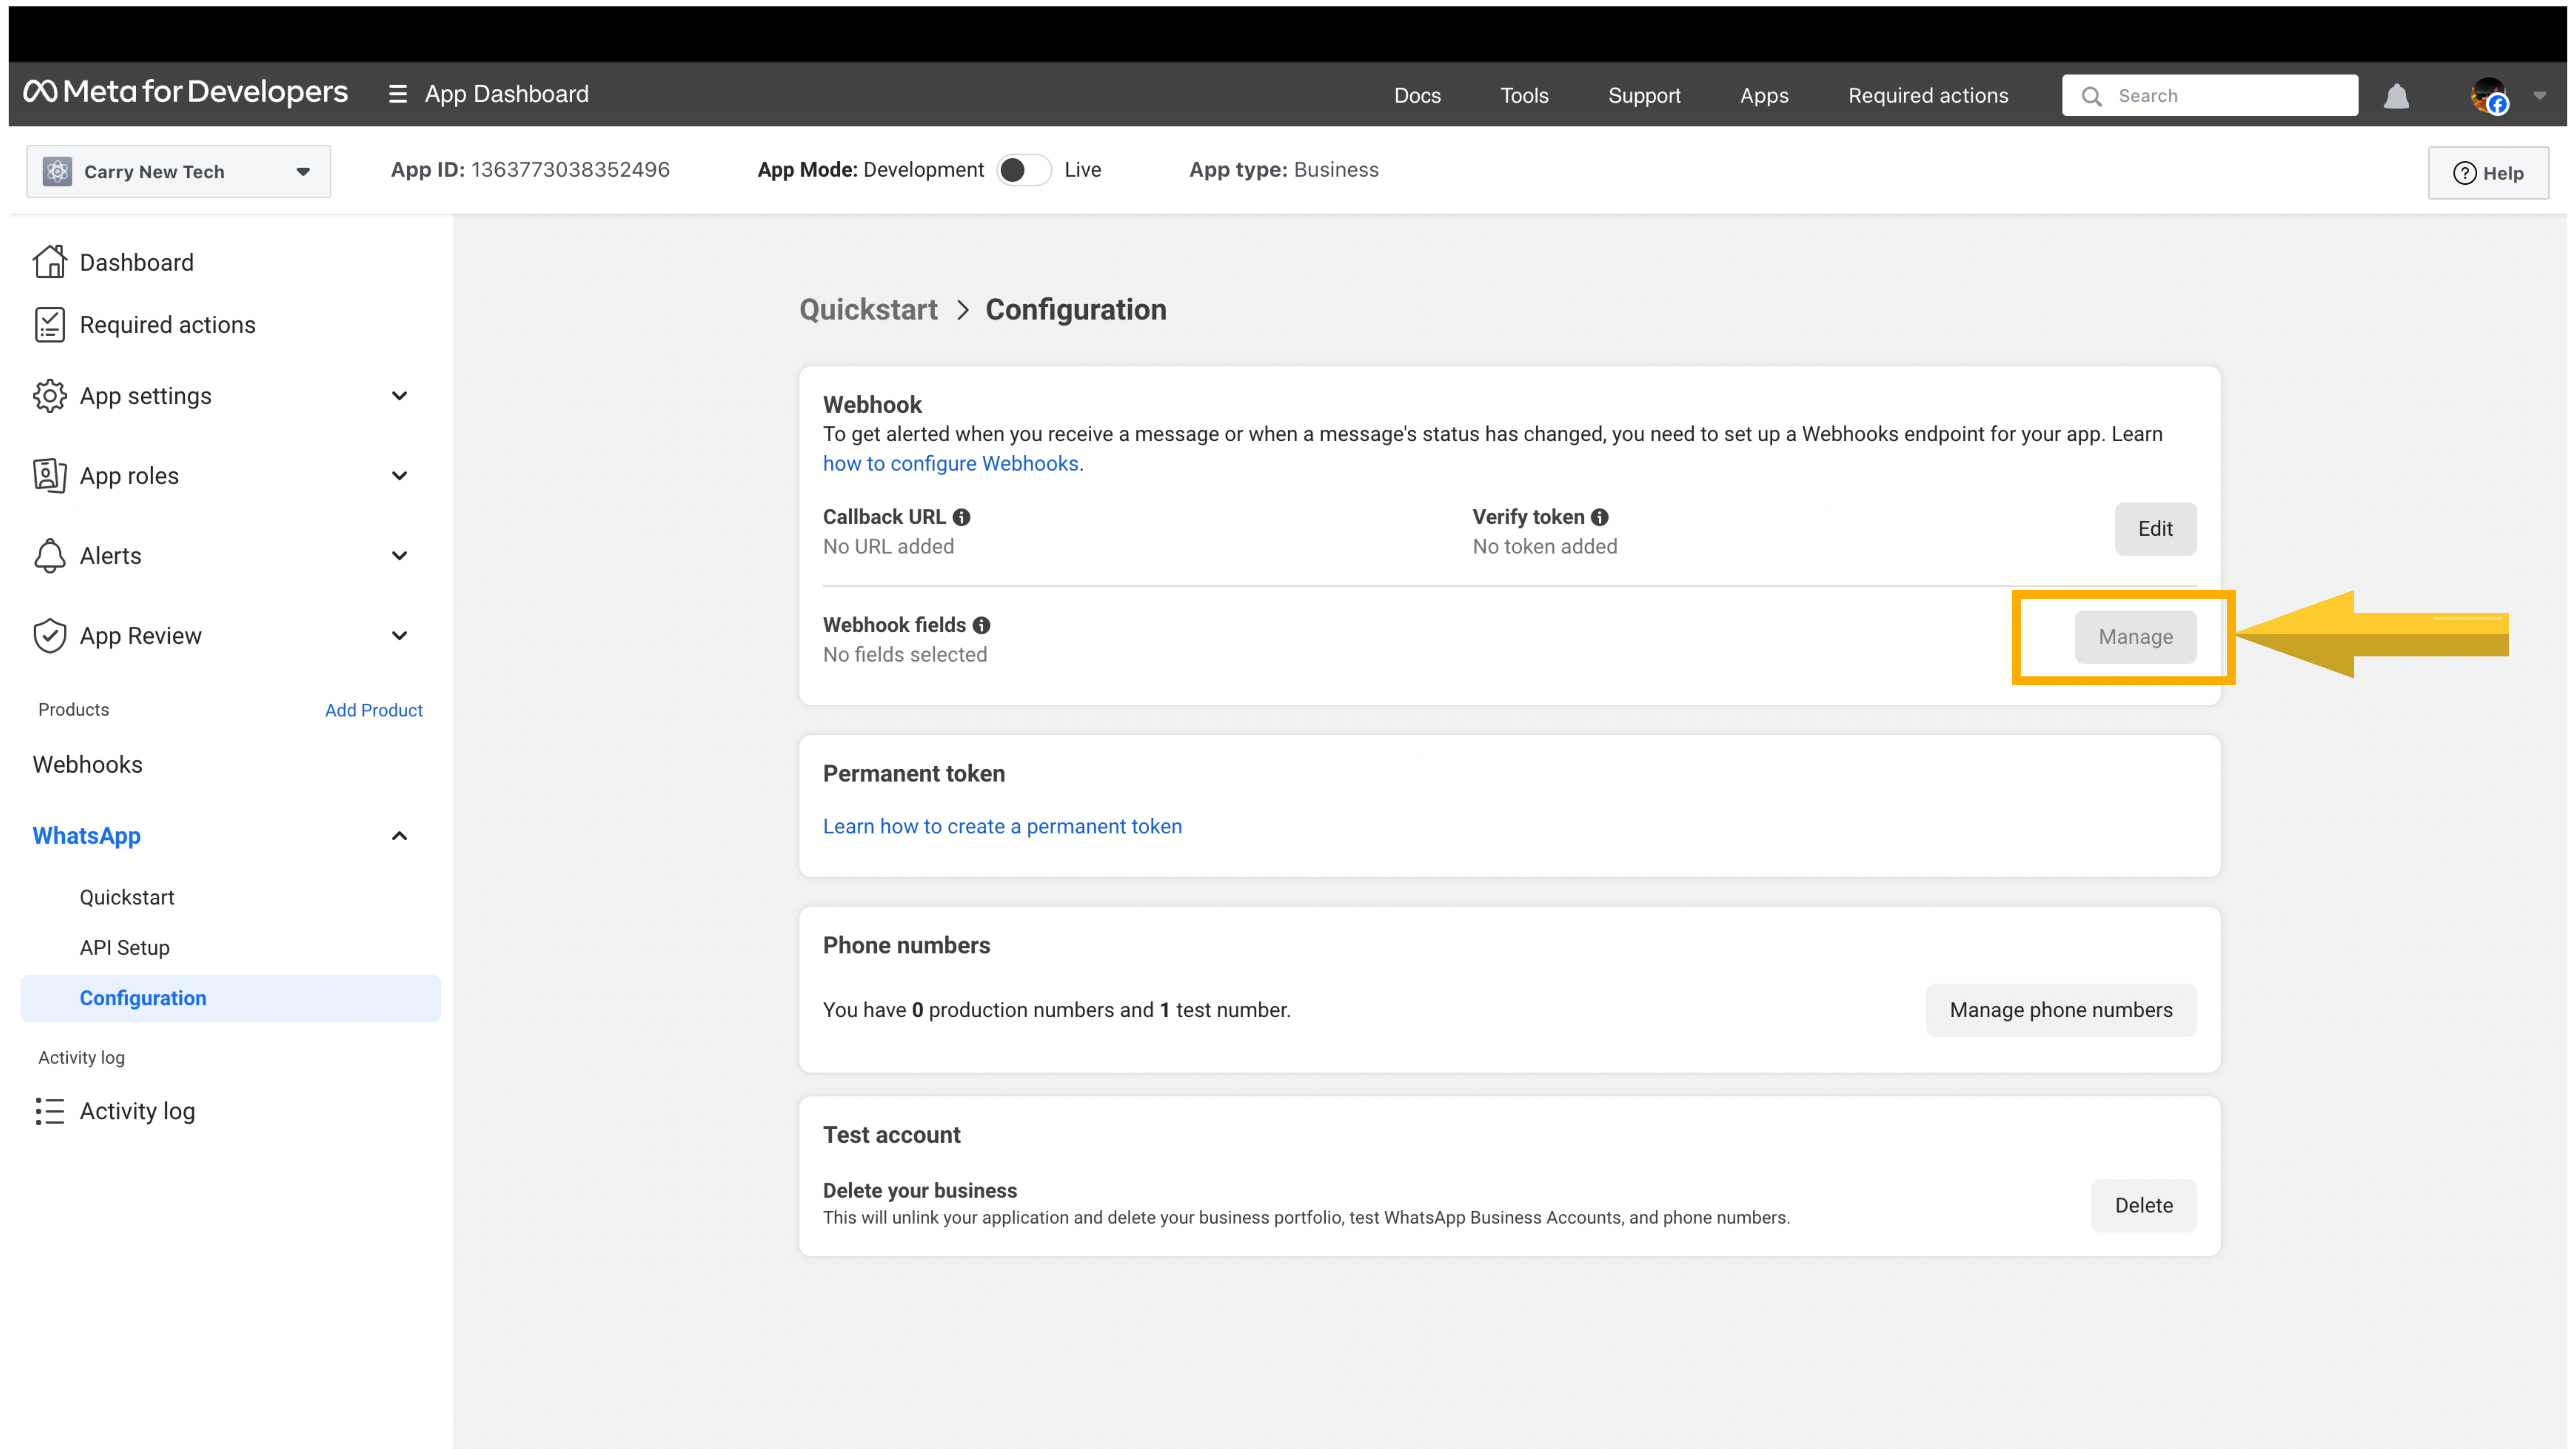
Step 10. Now Click on "Manage", next to Webhook Fields and subscribe to the "message" field from the popup.
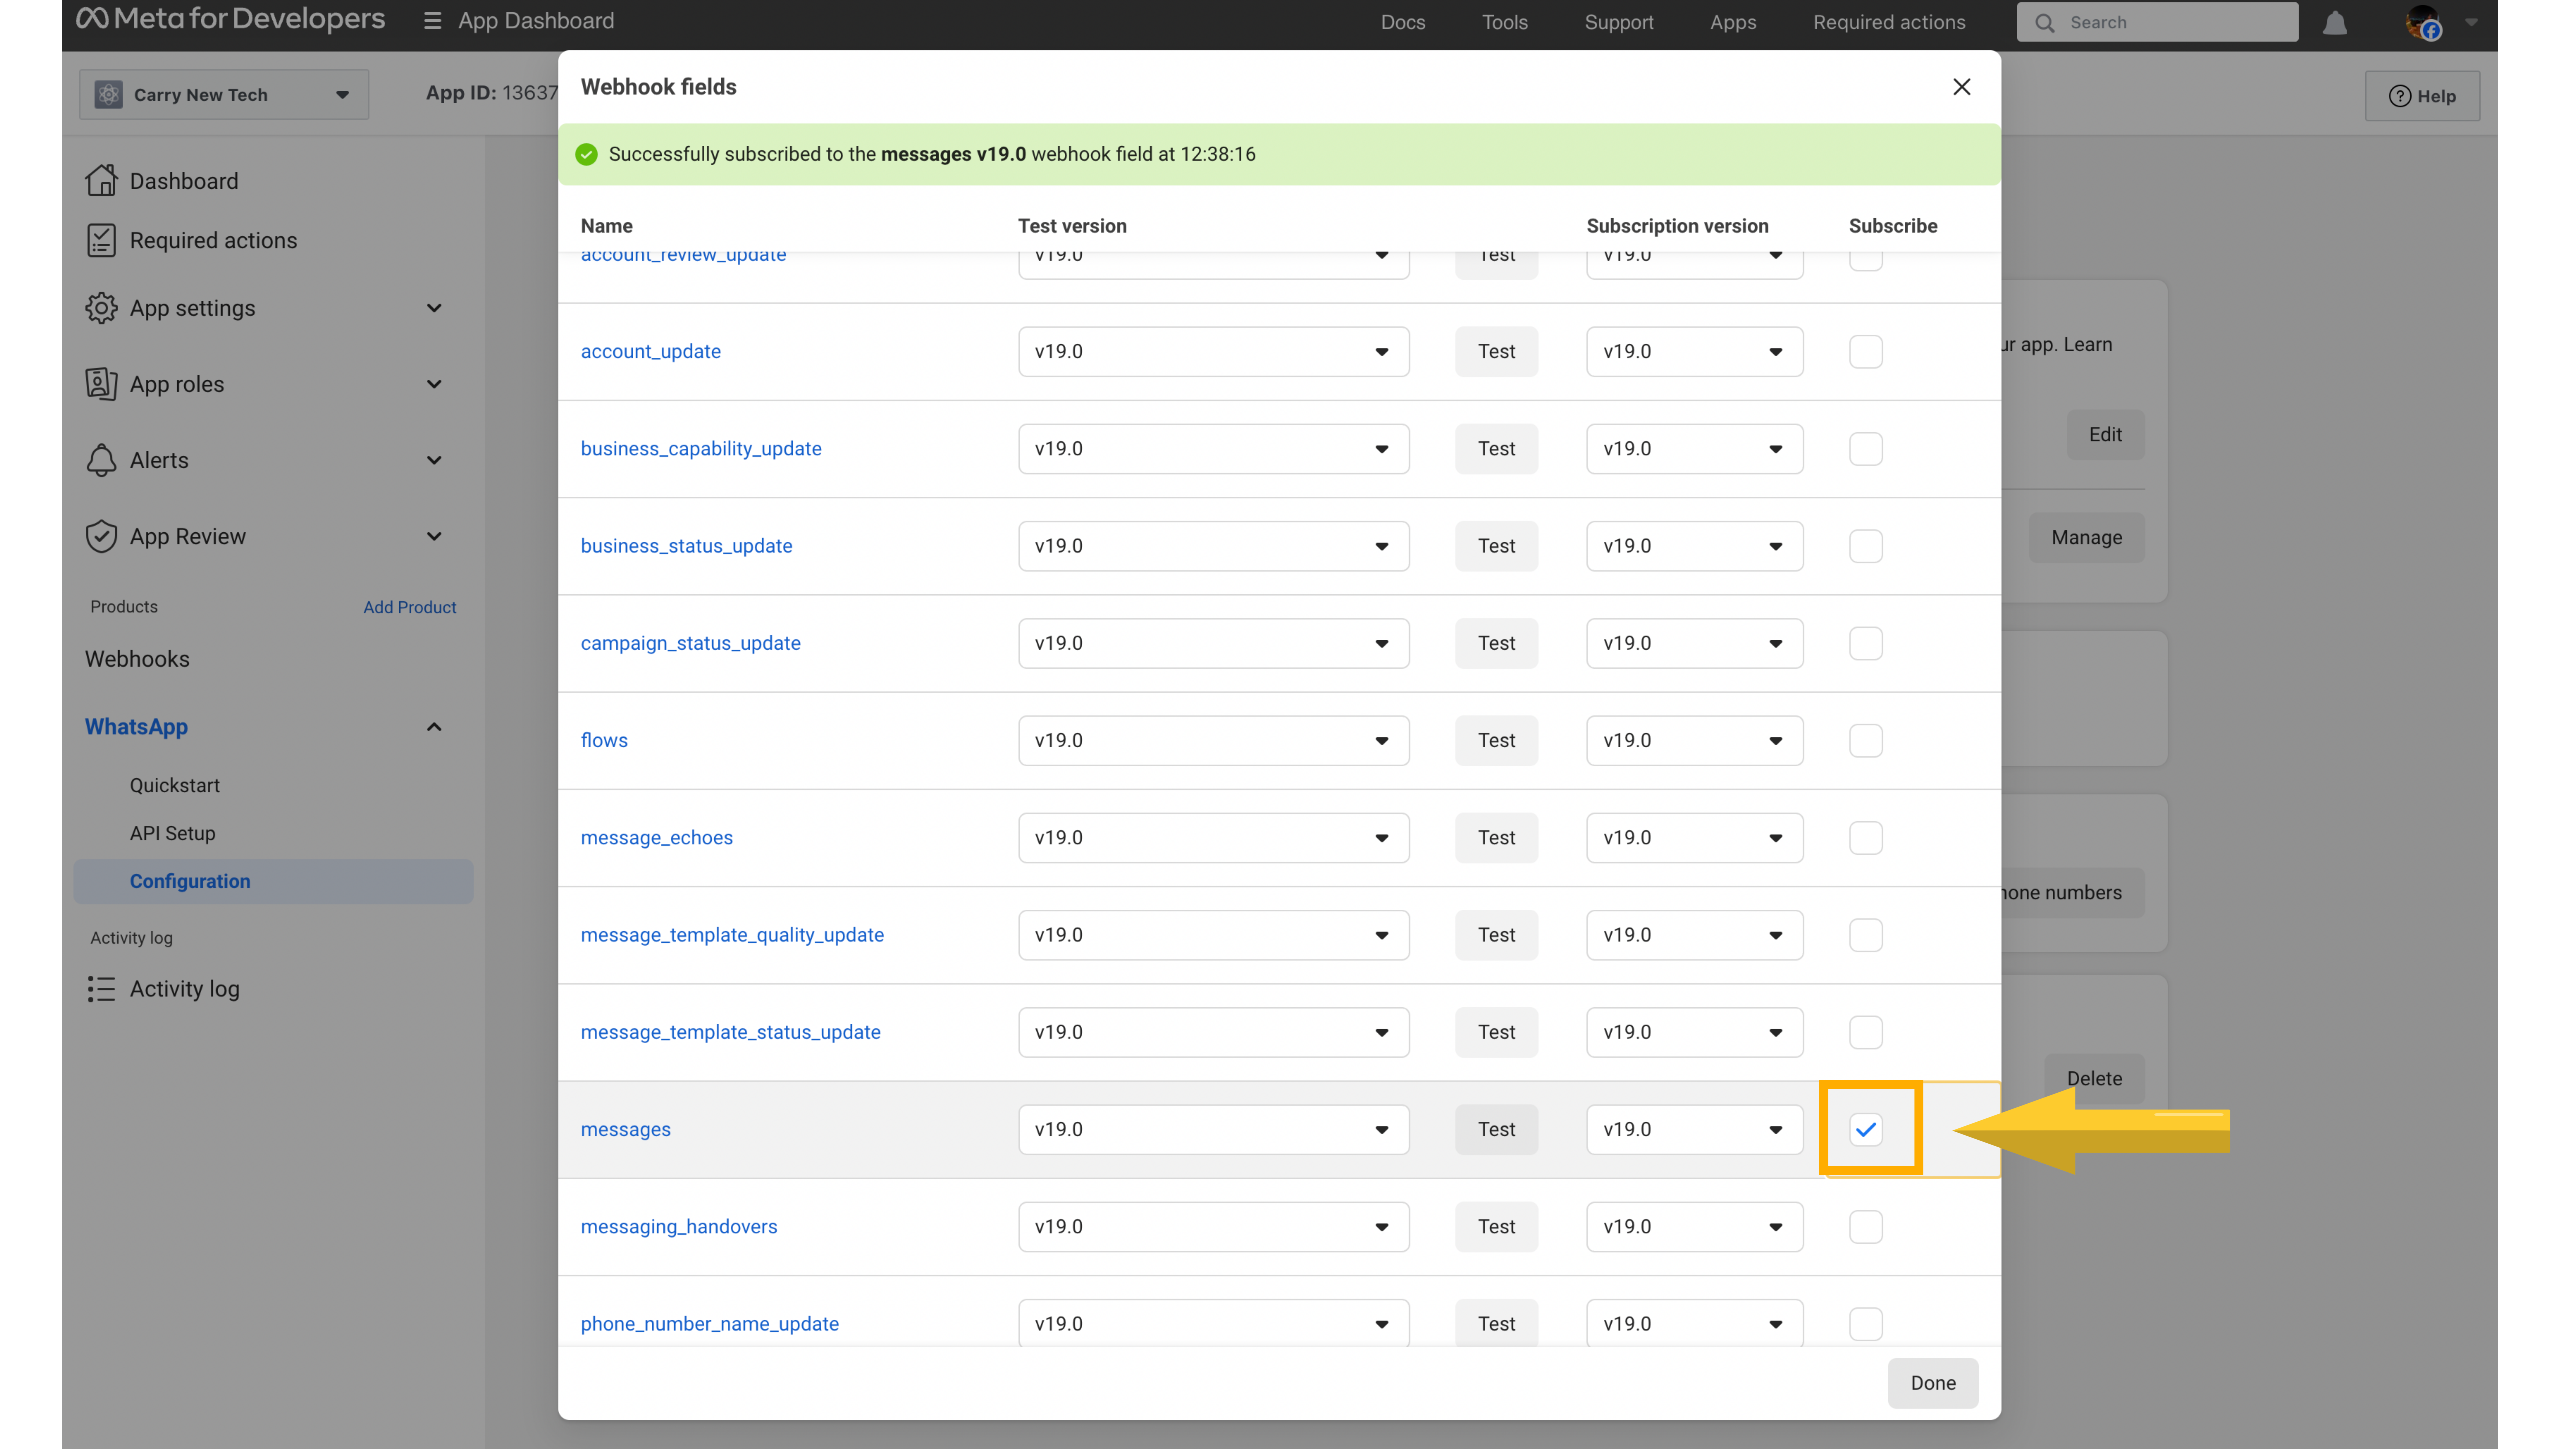
Step 11. Congrats! Your WhatsApp integration is now active.
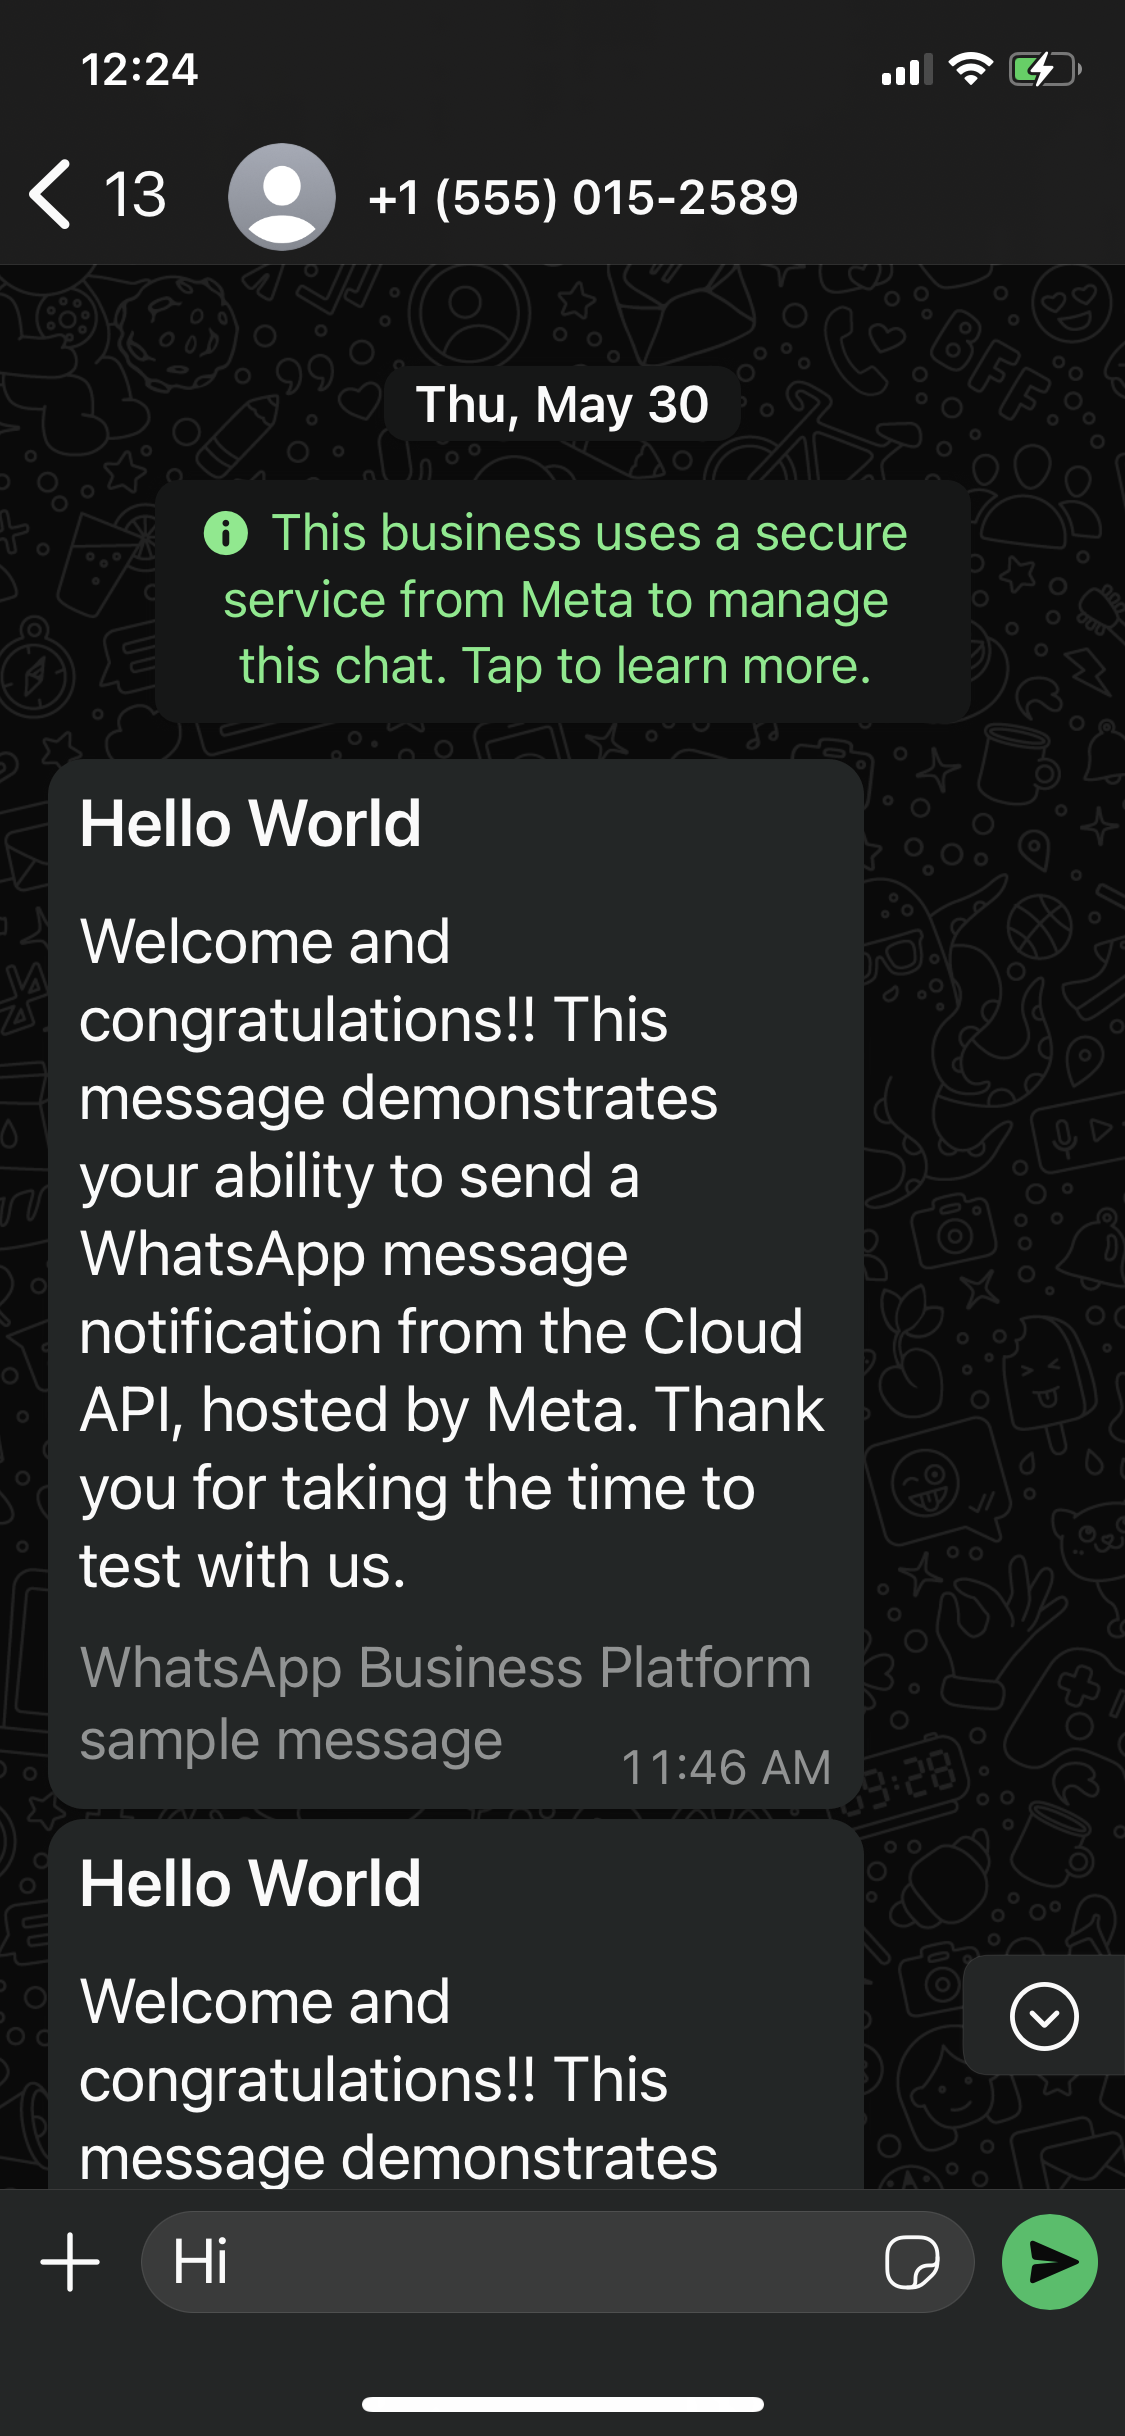
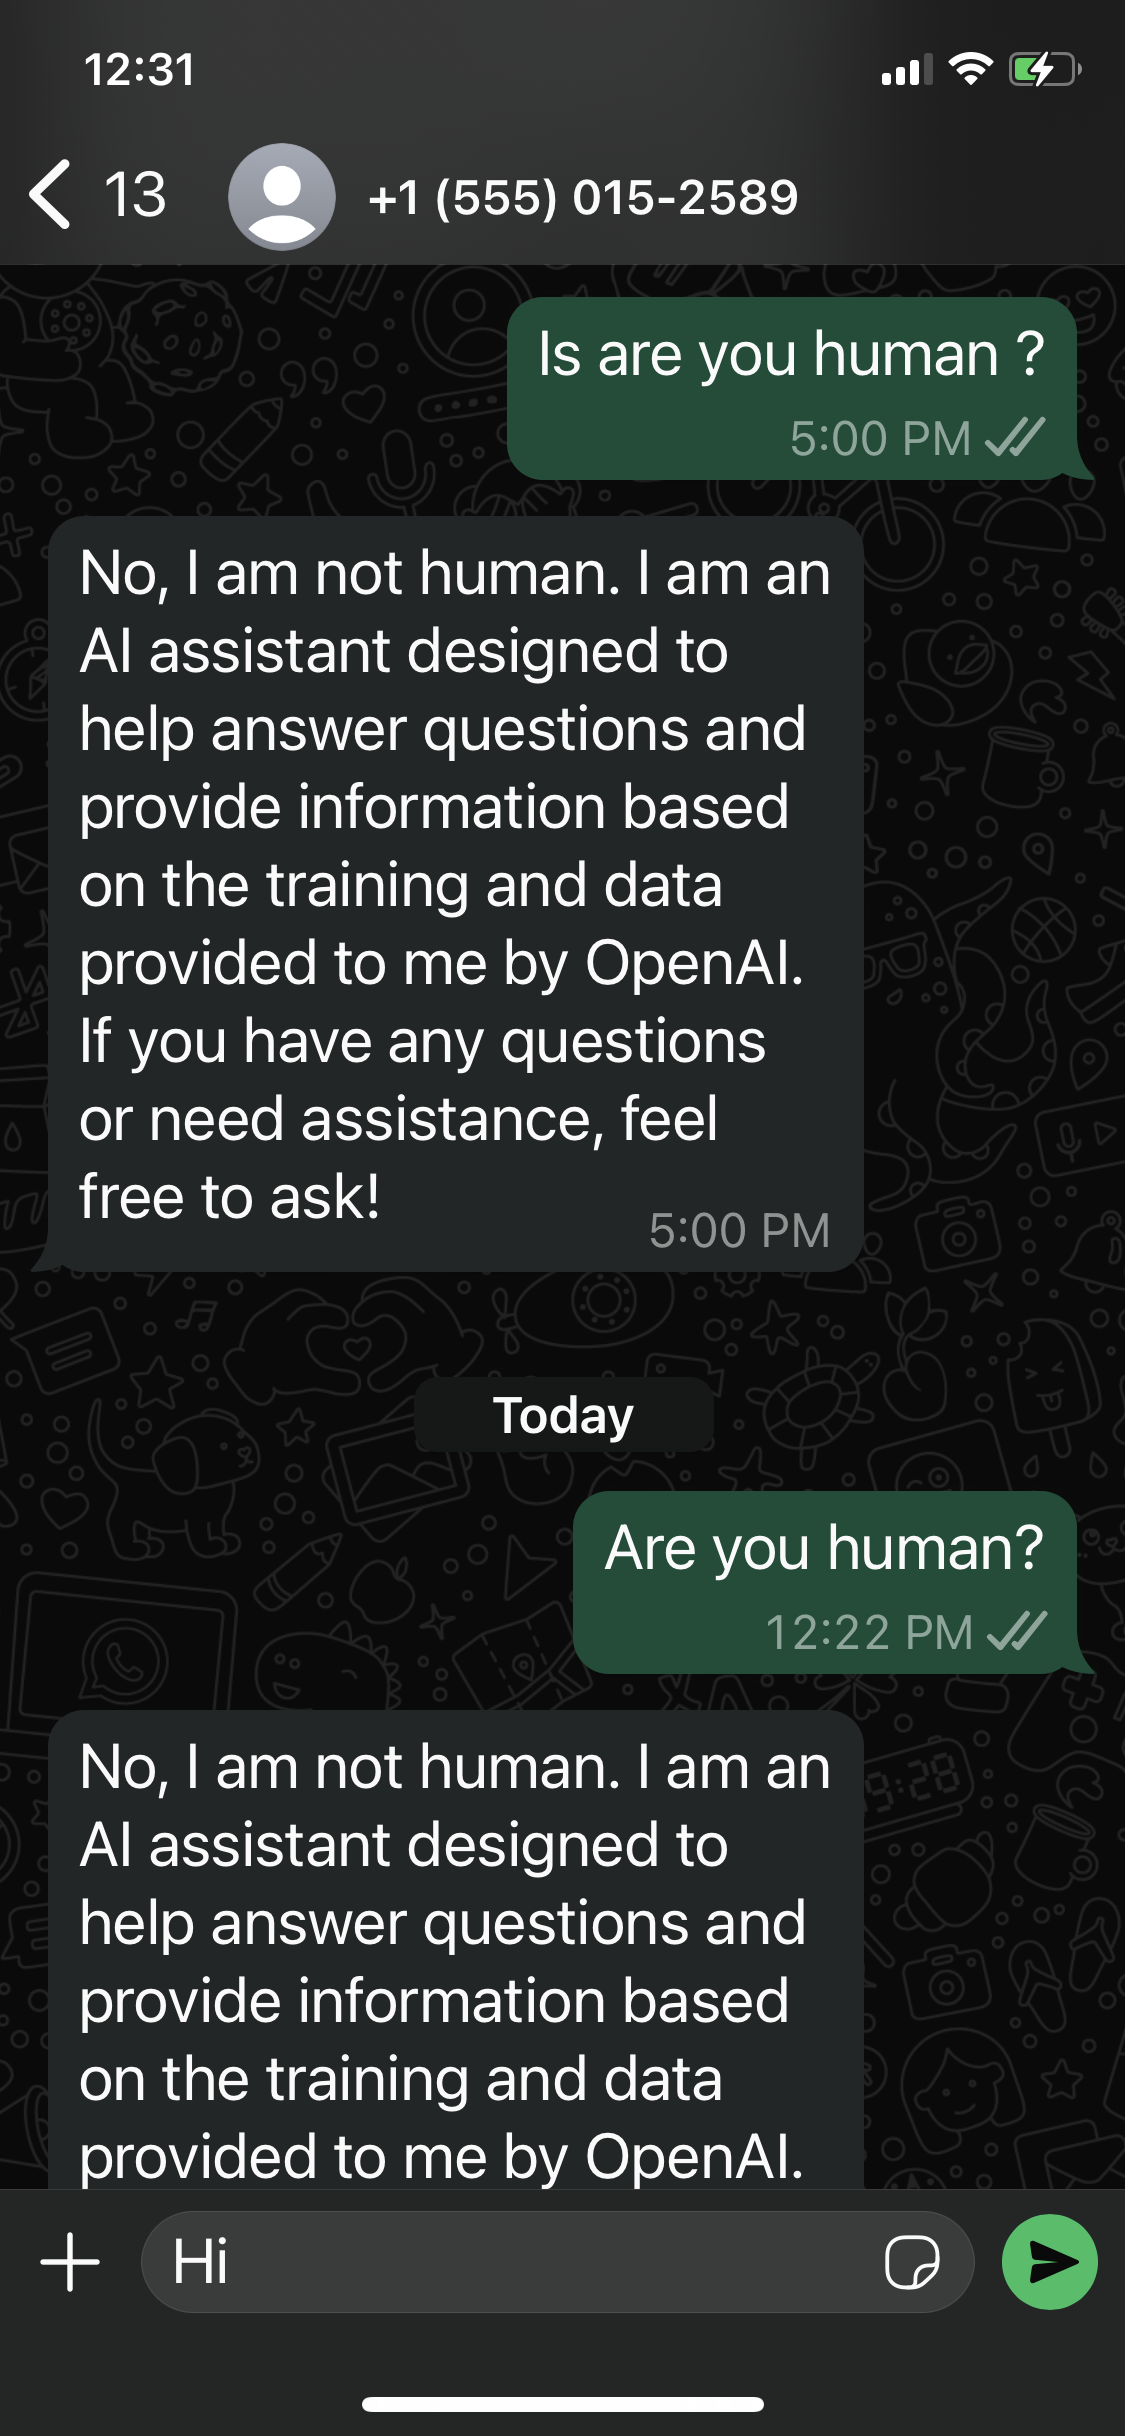
Remember you have received a welcome message when you clicked "Send Message" in step 5? Reply it with something now and you will get a reply from your Brainybear AI chatbot.
